Editing, renaming and re-ordering ↓
Adding and configuring stages and operations ↓
Disabling stages and operations ↓
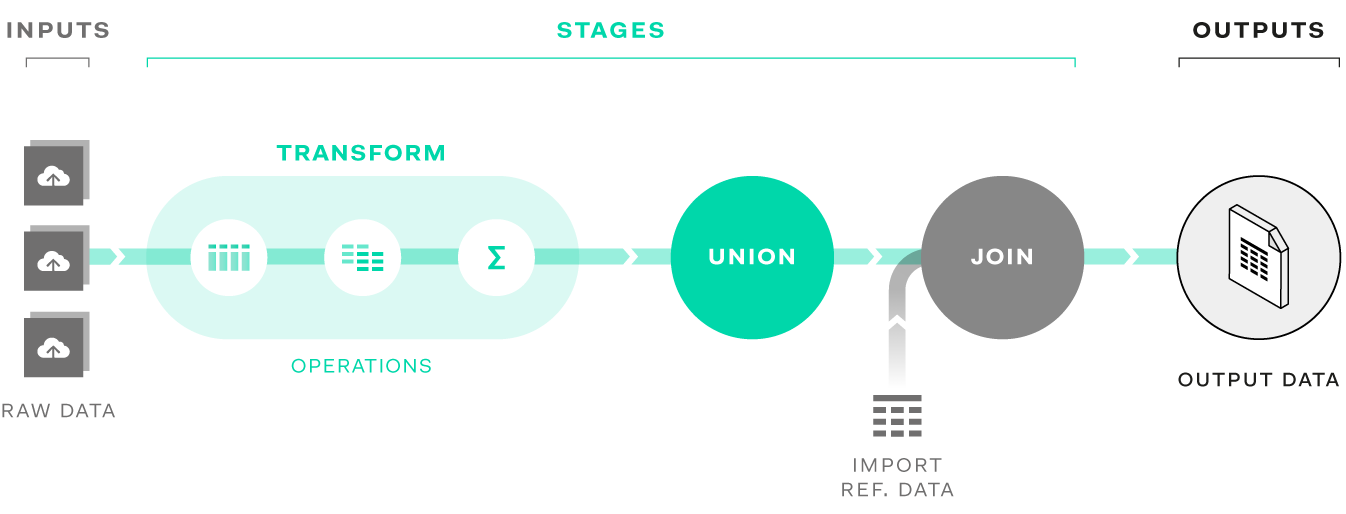
Quantemplate breaks the data transformation process down into stages and operations, allowing you to sequence and structure your data transformation process in a way that is easy to browse and navigate.
Stages are structural components with a defined number of inputs and outputs. There are three kinds of stage: Transform, Union and Join.
Operations are individual transformation steps, grouped together within a Transform stage.
For a full list of operations available in Transform stages, see the Operations Index.
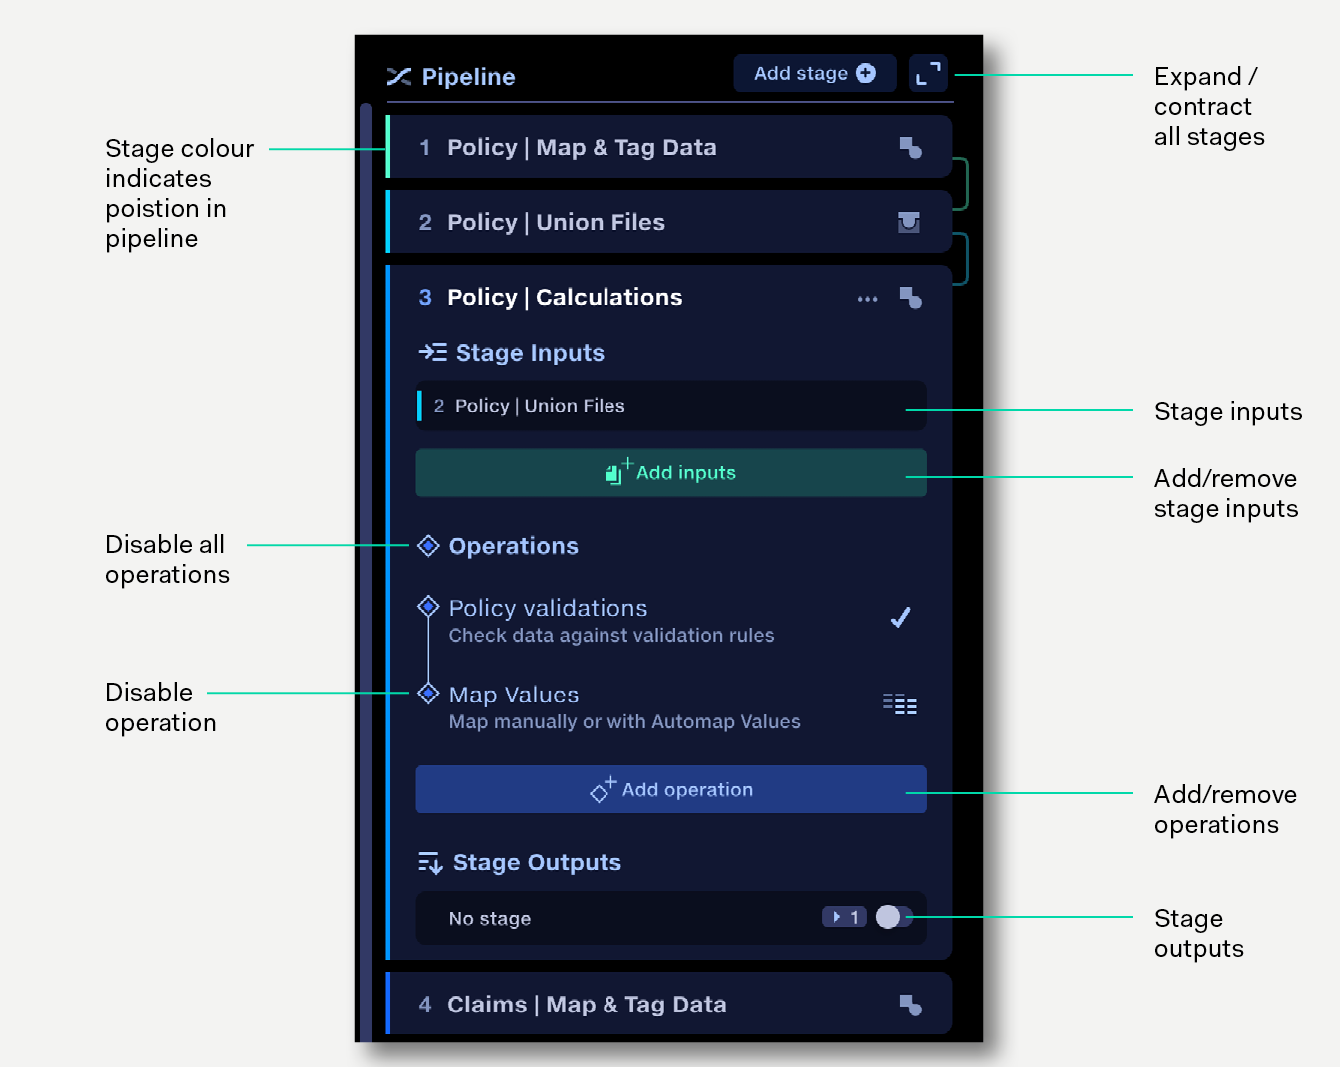
Stages can be visually expanded to show inputs, outputs and configuration options, and can be collapsed to provide an overview of the whole process. When clicked, operations slide across to reveal their configuration panel.
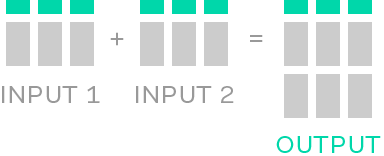
A Join stage combines two different datasets which have one or more shared columns of data. For example, a premium dataset could be joined to a claims dataset using the policy number column as the join point. A join stage would typically have one or two outputs. Learn more about the Join stage.
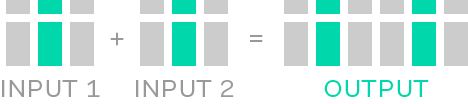
A Union stage is used to combine multiple datasets with identical sets of column headers to produce a single output. Because the headers are the same in each source file the rows can be stacked on top of each other to produce a single unified output dataset. Learn more about the Union stage.
Operations to transform data are accessed and sequenced in Transform stages. Transform stages allow multiple input datasets; the number of output datasets will usually equal the number of input datasets, unless the Aggregate or Partition operations have been used. These operations can potentially change the number of output datasets created.
Data runs through the pipeline in sequential order, from top to bottom in the pipeline view. For the data to run between stages, the outputs of one stage are selected as the inputs to a lower stage.
Connections between stages are shown to the right of the pipeline panel. Hovering over a stage highlights the connections to other stages.
Trace is a feature that enables changes in pipeline configuration to be rapidly previewed downstream. As you build and edit a pipeline, Trace simulates and validates any changes you make along the way, without the need to execute the pipeline. This provides a real time view of the data structure at any point in a pipeline and helps to flag errors prior to running the pipeline.
As you make changes, it may take a few moments for Trace to run through the pipeline. Trace progress is indicated by a spinner on each stage being processed.
Click on a stage to expand it and view its inputs, outputs and operations.
Click the expand-contract button at the top of the pipeline to expand or contract all stages at once.
To rename a stage, double click on the stage name, or click the edit icon to the right of the stage name.
To edit an operation, click on the operation to go to its edit panel. The stage the operation sits within is listed top left – click it to go back to the stages view.
To rename an operation, click on the operation to go to its edit panel. Click on the name to edit it.
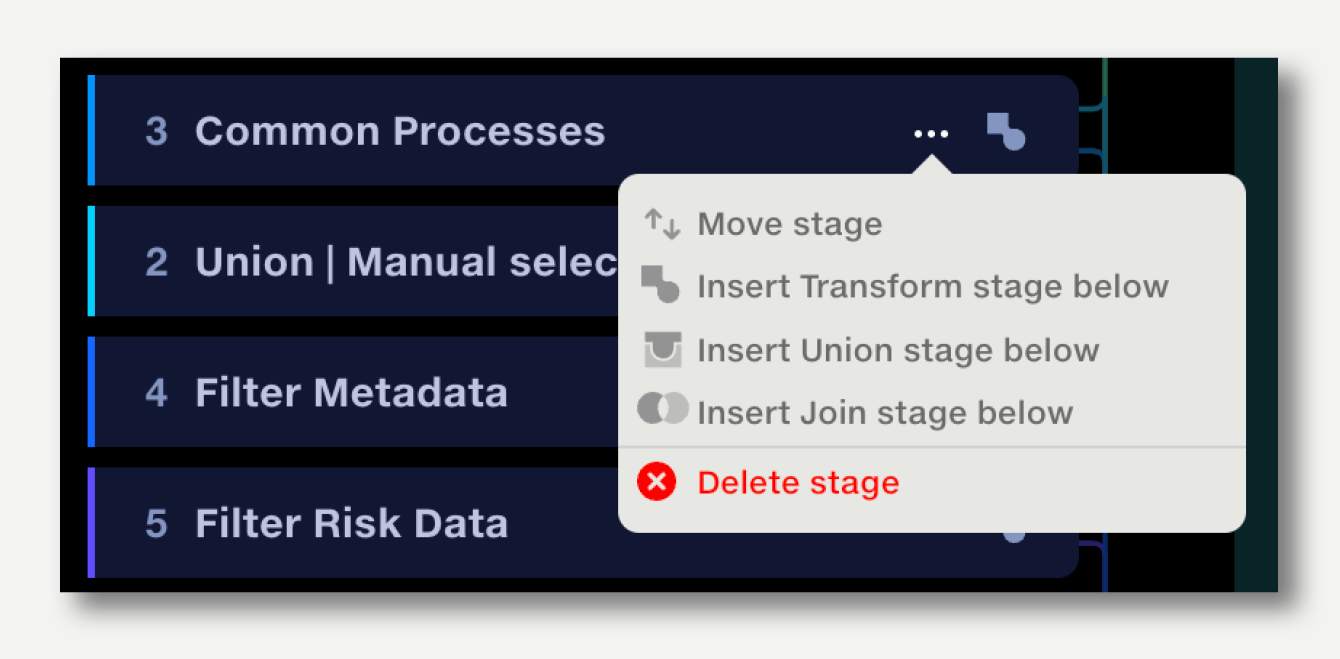
To reorder stages, click on the ‘...’ next to the stage icon. Select ‘Move stage’ and enter the position to move it to.
Note that if a stage that uses outputs from a previous stage is reordered above its inputs, the inputs will be removed. Outputs may also need to be reconnected if inputs are lost.
To reorder operations, hover over the operation you wish to move then drag and drop it to its new position.
To configure a Transform stage:
To configure Join stages, add inputs and click on the join configuration panel. Learn more.
To configure Union stages, simply add inputs – no further configuration required. Learn more.
Use the input selector to define inputs to a stage.
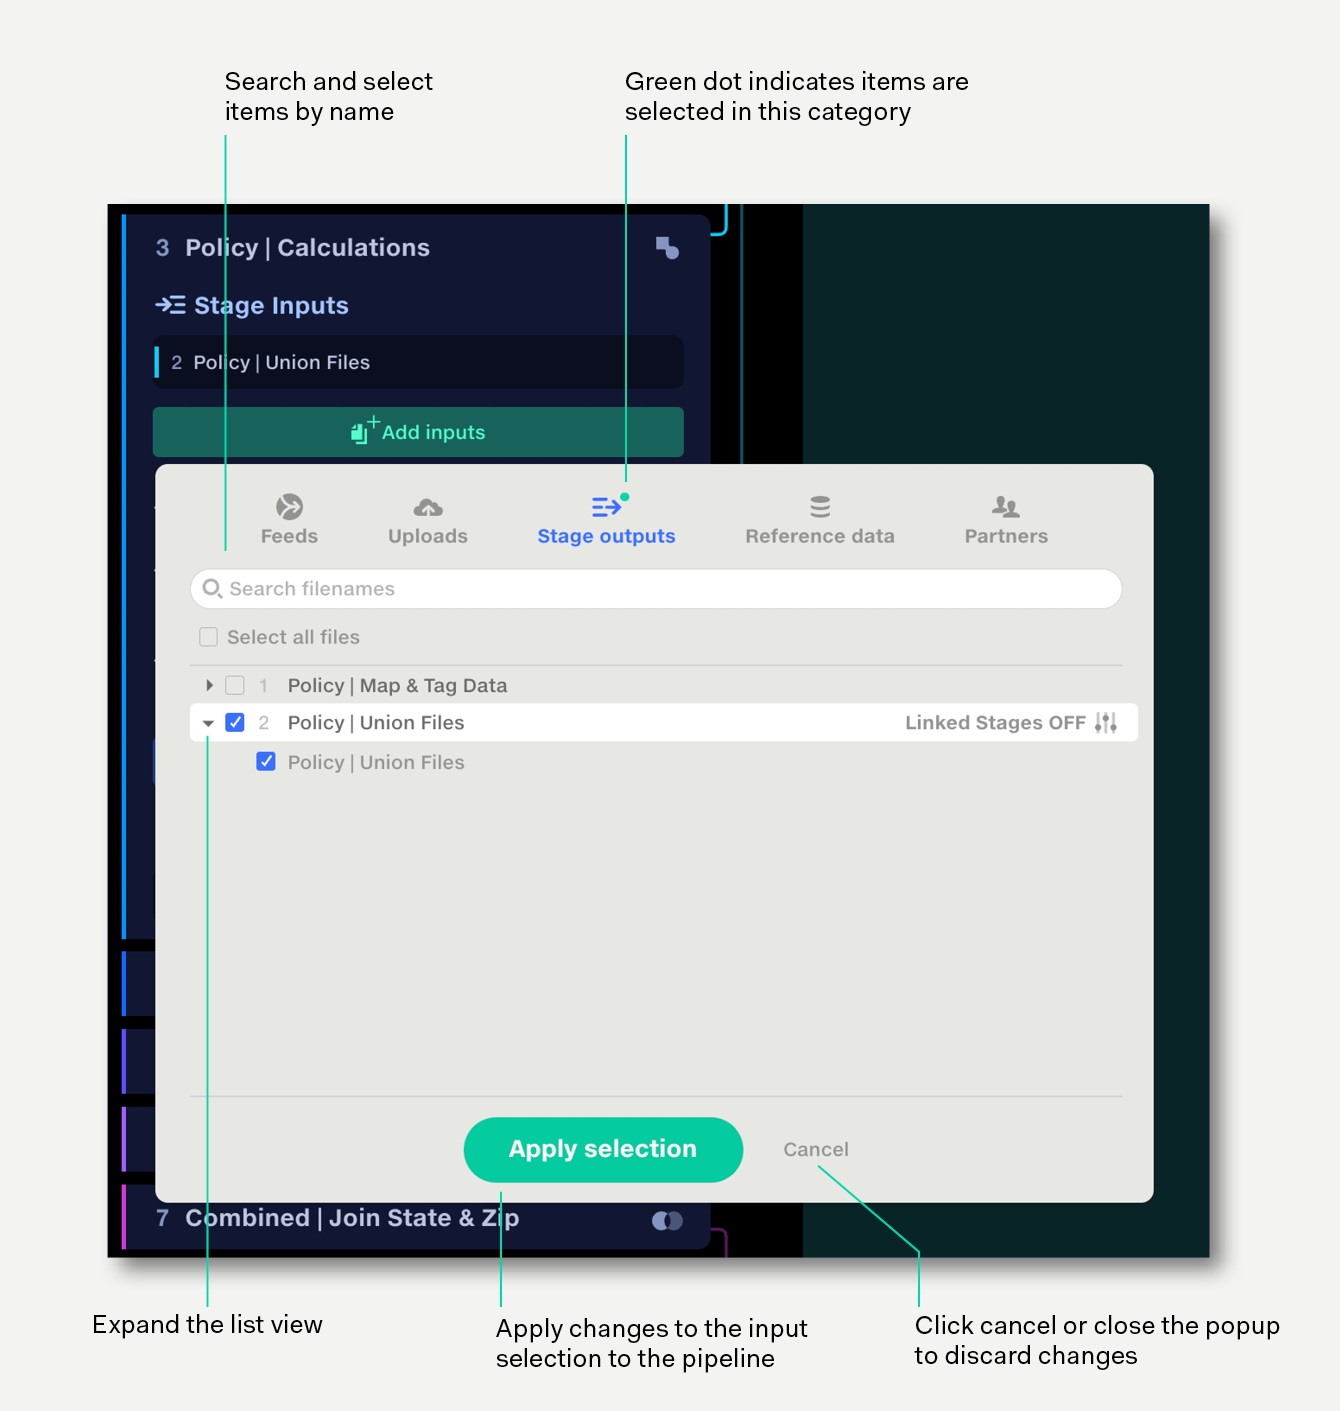
To add stage inputs:
To automatically import data from feeds, see connecting feeds to pipelines.
The ‘Link stages’ feature enables the outputs of one stage to be linked to the inputs of another stage. If the first stage’s input files change, the new files will be passed through to the linked stage.
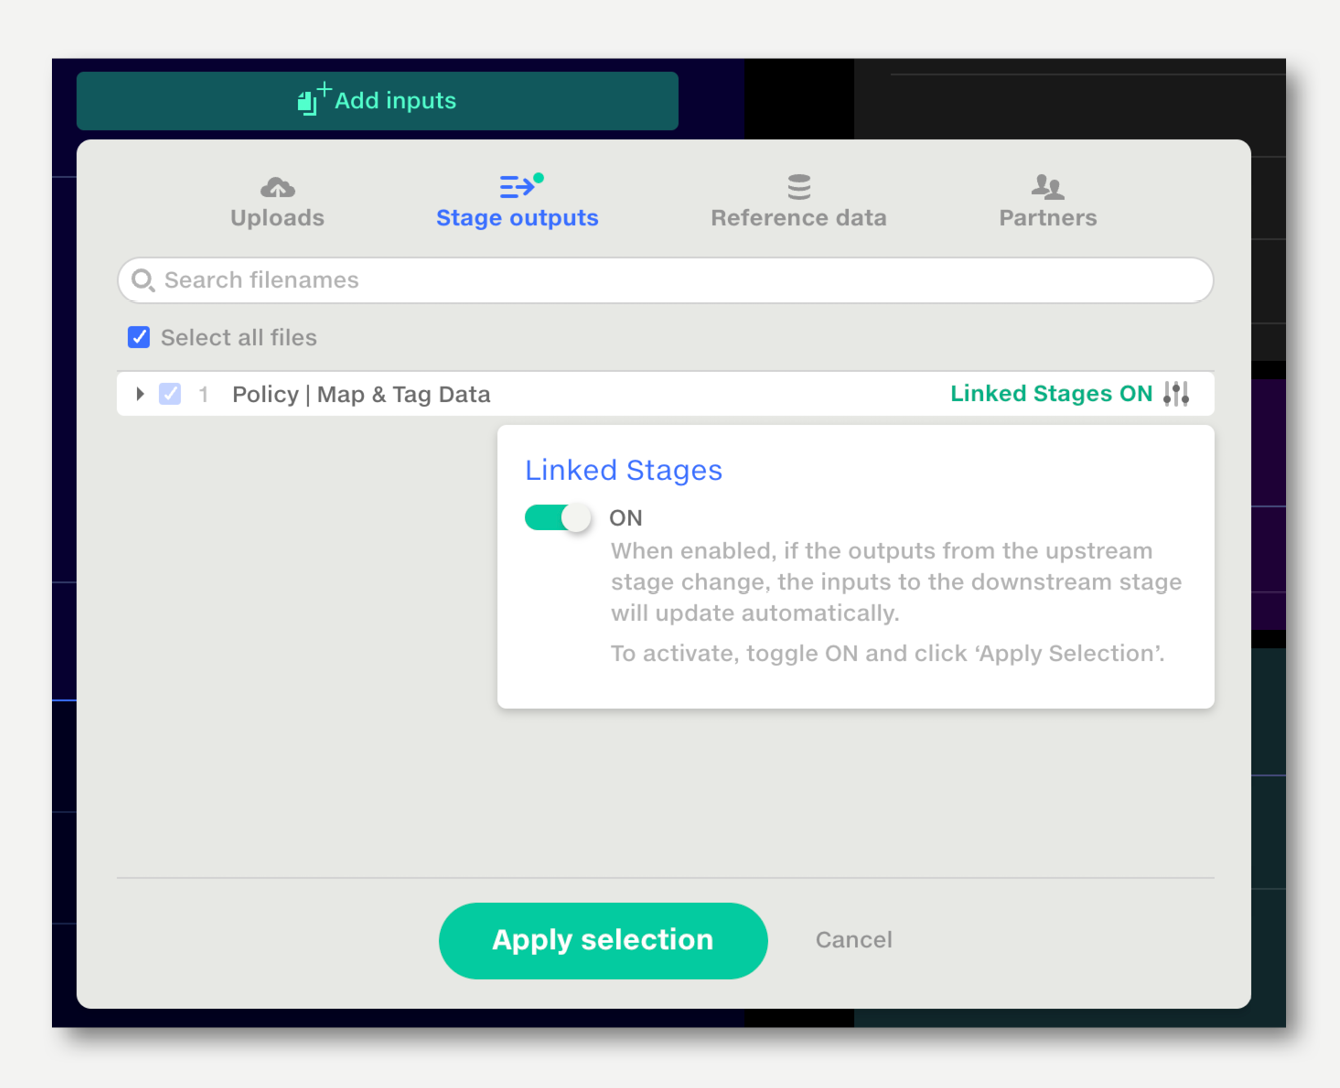
A common use for Linked Stages is to link the output of Stage 1 to the inputs of a Stage 2, which is often a Union. When new files are added to Stage 1, they will flow through automatically to Stage 2.
To enable Linked Stages:
To remove selected inputs to stage:
The inputs will no longer be connected to the stage but will remain available for other stages.
If the Linked Stages setting is enabled, first disable it to deselect the files – or remove the files from the upstream stage.
To permanently remove uploads from a pipeline, visit the inputs tab.
A stage can accept inputs from five sources:
When an input is selected within a category, a green dot is shown next to the category icon.
Data which requires cleansing should be uploaded to a Feed (or direct to a pipeline), rather than the Data Repo.
The best way to upload data to a pipeline is via the Input Selector.
Uploaded files are made available to all stages in the pipeline.
Stage outputs are the datasets resulting from the processes applied to the data in a stage. They can be connected to the inputs of subsequent stages for further processing, exported your data repo, or downloaded directly.
The names of output files from a Transform stage are generated by appending the stage name to the start of the name of the source file. Stages that the data has passed through are therefore recorded in the file name.
A Join stage will name the output files according to the input file names and the matching options selected. See the article on Join stages for more.
A Union stage will name its single output file with the name of the stage.
Input name |
Bordereaux-20220-03-18.csv |
Transform stage 1 |
Map and Tag Data |
Output name |
Map and Tag Data: Bordereaux-20220-03-18.csv |
Transform stage 2 |
Calculations |
Output name |
Calculations: Map and Tag Data: Bordereaux-20220-03-18.csv |
Union stage 3 |
Combined inputs |
Output name |
Combined inputs |
By default all stage outputs appear in your pipeline outputs available for export. Making an output non-exportable removes it from the list of Output Datasets, though it is still available for use in subsequent pipeline stages. Disabling outputs that are not required for export has two benefits:
1. Cleaner output list
Your output list only displays your final datasets, so it’s easier to configure their export destinations.
2. Accelerated pipeline run-times
Limiting the number of datasets available for export will speed up pipeline run time.
To disable stage outputs, expand the outputs list and toggle off the ones that are not required. Toggle off all outputs for that stage by using the toggle at the top of the list. Next time the pipeline runs the disabled stage outputs will not appear in the list of output datasets.
If new inputs are added to a stage, they will be enabled by default.
Transform operations and Join stages can be temporarily disabled, allowing before and after comparison of the effects of that stage on your output data, without losing their configuration.
To disable an operation or stage, click on the diamond-shaped Operation button next to the operation name. The operation or stage is greyed-out, but the parameters can still be edited.
To disable all operations in a Transform stage, click on the All Operations button next to the Operations heading. Stages with all the operations disabled will display greyed-out in the pipeline editor.
If a stage has an issue which might prevent a pipeline from running, or might give an unexpected result, you will be notified via an error message in the pipeline panel.
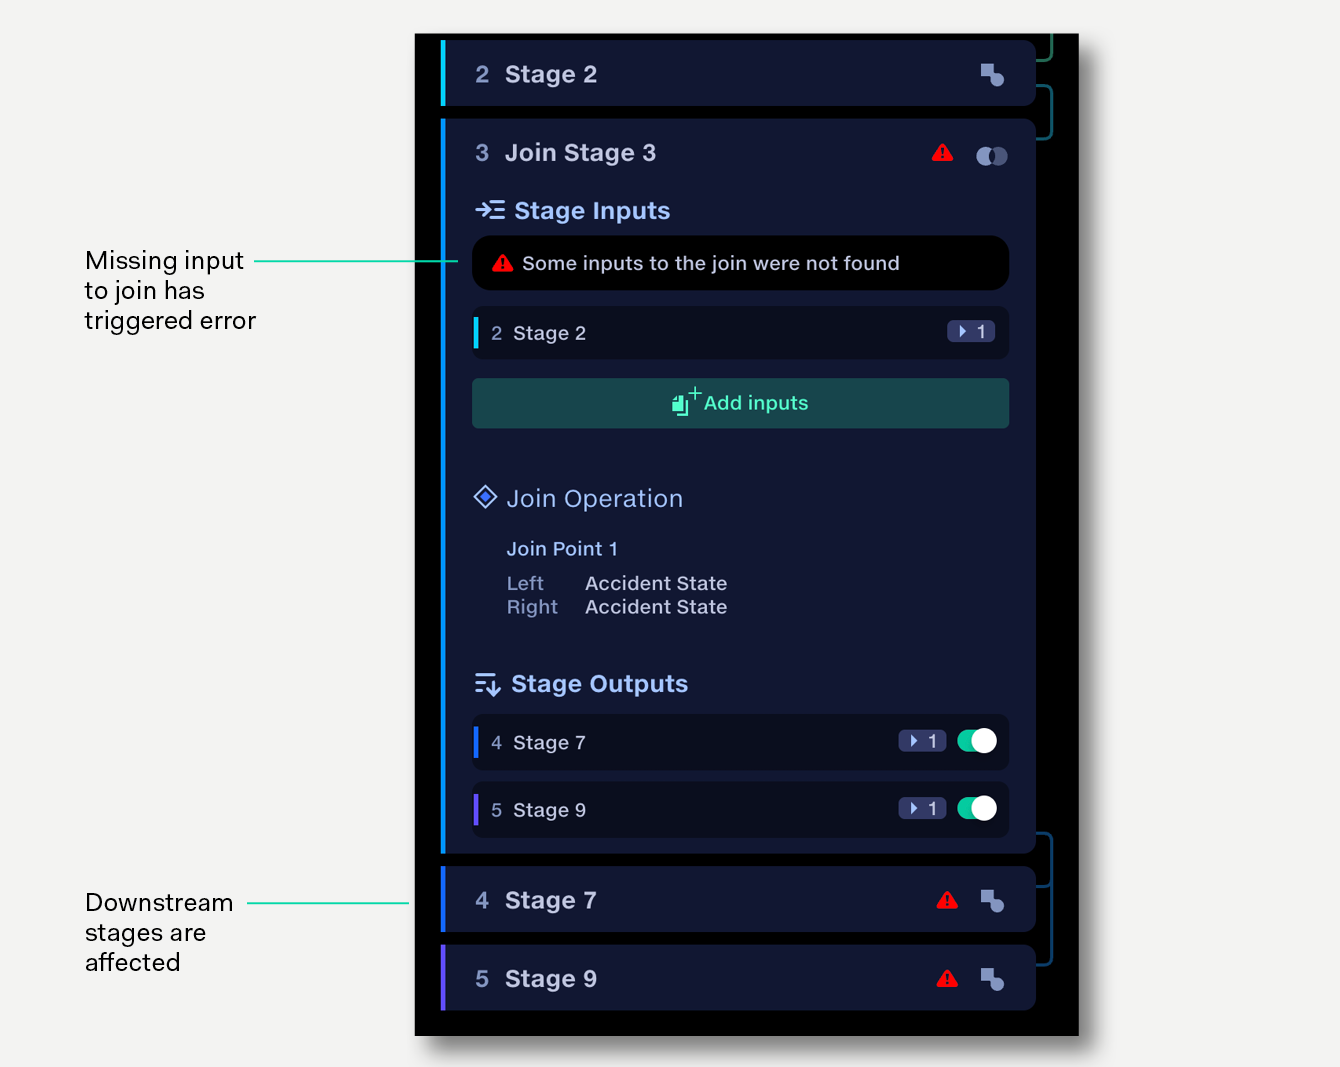
Red warnings indicate an issue with the data or configuration that needs to be resolved.
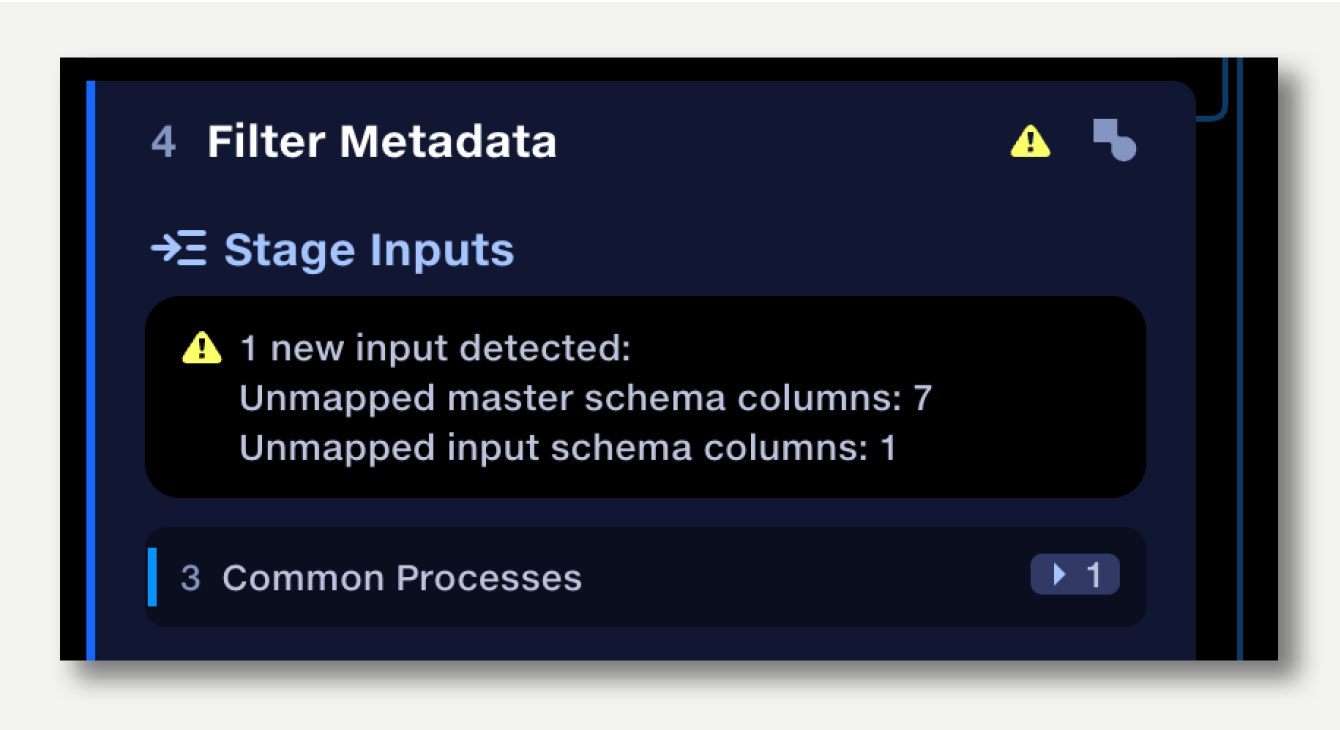
Yellow warnings are for potentially less critical issues, such as a new column being detected by Map Column Headers (see Default column mapping rules).