
The Data repo is the storage area for clean datasets. This includes reference data to be used in pipelines and cleansed pipeline outputs.
Datasets in the Data repo can also be used to chain pipelines together.
Datasets with a single row of headers can be uploaded directly to the Data repo to create a reference dataset for use in pipelines, for example a target header schema to map to. The upload process will ignore any blank rows above or below the data, or blank columns either side of the data. The first line of data will be interpreted as column headers.
Read more about uploading data to the Data repo.
Cleansed outputs from pipelines can also be exported to the Data repo for onward sharing via API, sharing within Quantemplate, or reporting in Analyse.
Quantemplate’s APIs allow you to import to a dataset (overwrite it) and export a dataset whenever it is updated.
This can be combined with Automation features to:
Quantemplate's newsfeed-style repos provides a live view of your dataset activity across your environment. Repos help you monitor dataset updates to keep track of the automated flow of data.
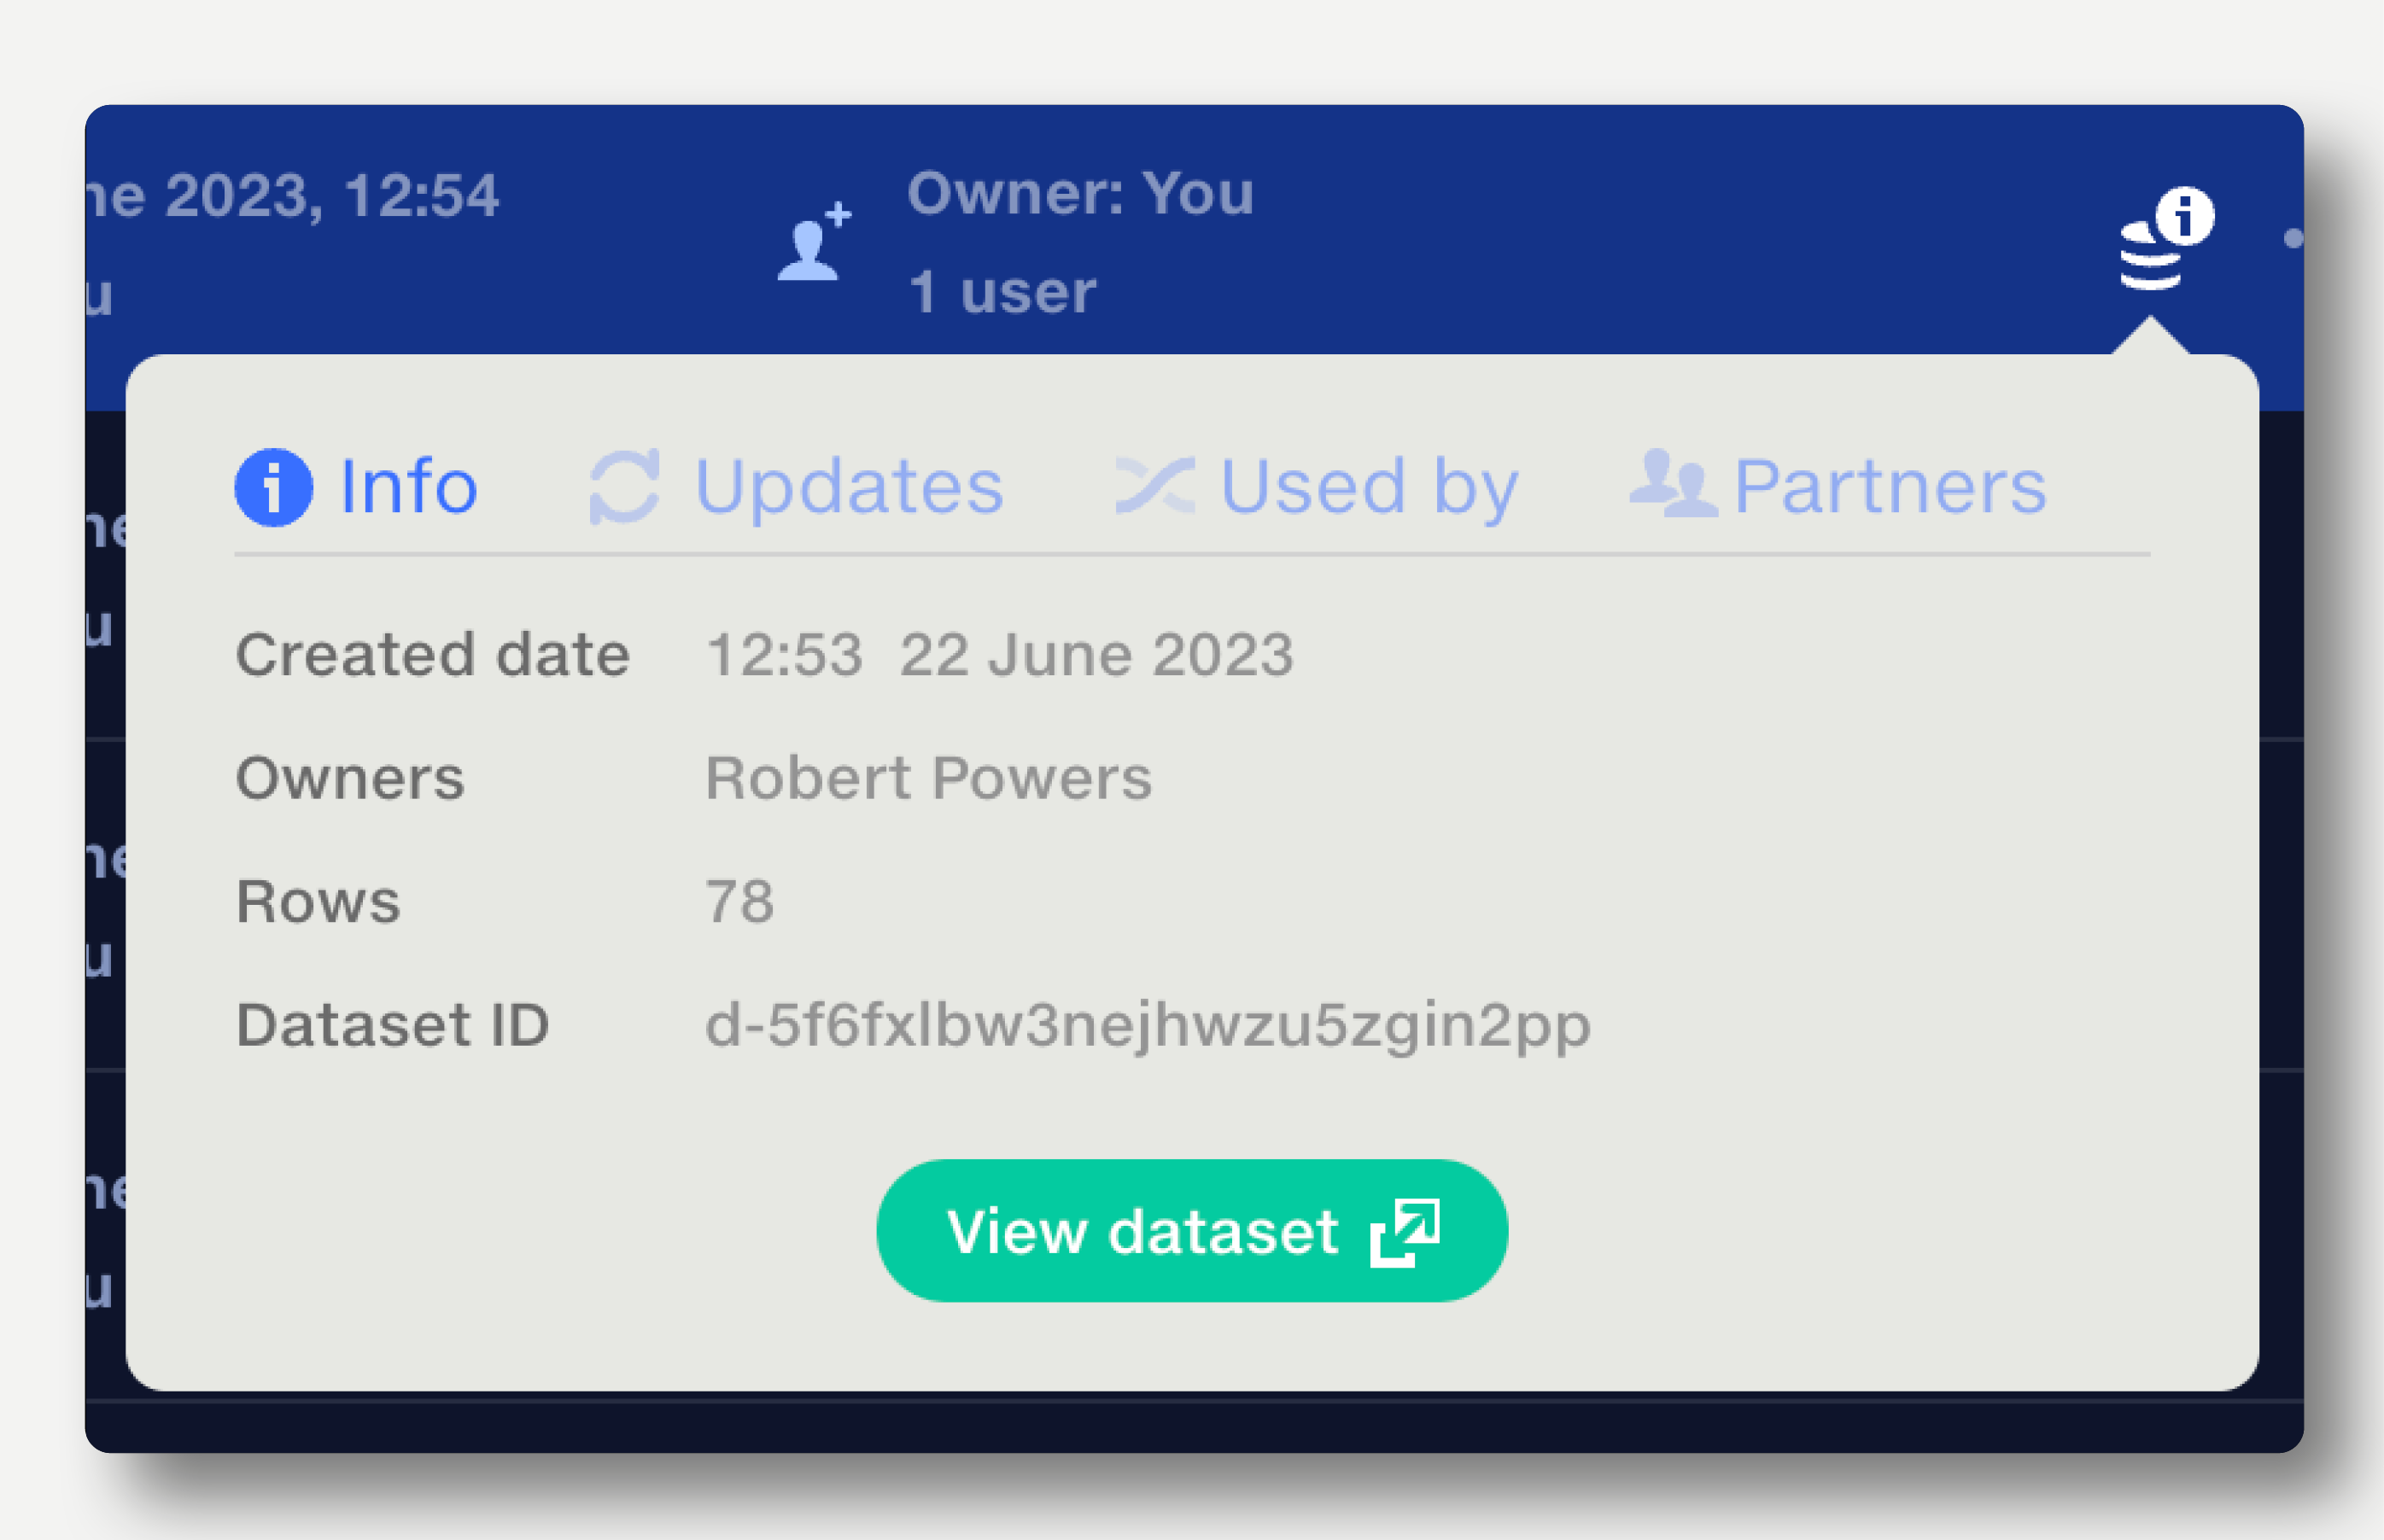
The metadata bar below the dataset name displays information about how the dataset is used, updated and connected. Click on each item to reveal more details.
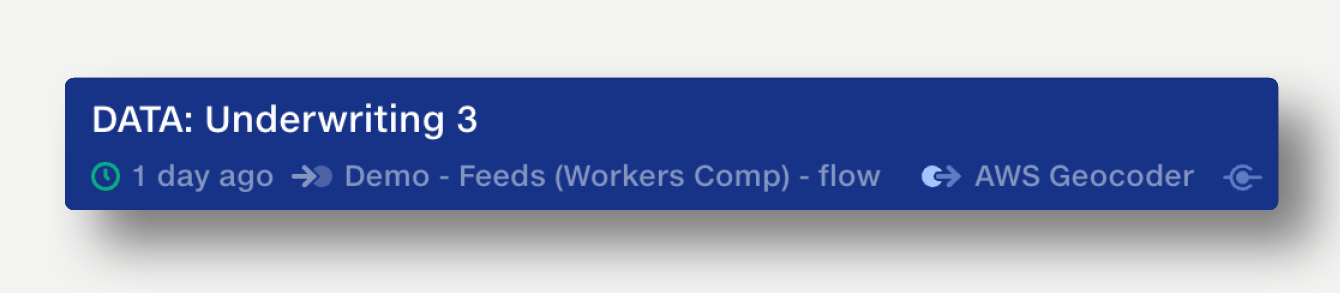
See if a dataset was updated, 'Just now', '1 minute ago' or even '1 year ago'. The clock icon changes tone depending on the recency of the last update, helping spot recent activity at-a-glance.
The metadata bar lists the last user or pipeline that updated the dataset. Click on the name to reveal more information or view the pipeline in a new tab.
If the dataset has been shared with the API or Robot users, the API or Robot icon is displayed in the metadata bar.
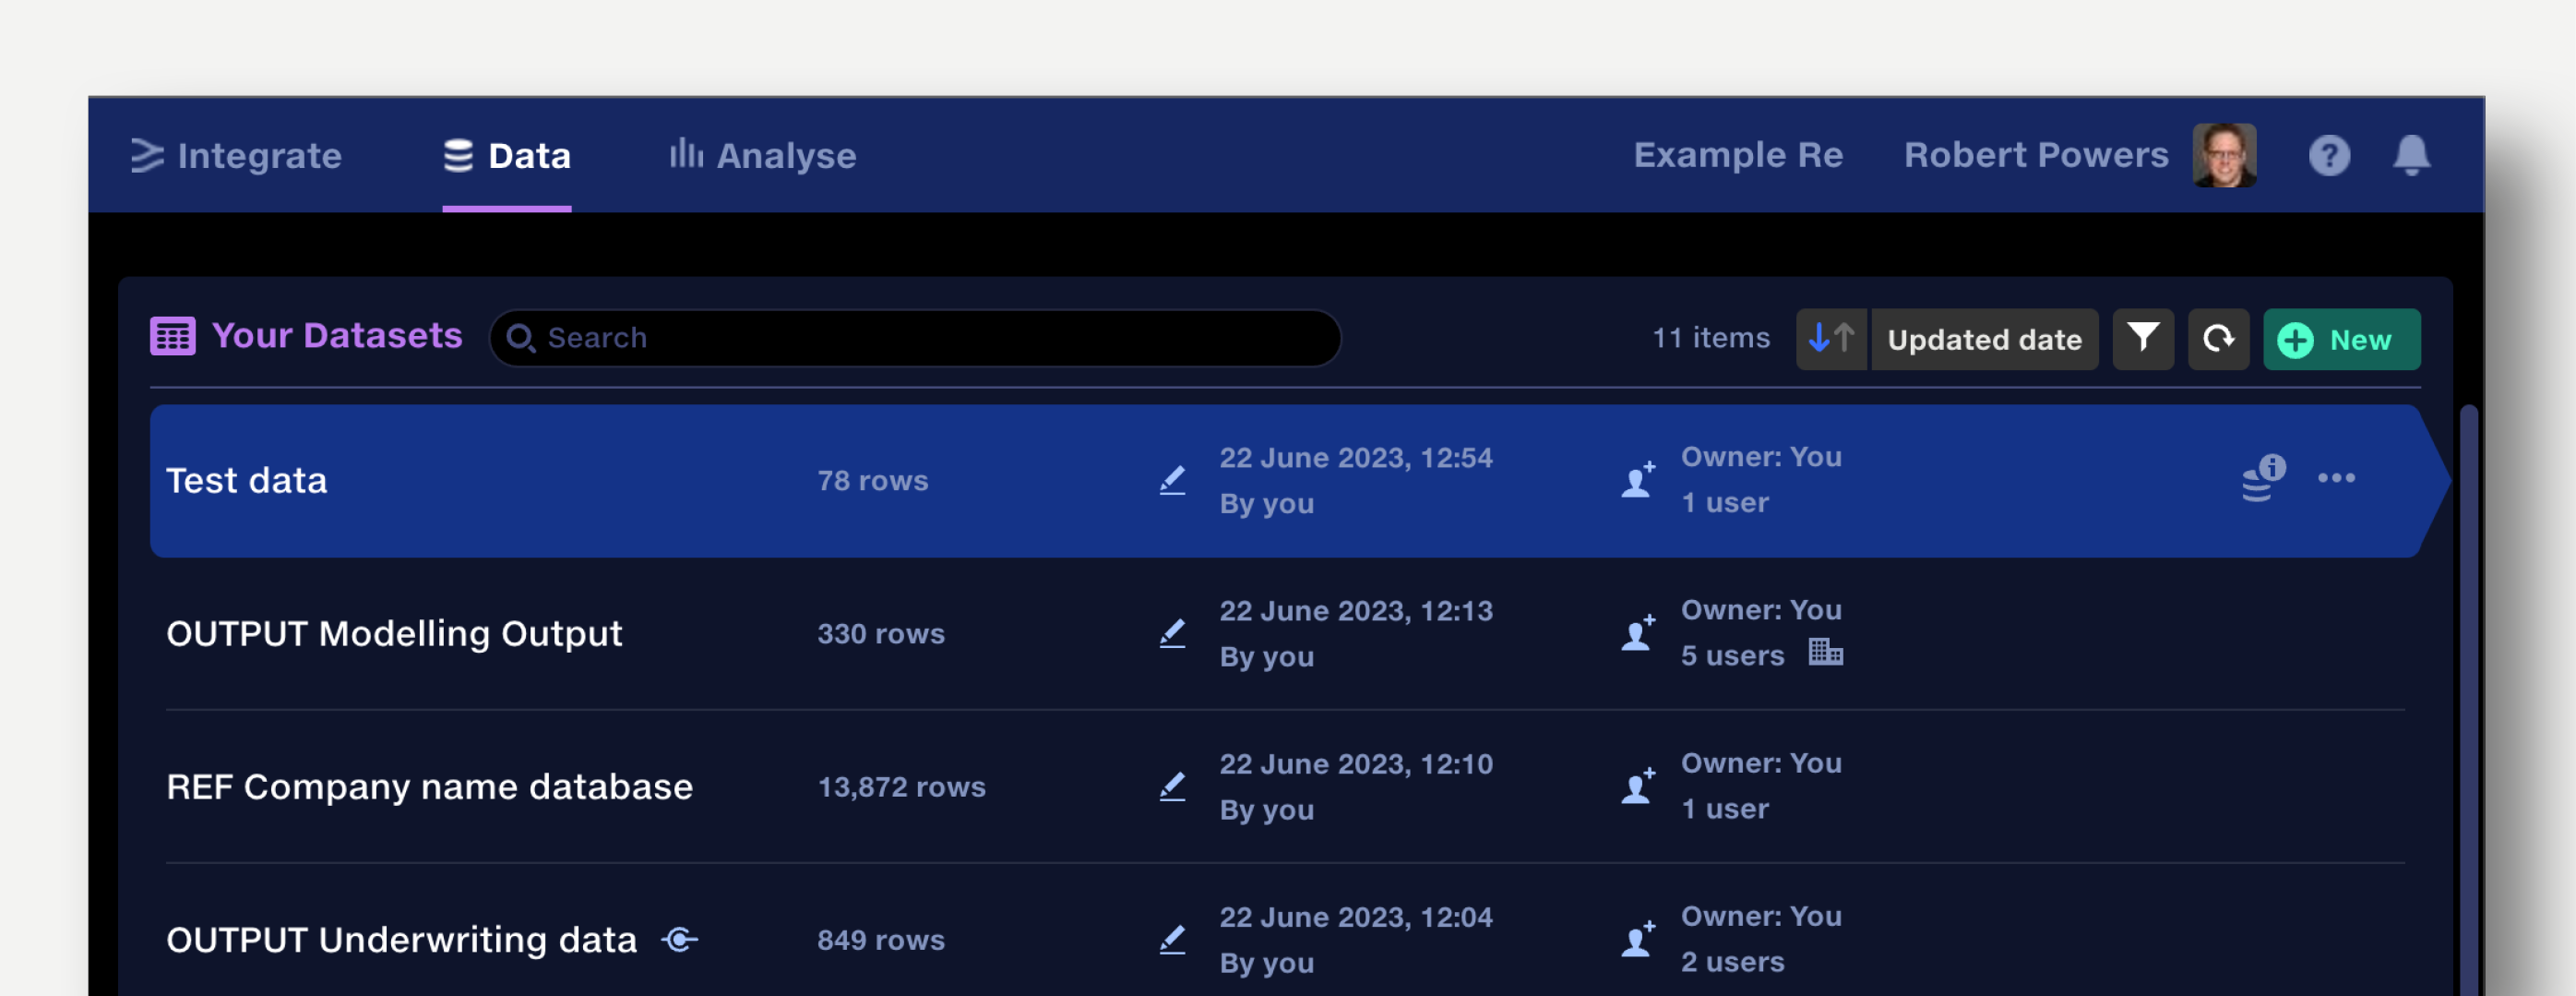
Datasets are sorted by 'Last update' by default. This updates live, keeping you up to date with the status of your partner data sharing.
Datasets can be sorted by dataset name, status, last updated date and last updated by user. Click the arrow button to reverse the sort direction. Your sorting choice will be remembered.
Click in the search field to search datasets by name.
The repo view also shows:

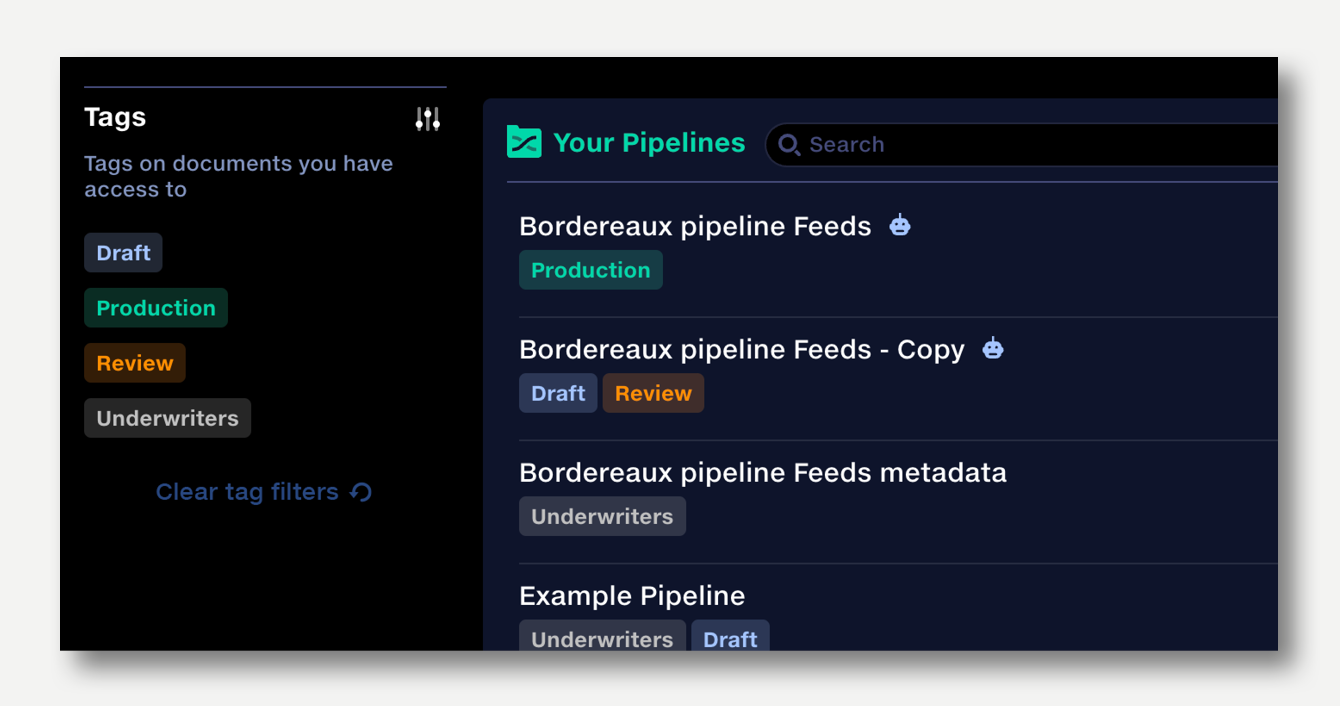
Tags can be applied to any document in Quantemplate to help organise assets.
Tags are created by Org Admins within the repo views for Feeds, Pipelines, Data, and Analyse. They can be applied to documents by document owners. Tags are set at an organisation level and are available to all document types.
Within the repo sidebar, users see all the tags for documents they have access to. Clicking a tag in the sidebar filters the document list by that tag.
Datasets can be sorted by dataset name, updated date, and last updated by user. Click the arrow button to reverse the sort direction.
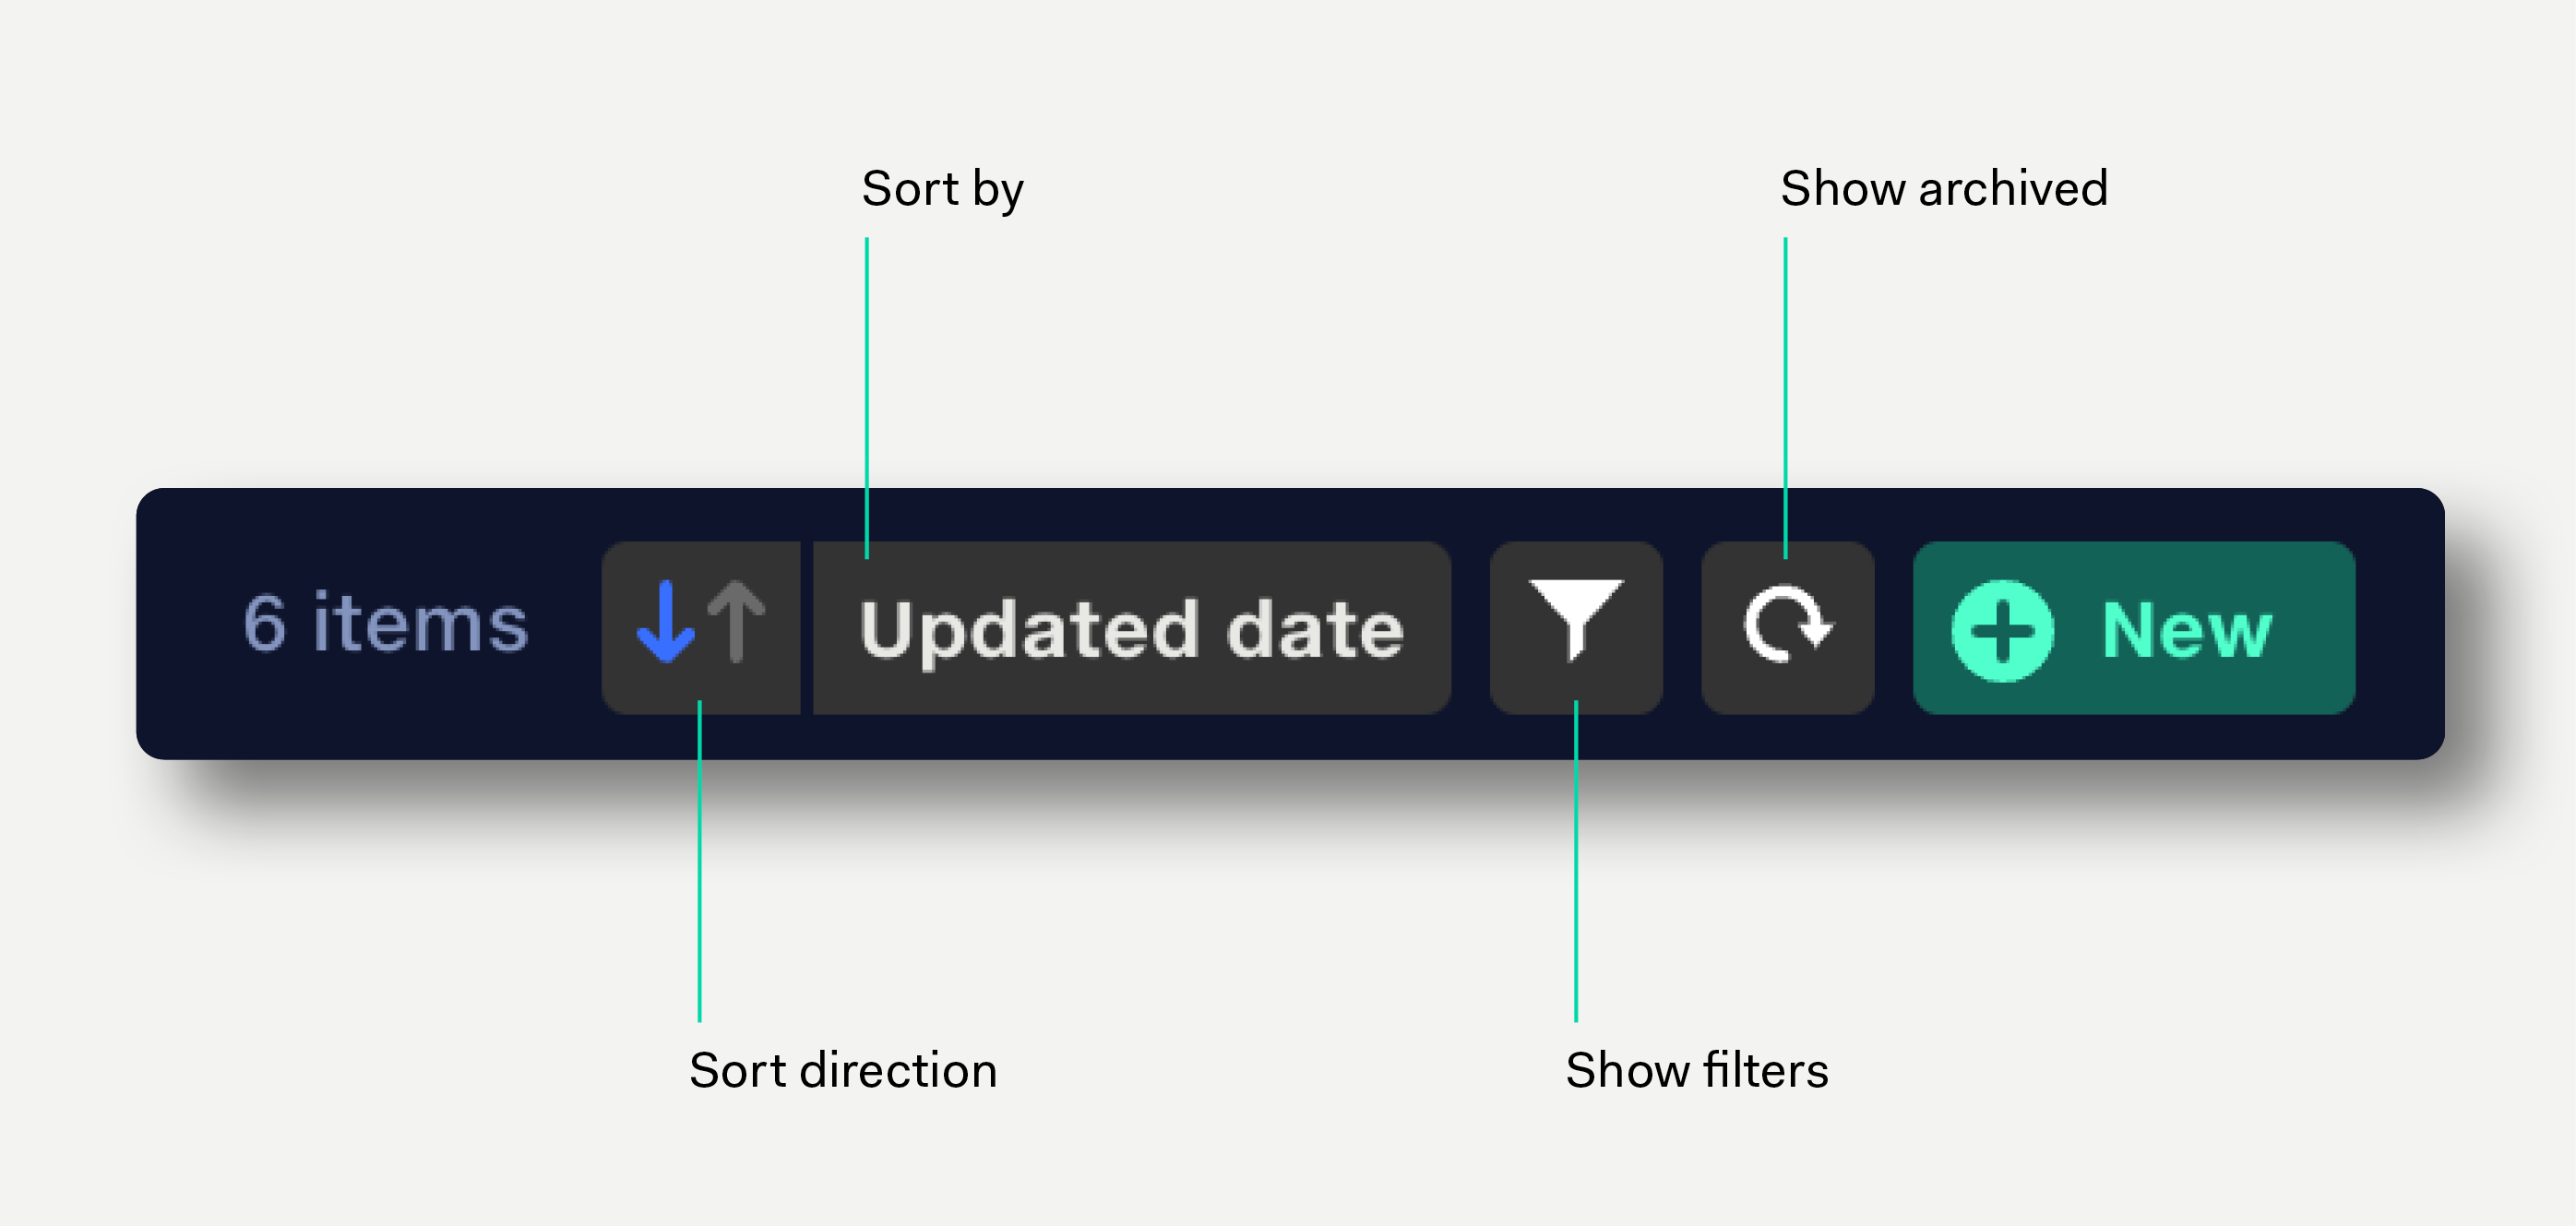
Click in the search field to search datasets by name.
Click the filter icon or press F on the keyboard to filter datasets by date created, date updated, dataset name, owner, and updated by user.
Click the three dots at the end of the row and select ‘Duplicate’ from the popup menu. The dataset is instantly duplicated and the document opened. The suffix ‘copy’ is added to the duplicate dataset’s name.
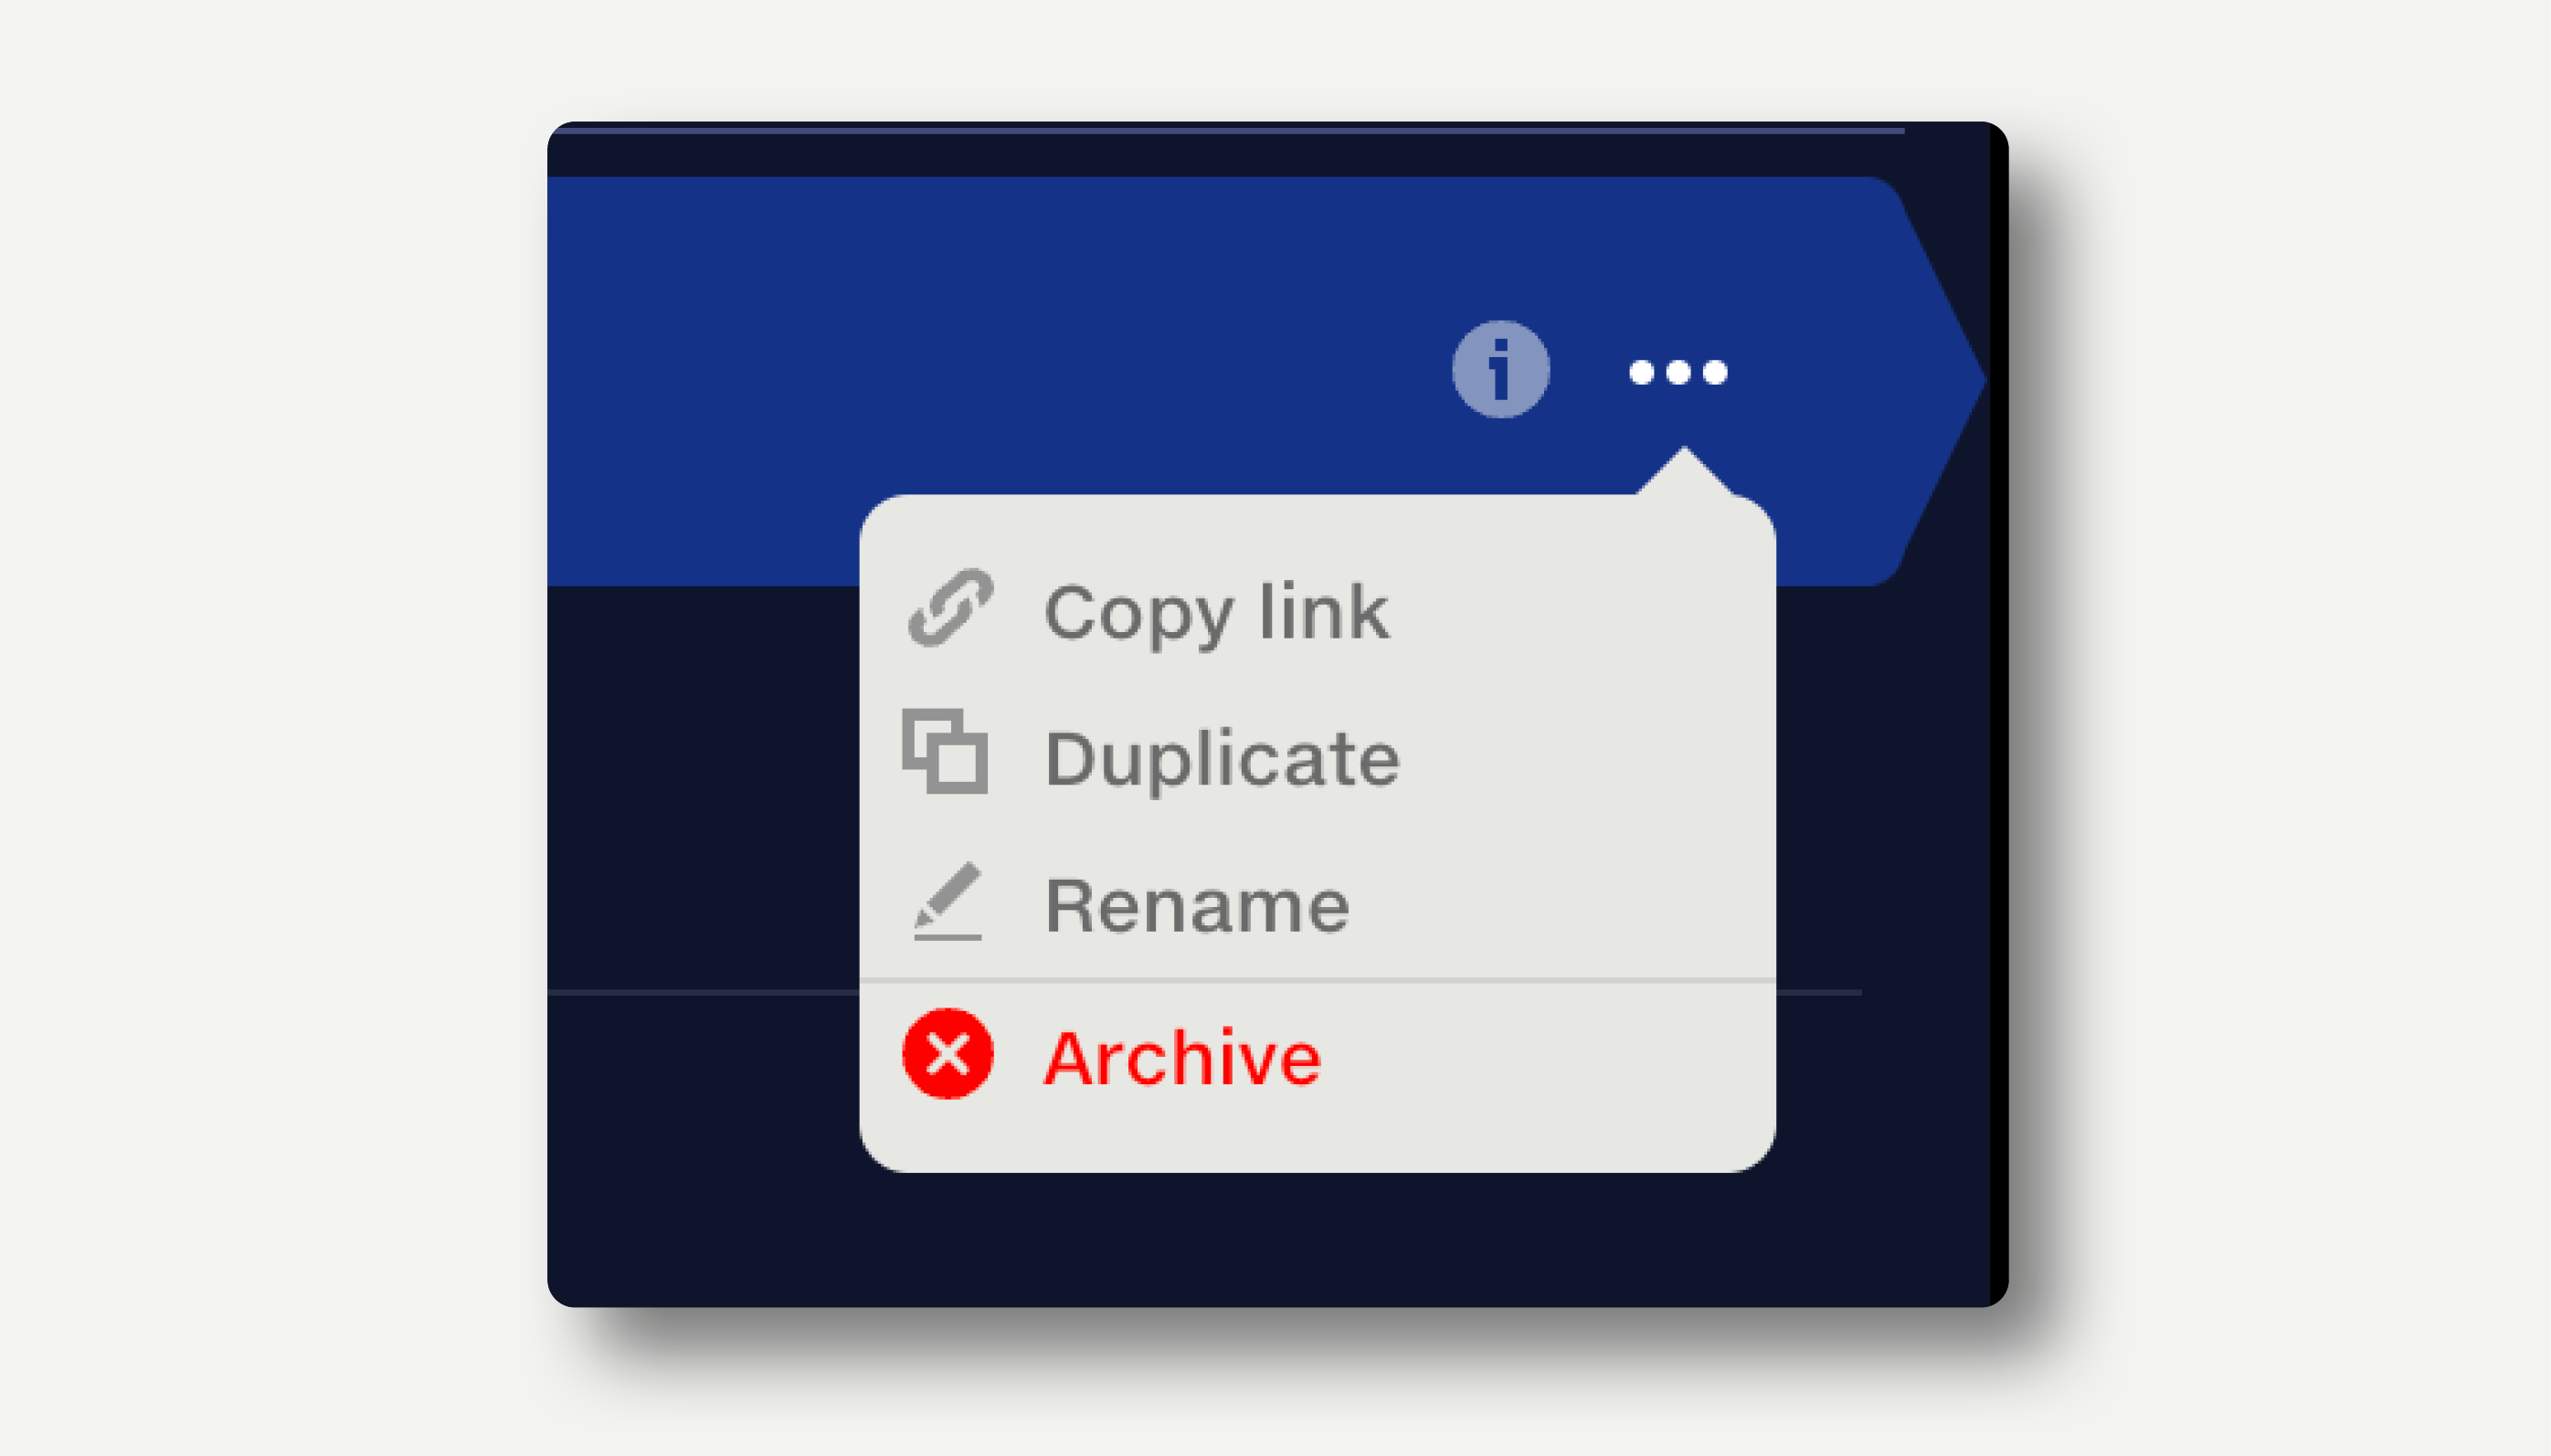
Click the three dots at the end of the row and select ‘Rename’ from the popup menu. Alternatively, edit the dataset name by opening the document and clicking on the name. Name changes propagate throughout the system, and any reports or pipelines using that dataset will display the updated name.
Click the three dots at the end of the row and select ‘Archive’ from the popup menu. Archived documents are not deleted, but hidden from the repo and the pipeline input selector.
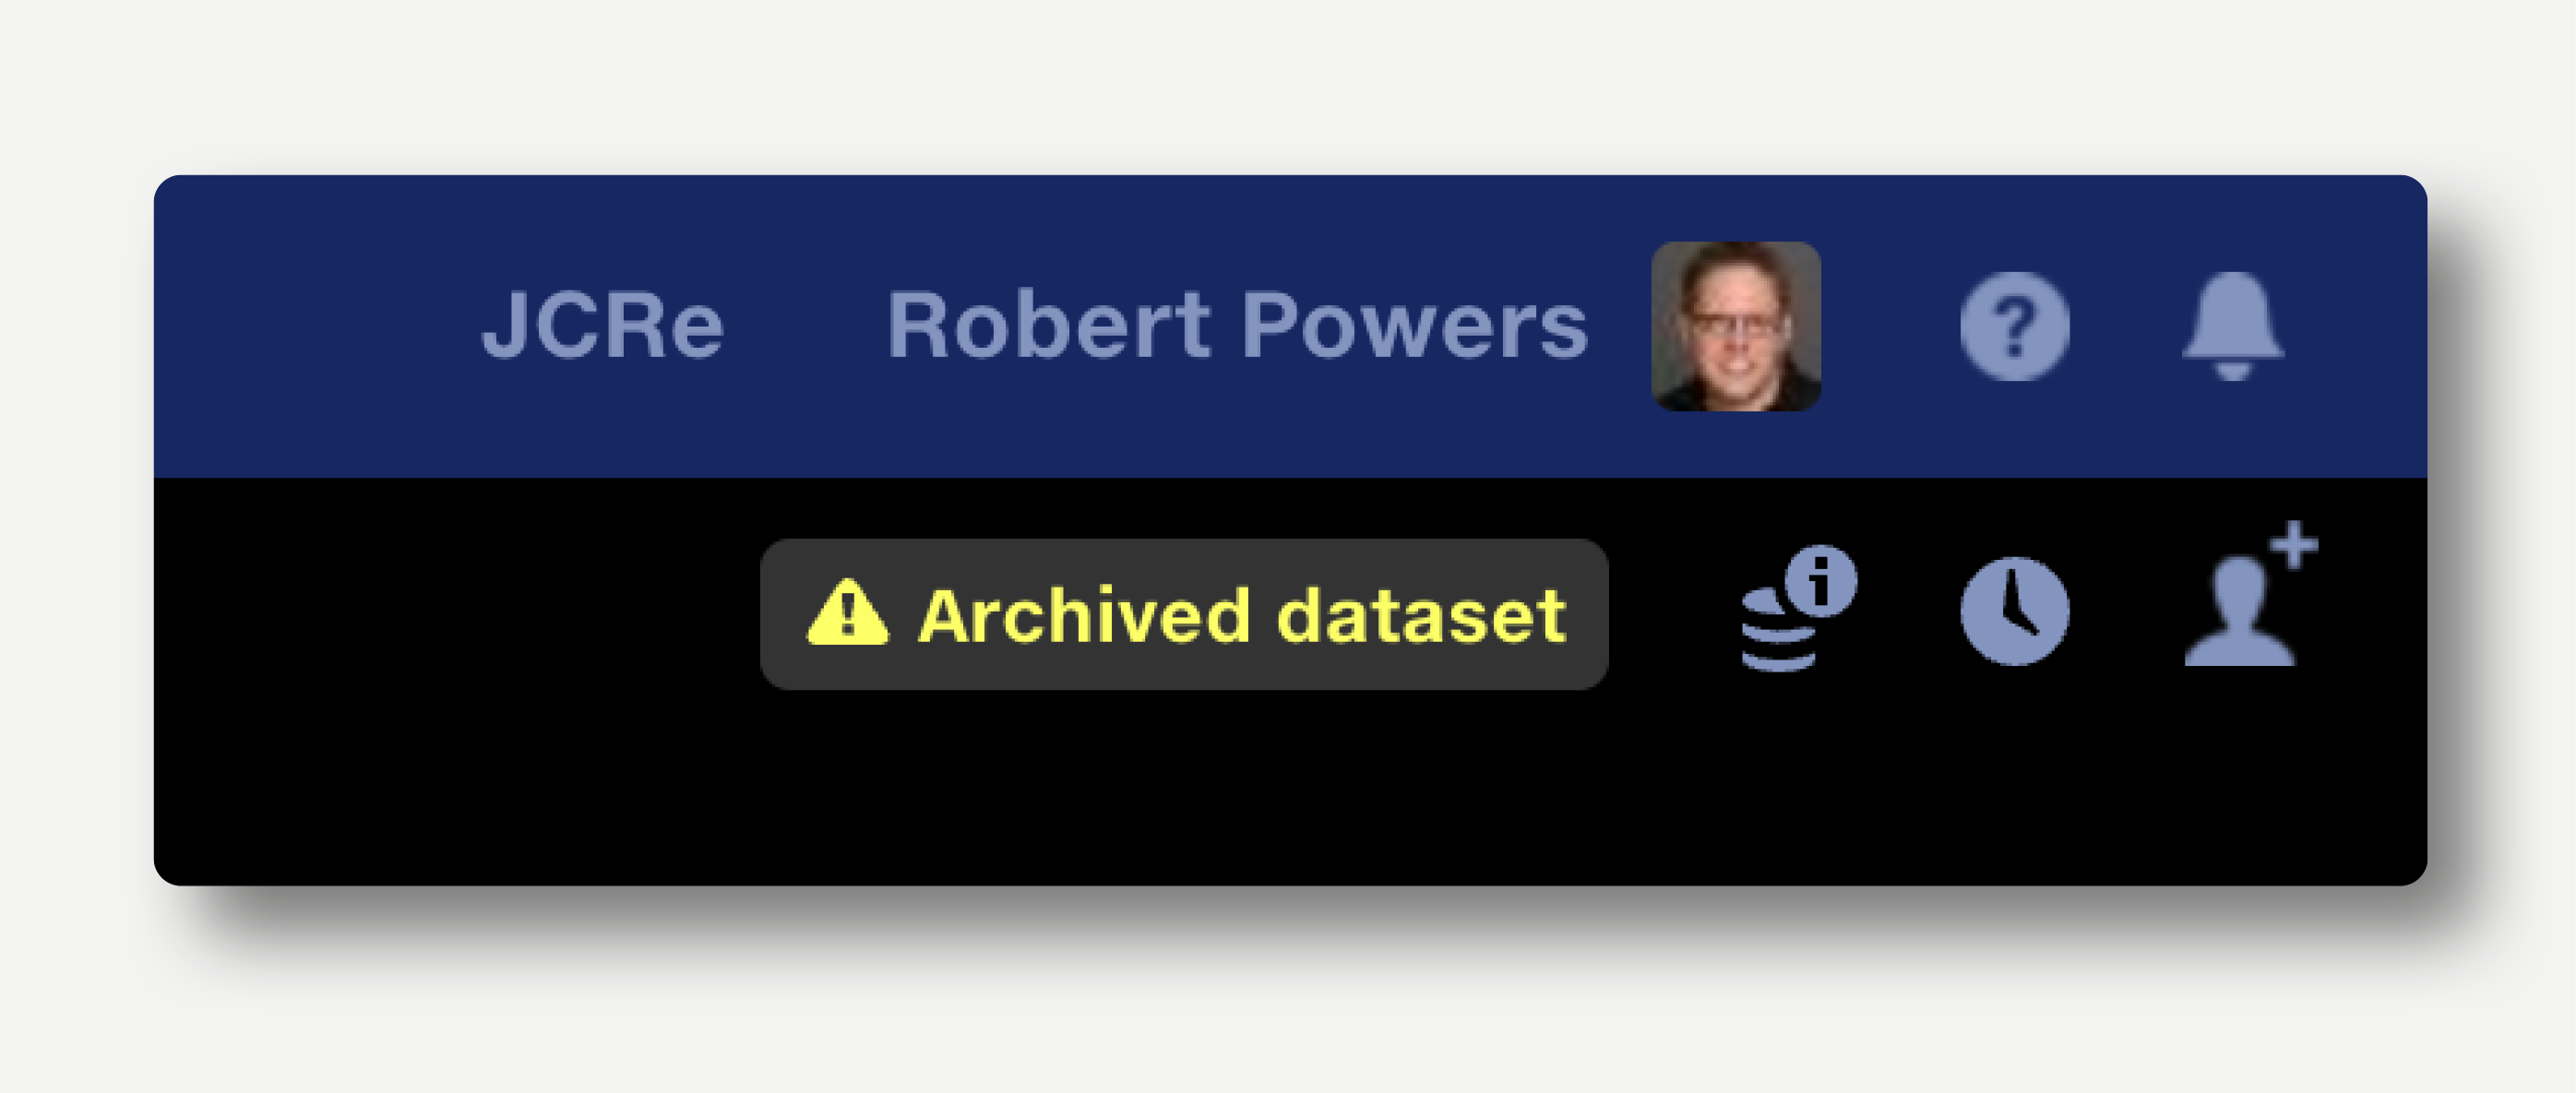
Archived datasets are ignored by the pipeline and will prevent a pipeline from running if used in a Join stage.
Archived datasets display a warning in the top right of the dataset view.
Note that datasets in Quantemplate cannot be deleted permanently by users. Contact us if you have a specific deletion requirement.

The full change history of a dataset is logged in the Dataset History popup at the top right.
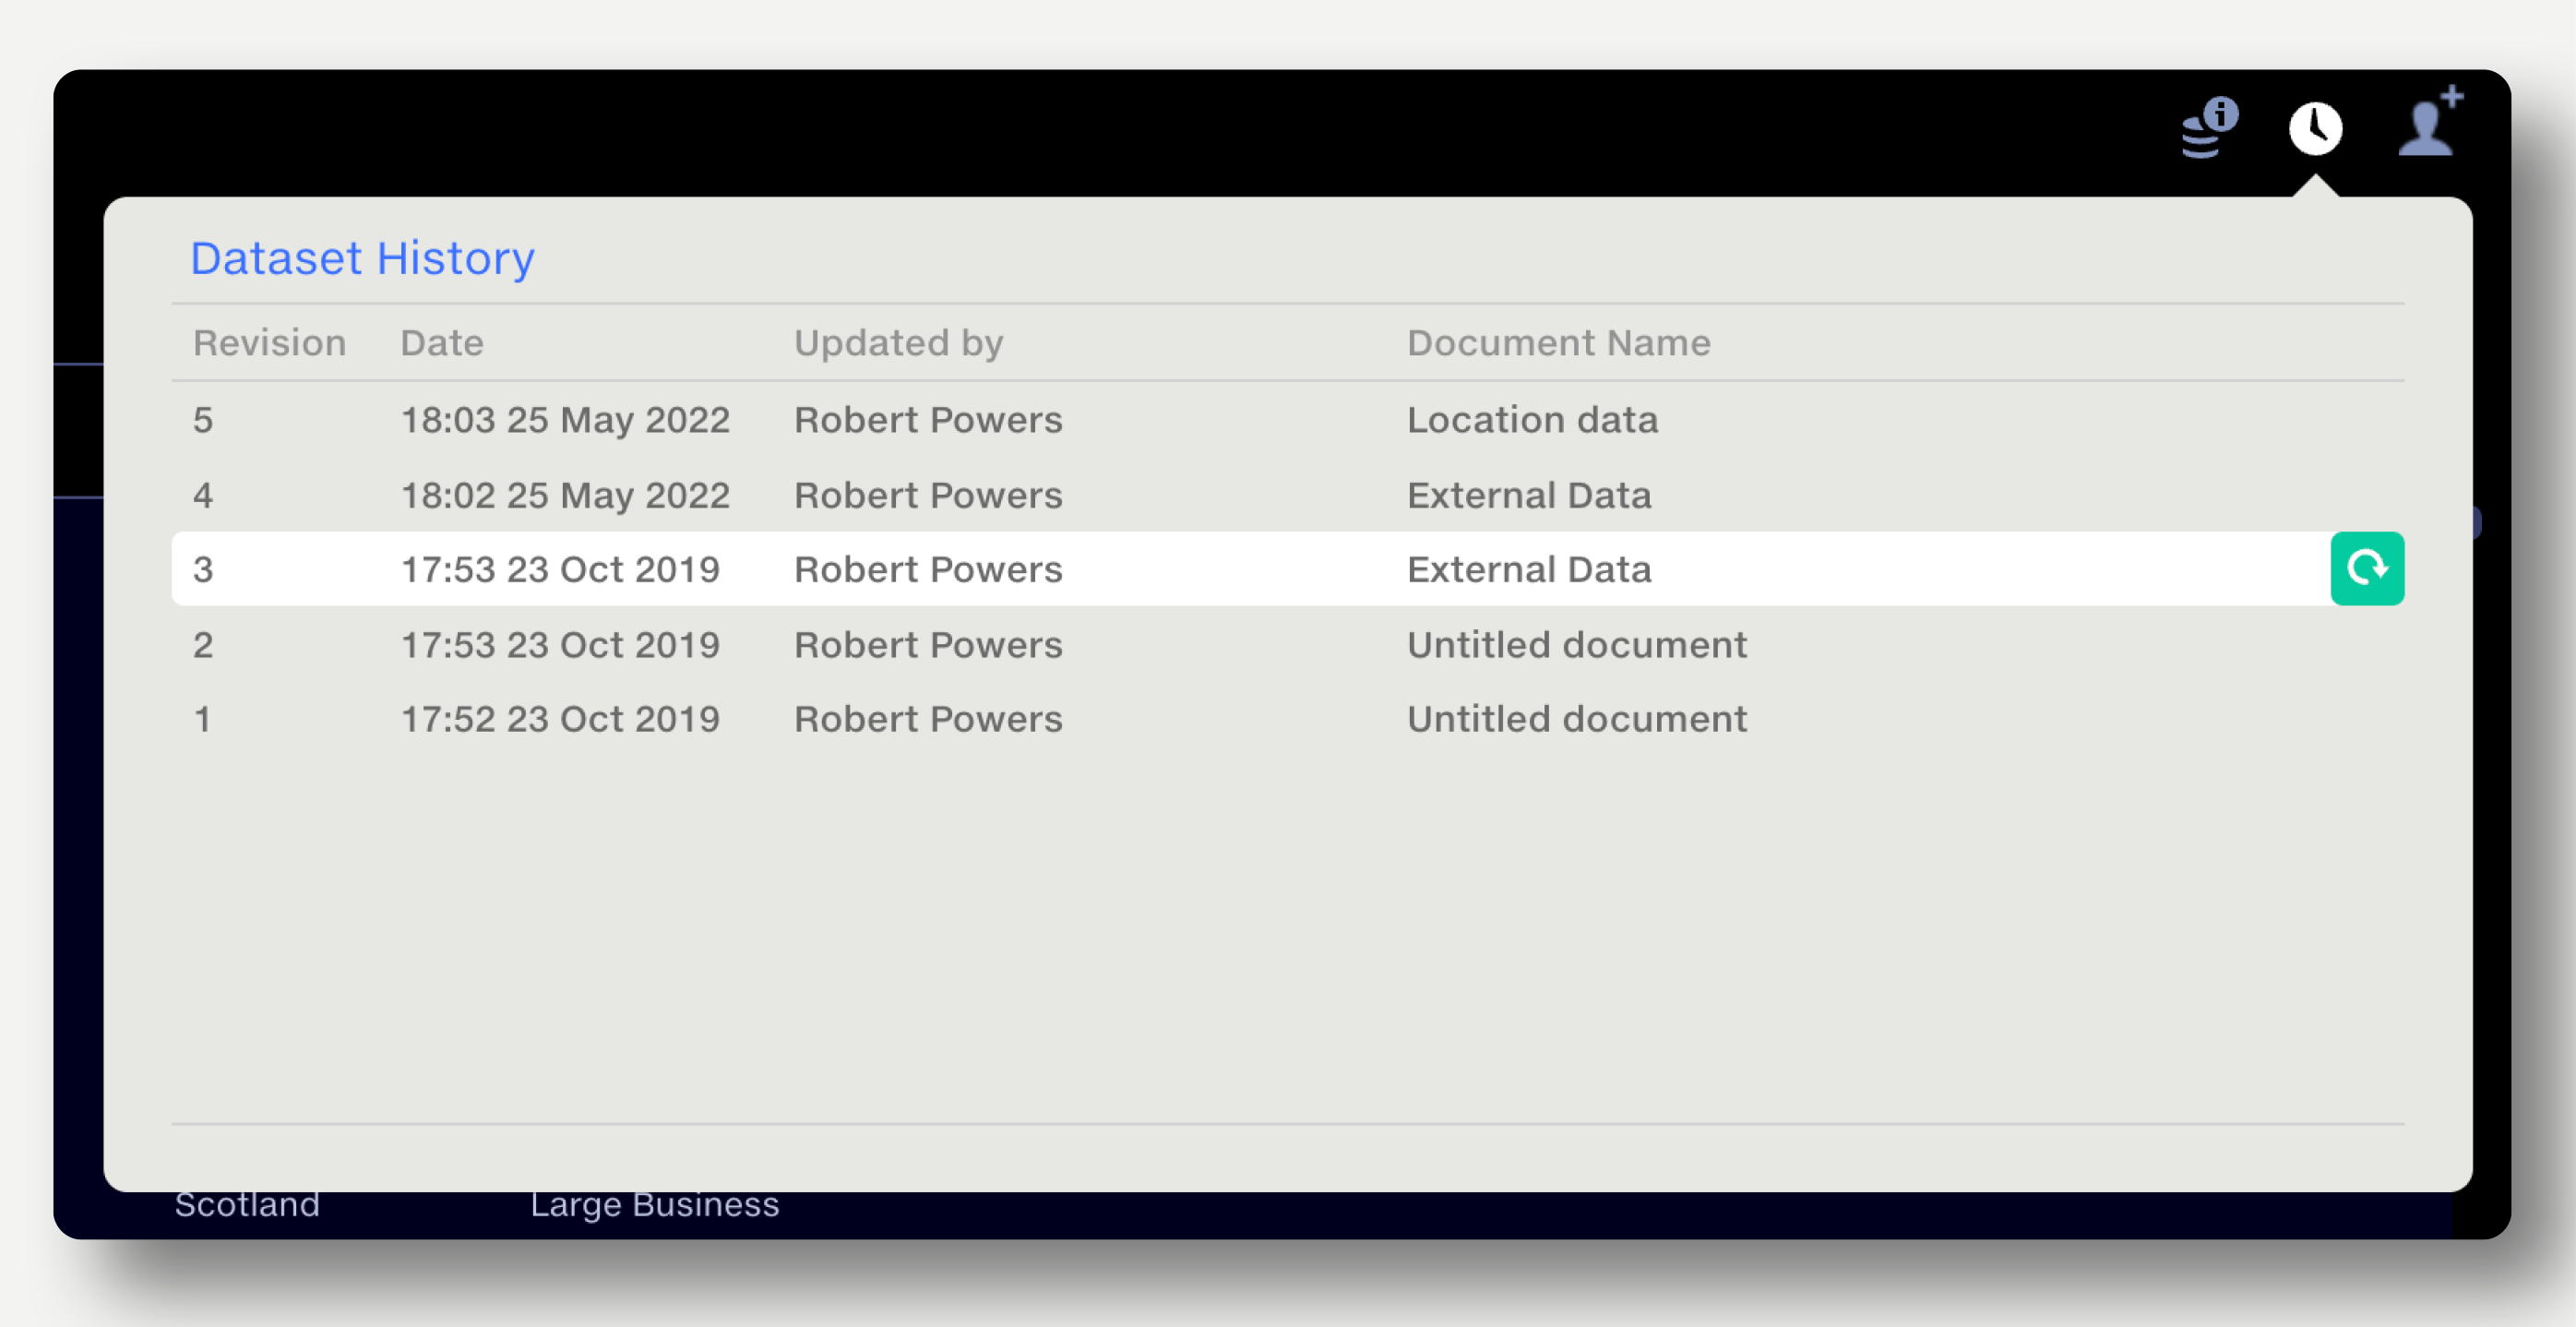
The dataset history shows a dataset’s revision number, date/time of revision, last editor, and the name of the dataset at the time of revision.
Dataset owners and editors can restore a previous version by clicking the green Restore button to the right of the dataset name in the popup. The restored version becomes the latest revision of the dataset.