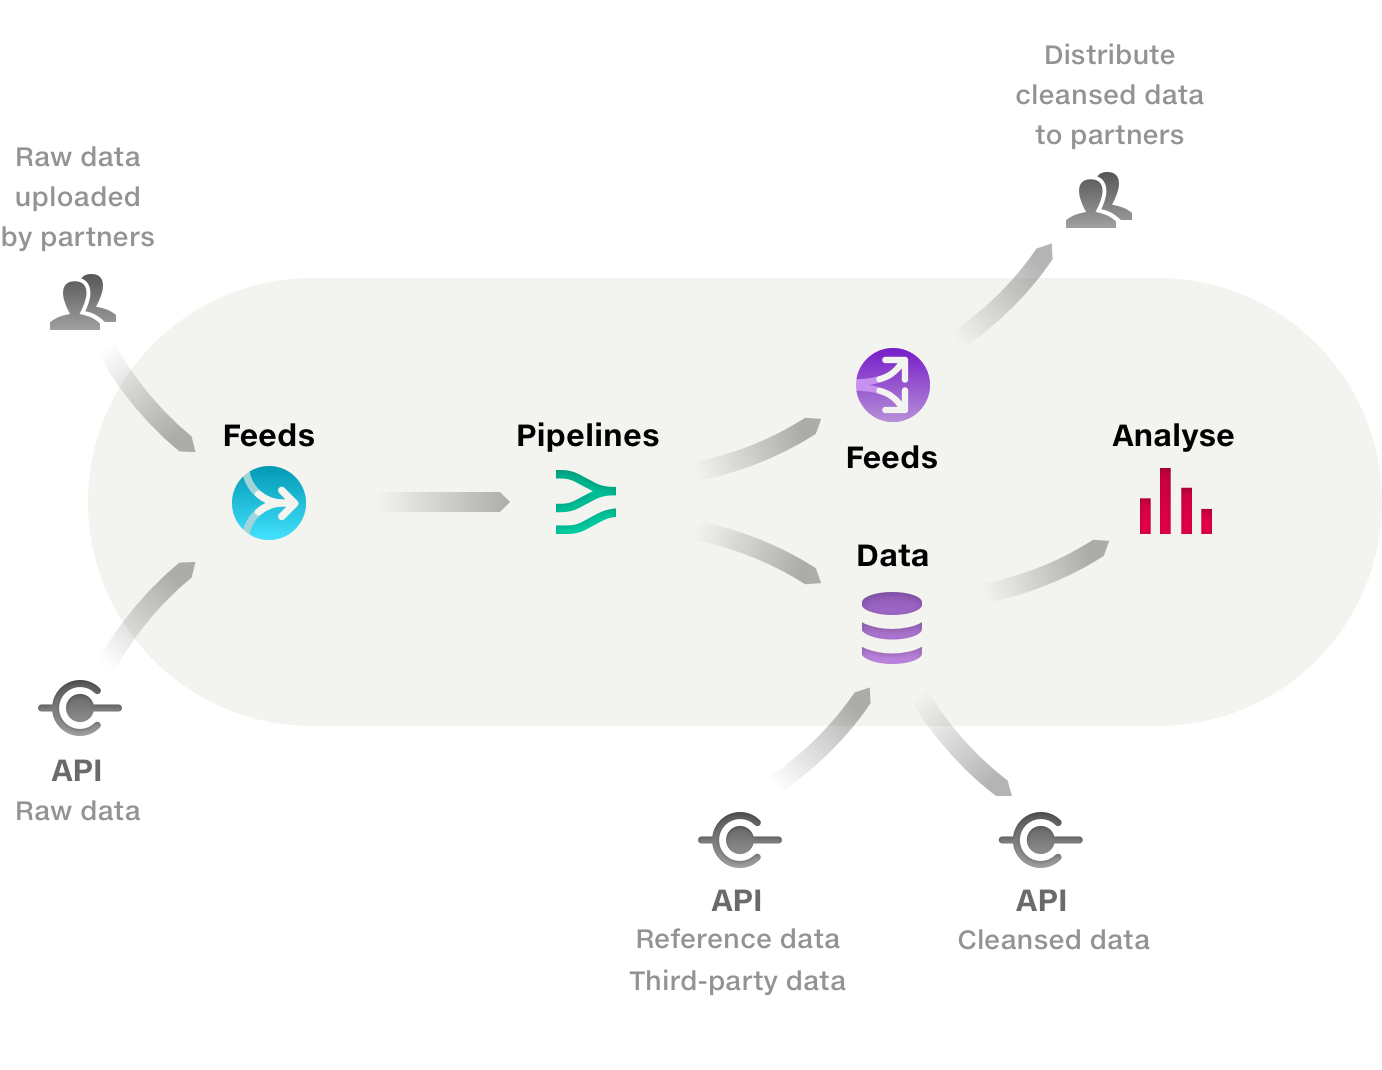
Quantemplate imports raw data via Feeds, cleanses and harmonises in Pipelines, then outputs it to the Data repo for downstream processes such as querying in Analyse or sending to external systems via API or distributing to partners via feeds.
Data which requires cleansing should be uploaded to a feed, or directly to a pipeline via the Uploads tab or input selector.
To add data via the input selector:
Quantemplate supports XLS, XLSX, CSV and GZipped CSV files.
GZipping a CSV file can significantly reduce its file size and upload time. 7-Zip is useful tool for applying GZip compression. Mac users can also use a Terminal command.
We are aware of an issue where CSV files which contain a Byte Order Mark and have GZip compression applied may fail to upload. In this case, use an uncompressed CSV format or open the file in a text editor and export as UTF-8 with no BOM.
The main panel of the pipeline workspace contains four input tabs:
The feeds tab shows the feeds that have been used in the pipeline. The view shows the submissions sorted by feed name, then by submission requested date. Click on submission to reveal it in the feeds view.
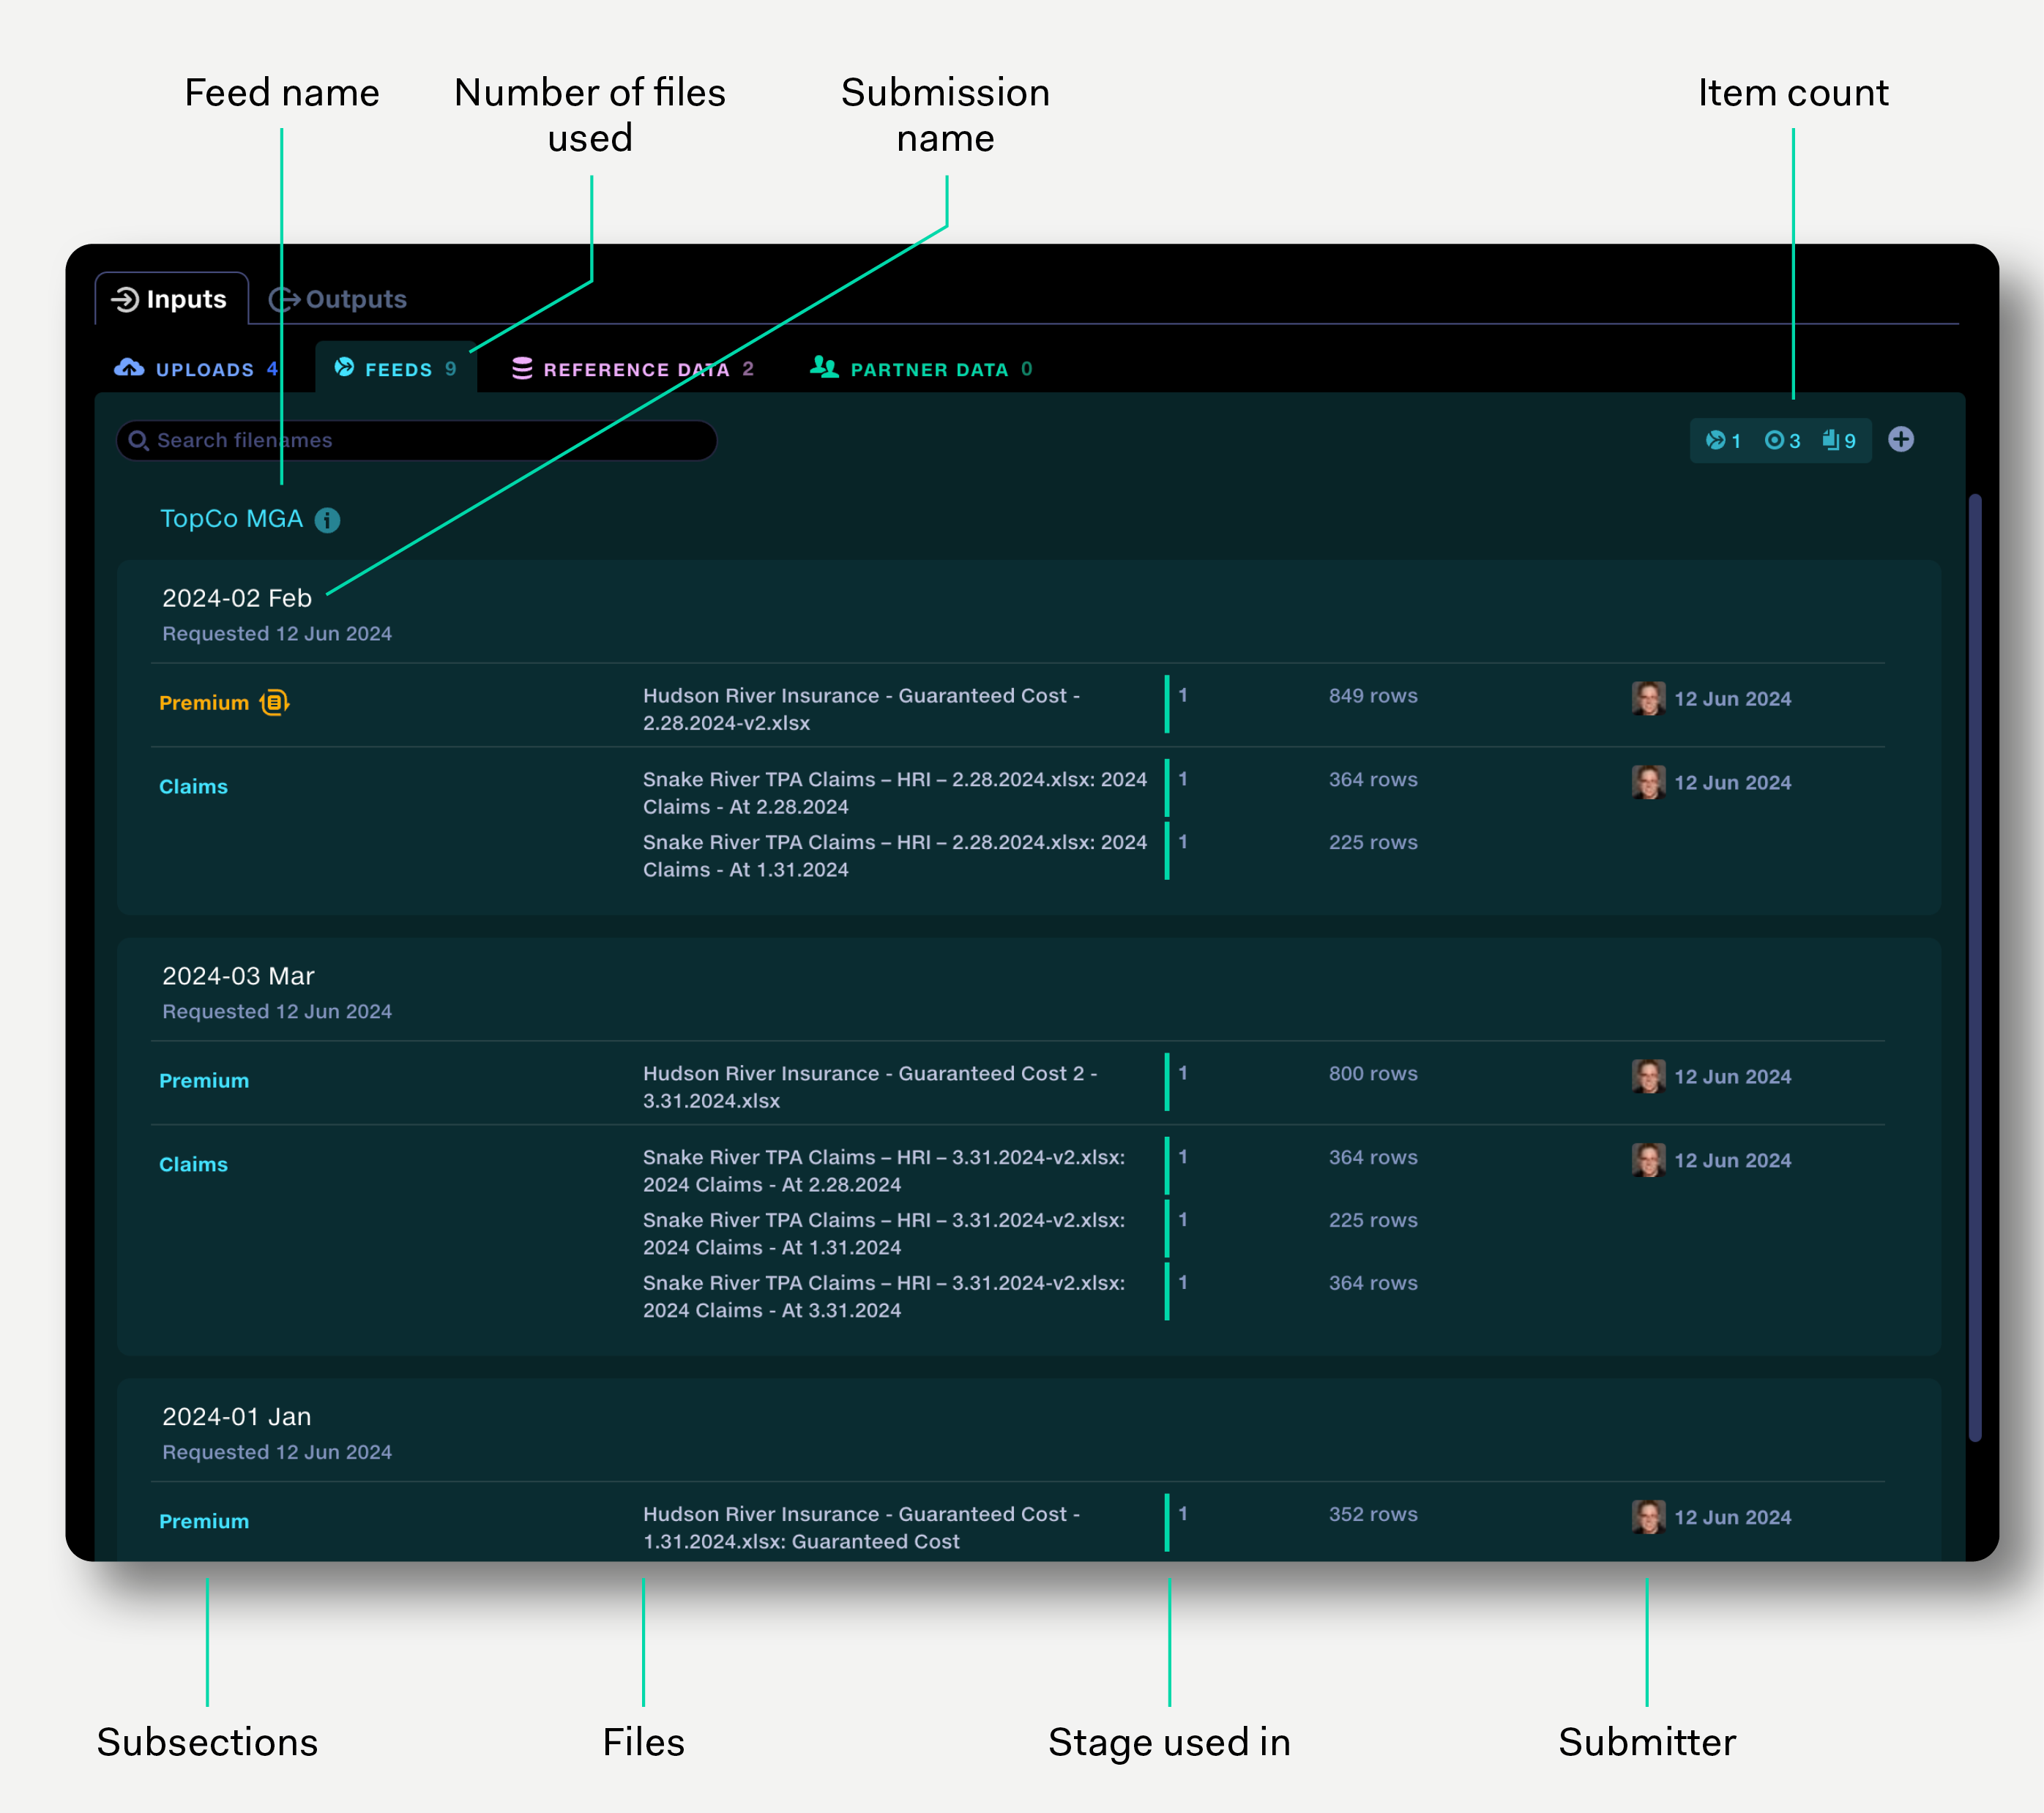
If a resubmission has been requested, this is indicated by the resubmission icon.

Feed data is added to the pipeline via the input selector and can be set to auto-update each time a submission receives new data.
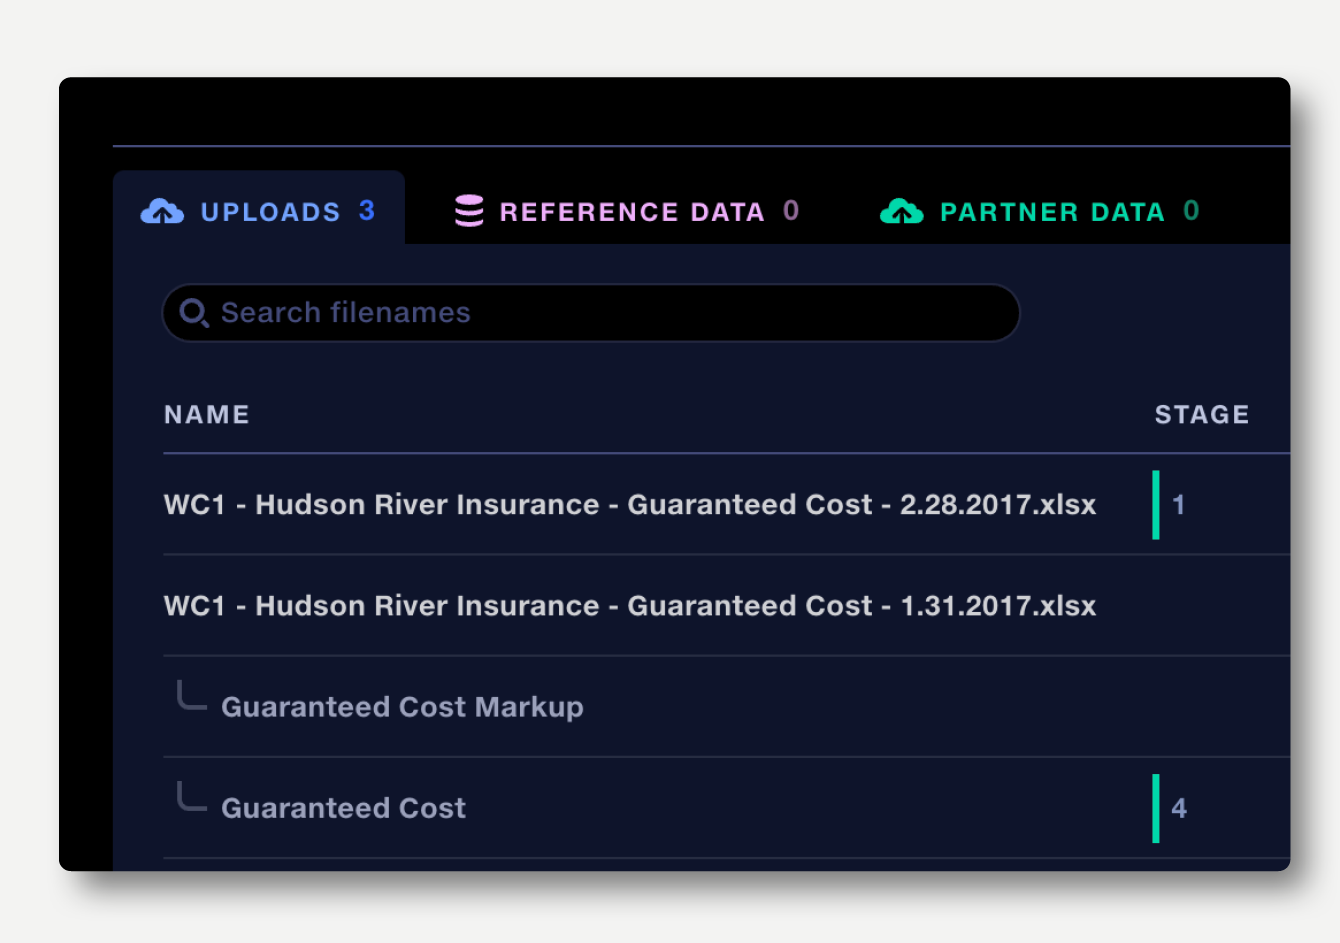
In the Pipeline view, the uploads tab allows raw data files to be uploaded directly to a pipeline. Once uploaded they need to be added to the correct pipeline stages via the input selector.
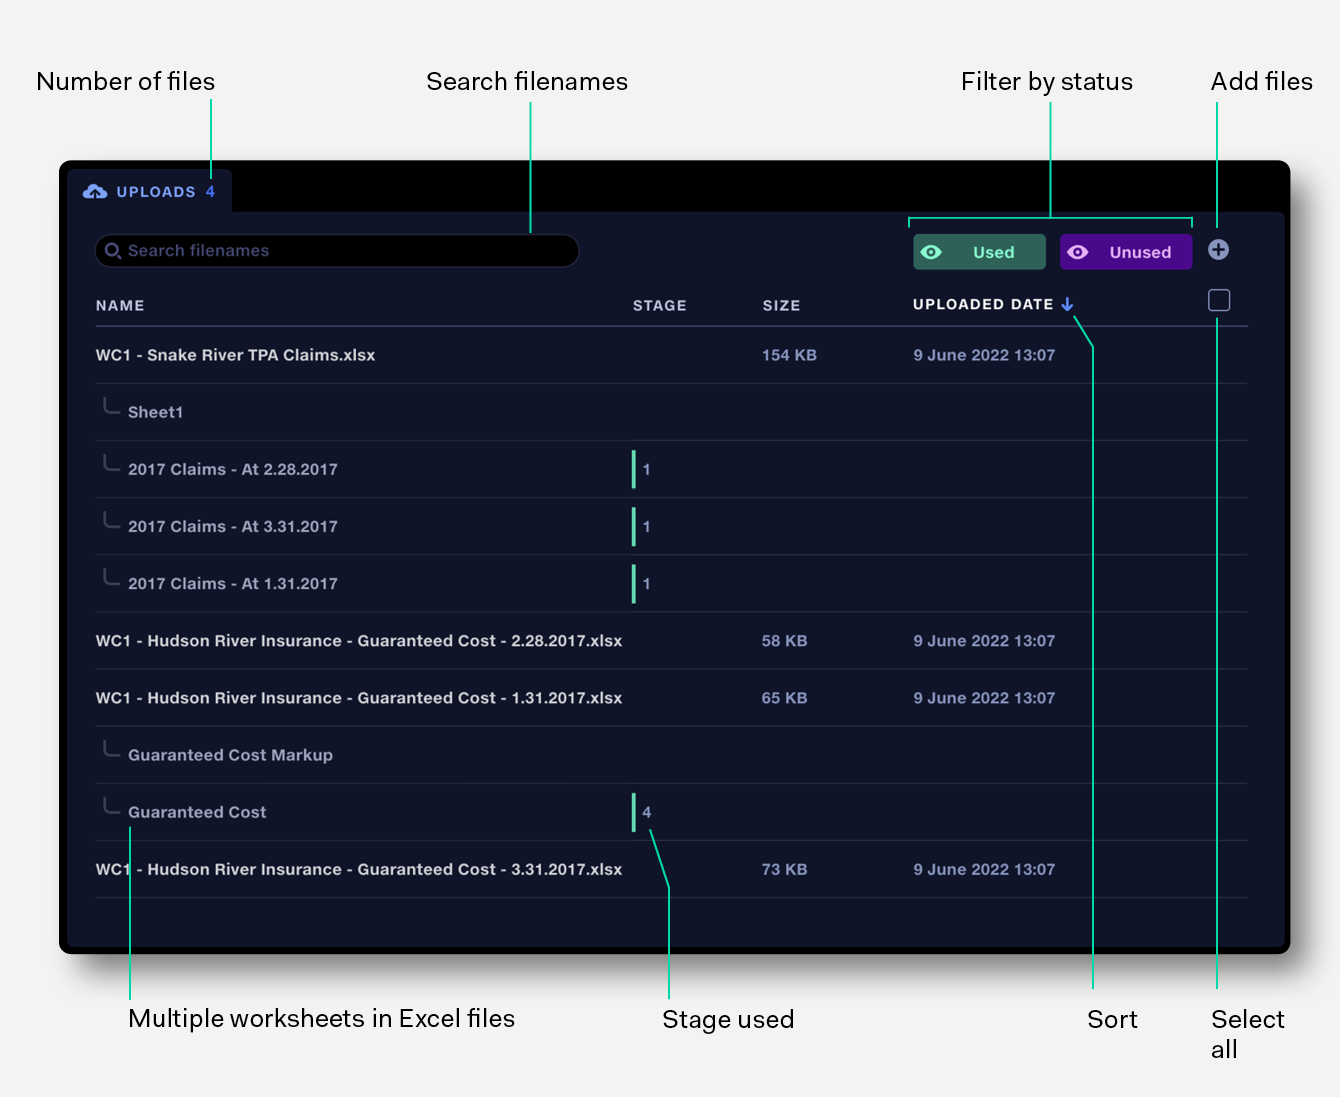
The uploads tab shows:
The uploads tab can display up to 500 items. To display more items, apply filters or archive some files.
By default, files are sorted by Uploaded date, with most recent uploads at the top. The list can also be sorted by Name and Size. Click on a column header to sort by that column. Click again to reverse the sort direction.
In the uploads view, when an Excel file contains multiple worksheets, they are presented as a subset of the file. The data in each worksheet can be previewed by clicking on it. Clicking on the main file name will show a preview of the first worksheet.
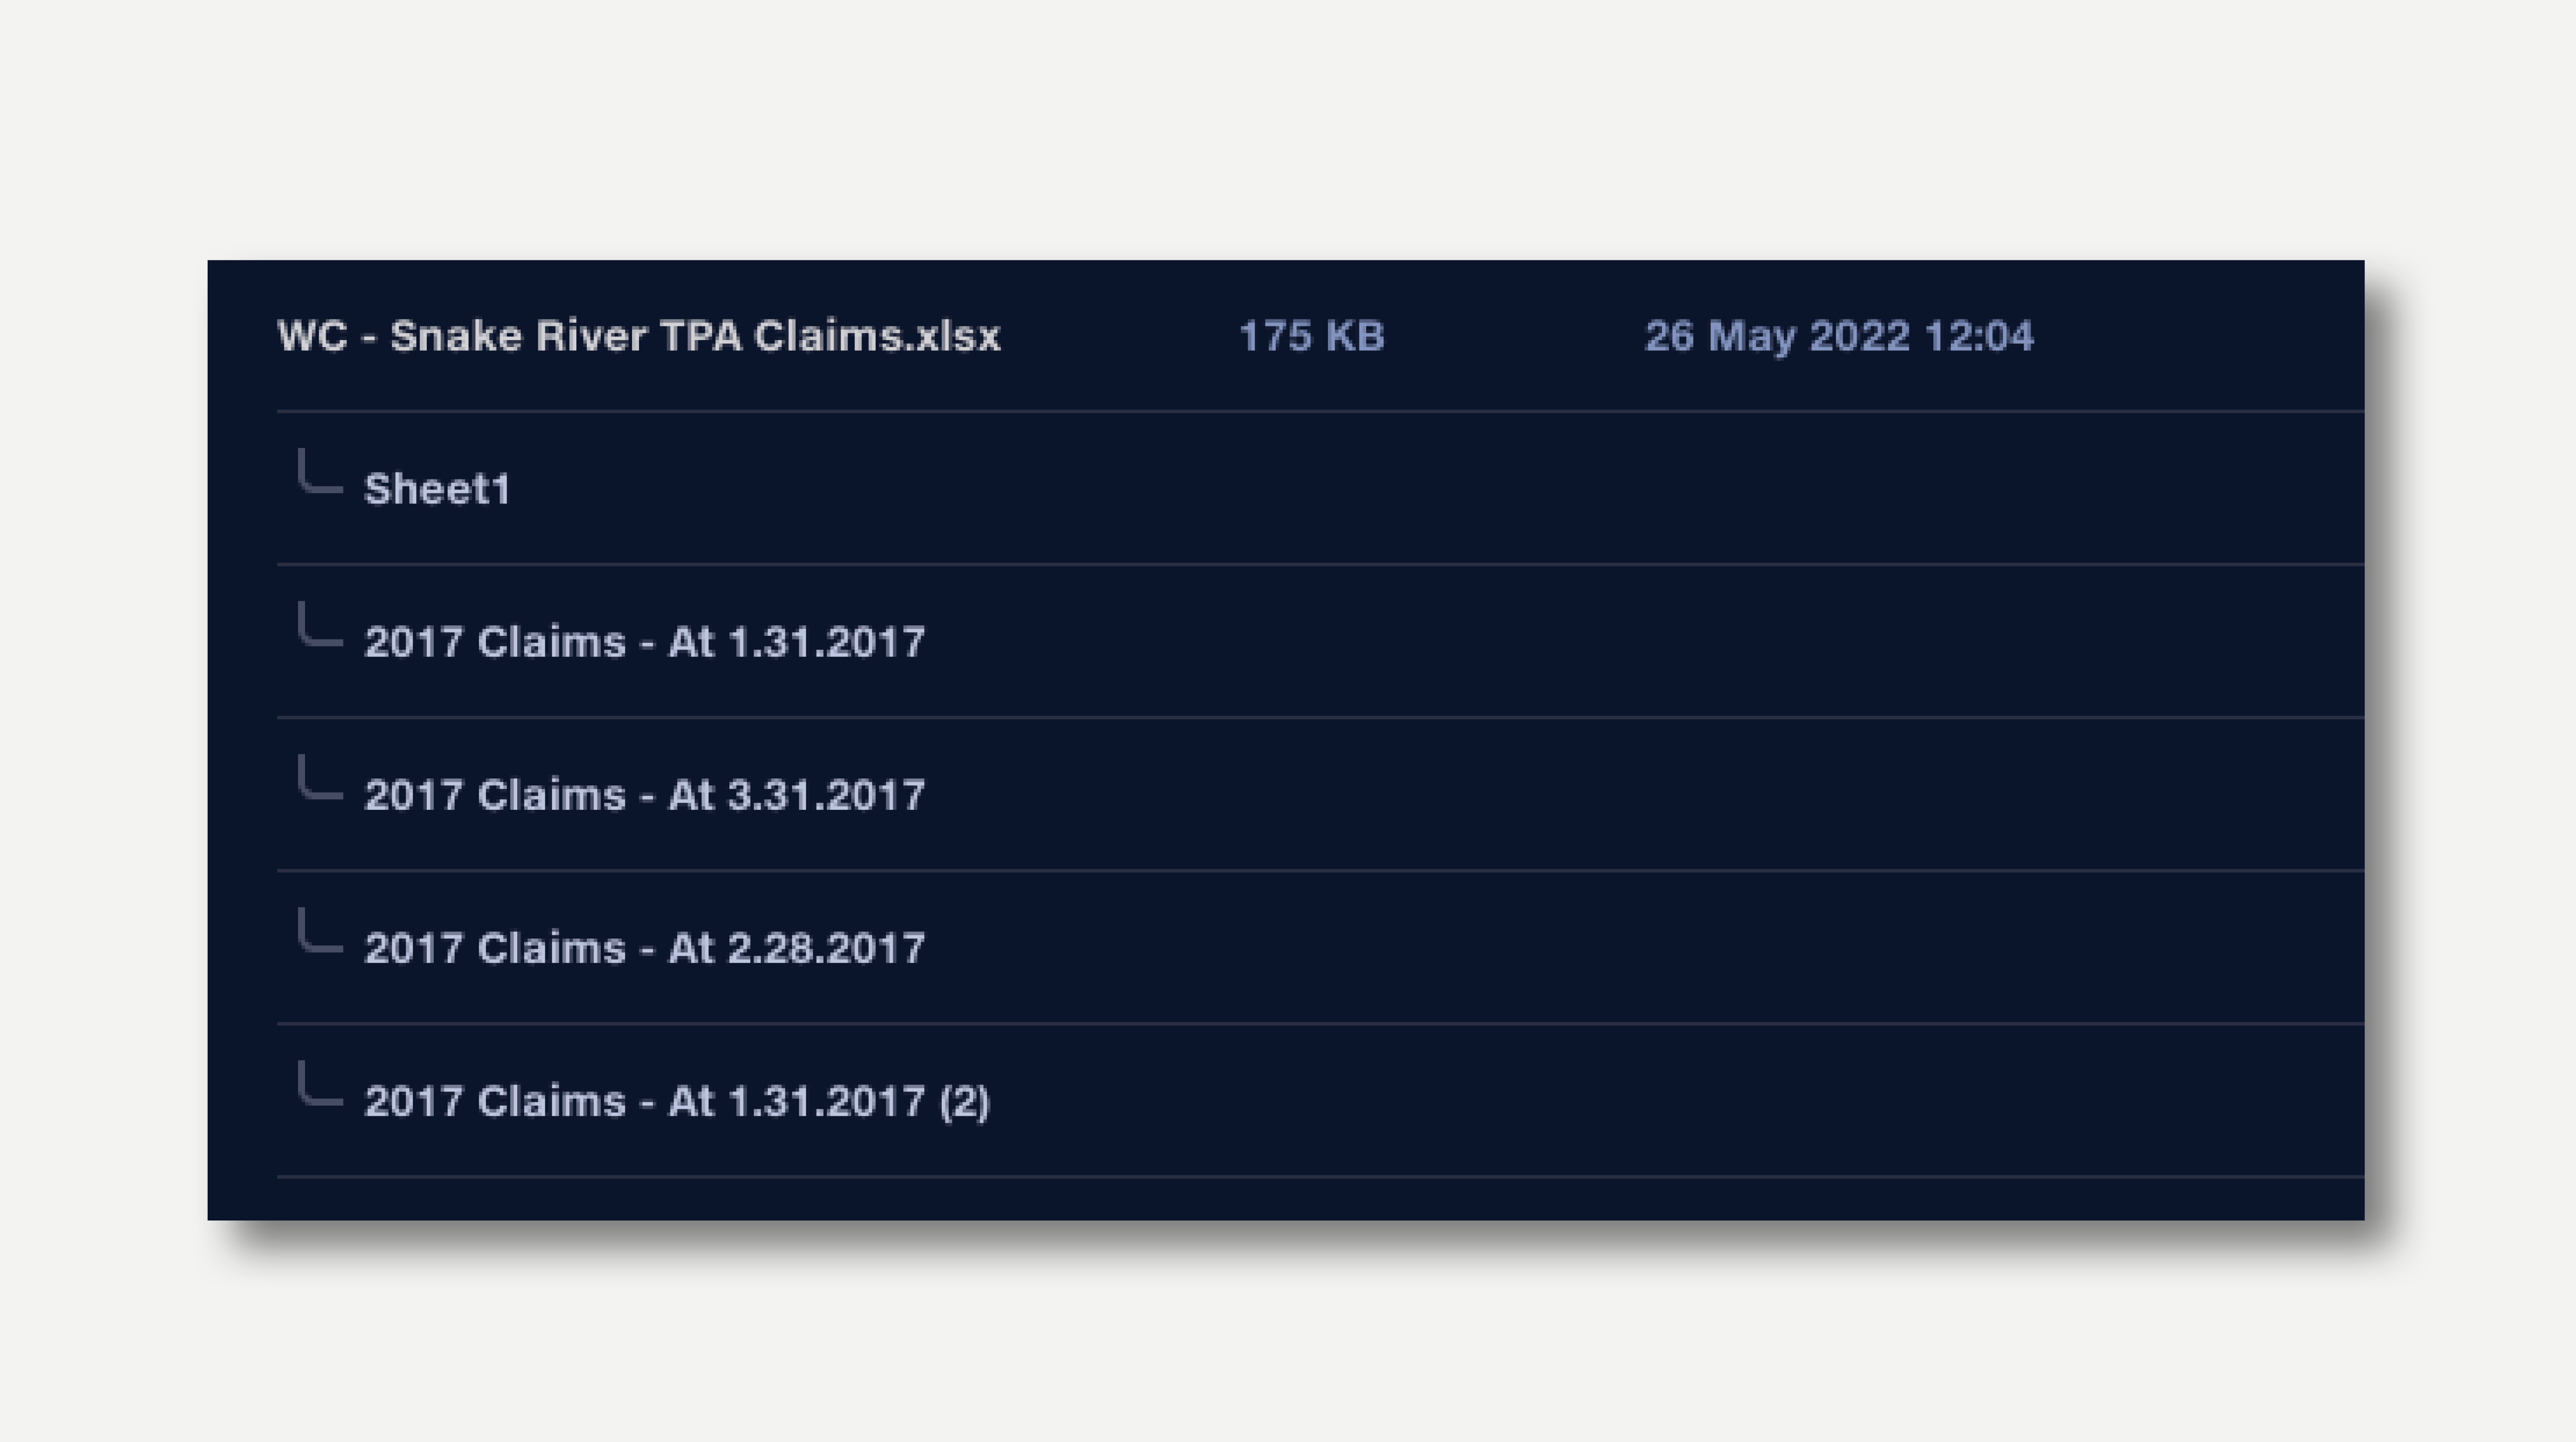
Elsewhere in Quantemplate, worksheets in Excel files are represented by joining the filename to the worksheet name.
Filename: Acme-claims-April-2018.xlsx
Worksheet name: Sheet1
Filename in Quantemplate: Acme-claims-April-2018.xlsx: Sheet1
Filter buttons for Used and Unused uploads allow the files uploaded to a pipeline to be easily managed.
Click a filter button once to toggle its state from showing to hiding, or vice-versa. Double-click a filter button to make it the only filter type showing.
Text filters allow you to search filenames to quickly find a file or worksheet.
To upload files to a pipeline, click the + button on the top right to open the browser file chooser, or drag-and-drop files directly onto the Uploads tab.
If a Used filter is applied at the time of upload, the upload progress will be shown, but the file will be filtered out once uploaded. This will also be the case if a text filter is applied which does not match the name of the uploaded file.
Adding files to the Uploads tab is useful if the uploads need to be previewed in Quantemplate before adding to the pipeline. Otherwise, the most efficient way to add uploads is via the stage input selector, where they can be quickly selected as inputs to the stage.
Archiving an uploaded file will remove it from the Uploads tab and any stages which use the file. The file will not be permanently deleted, since all uploads are preserved as part of the pipeline’s history. Restoring a pipeline to a previous revision number will also restore all uploads that were present at that revision point.
To remove an uploaded file, click on the cross which appears on the right when hovering an item. A confirmation button will appear. Click on this to archive the file. This cannot be undone.
To archive multiple uploads at once, first select the files:
When one or more items are selected, the bulk edit bar appears. Click the Archive button in the bulk edit bar to archive the selected files.
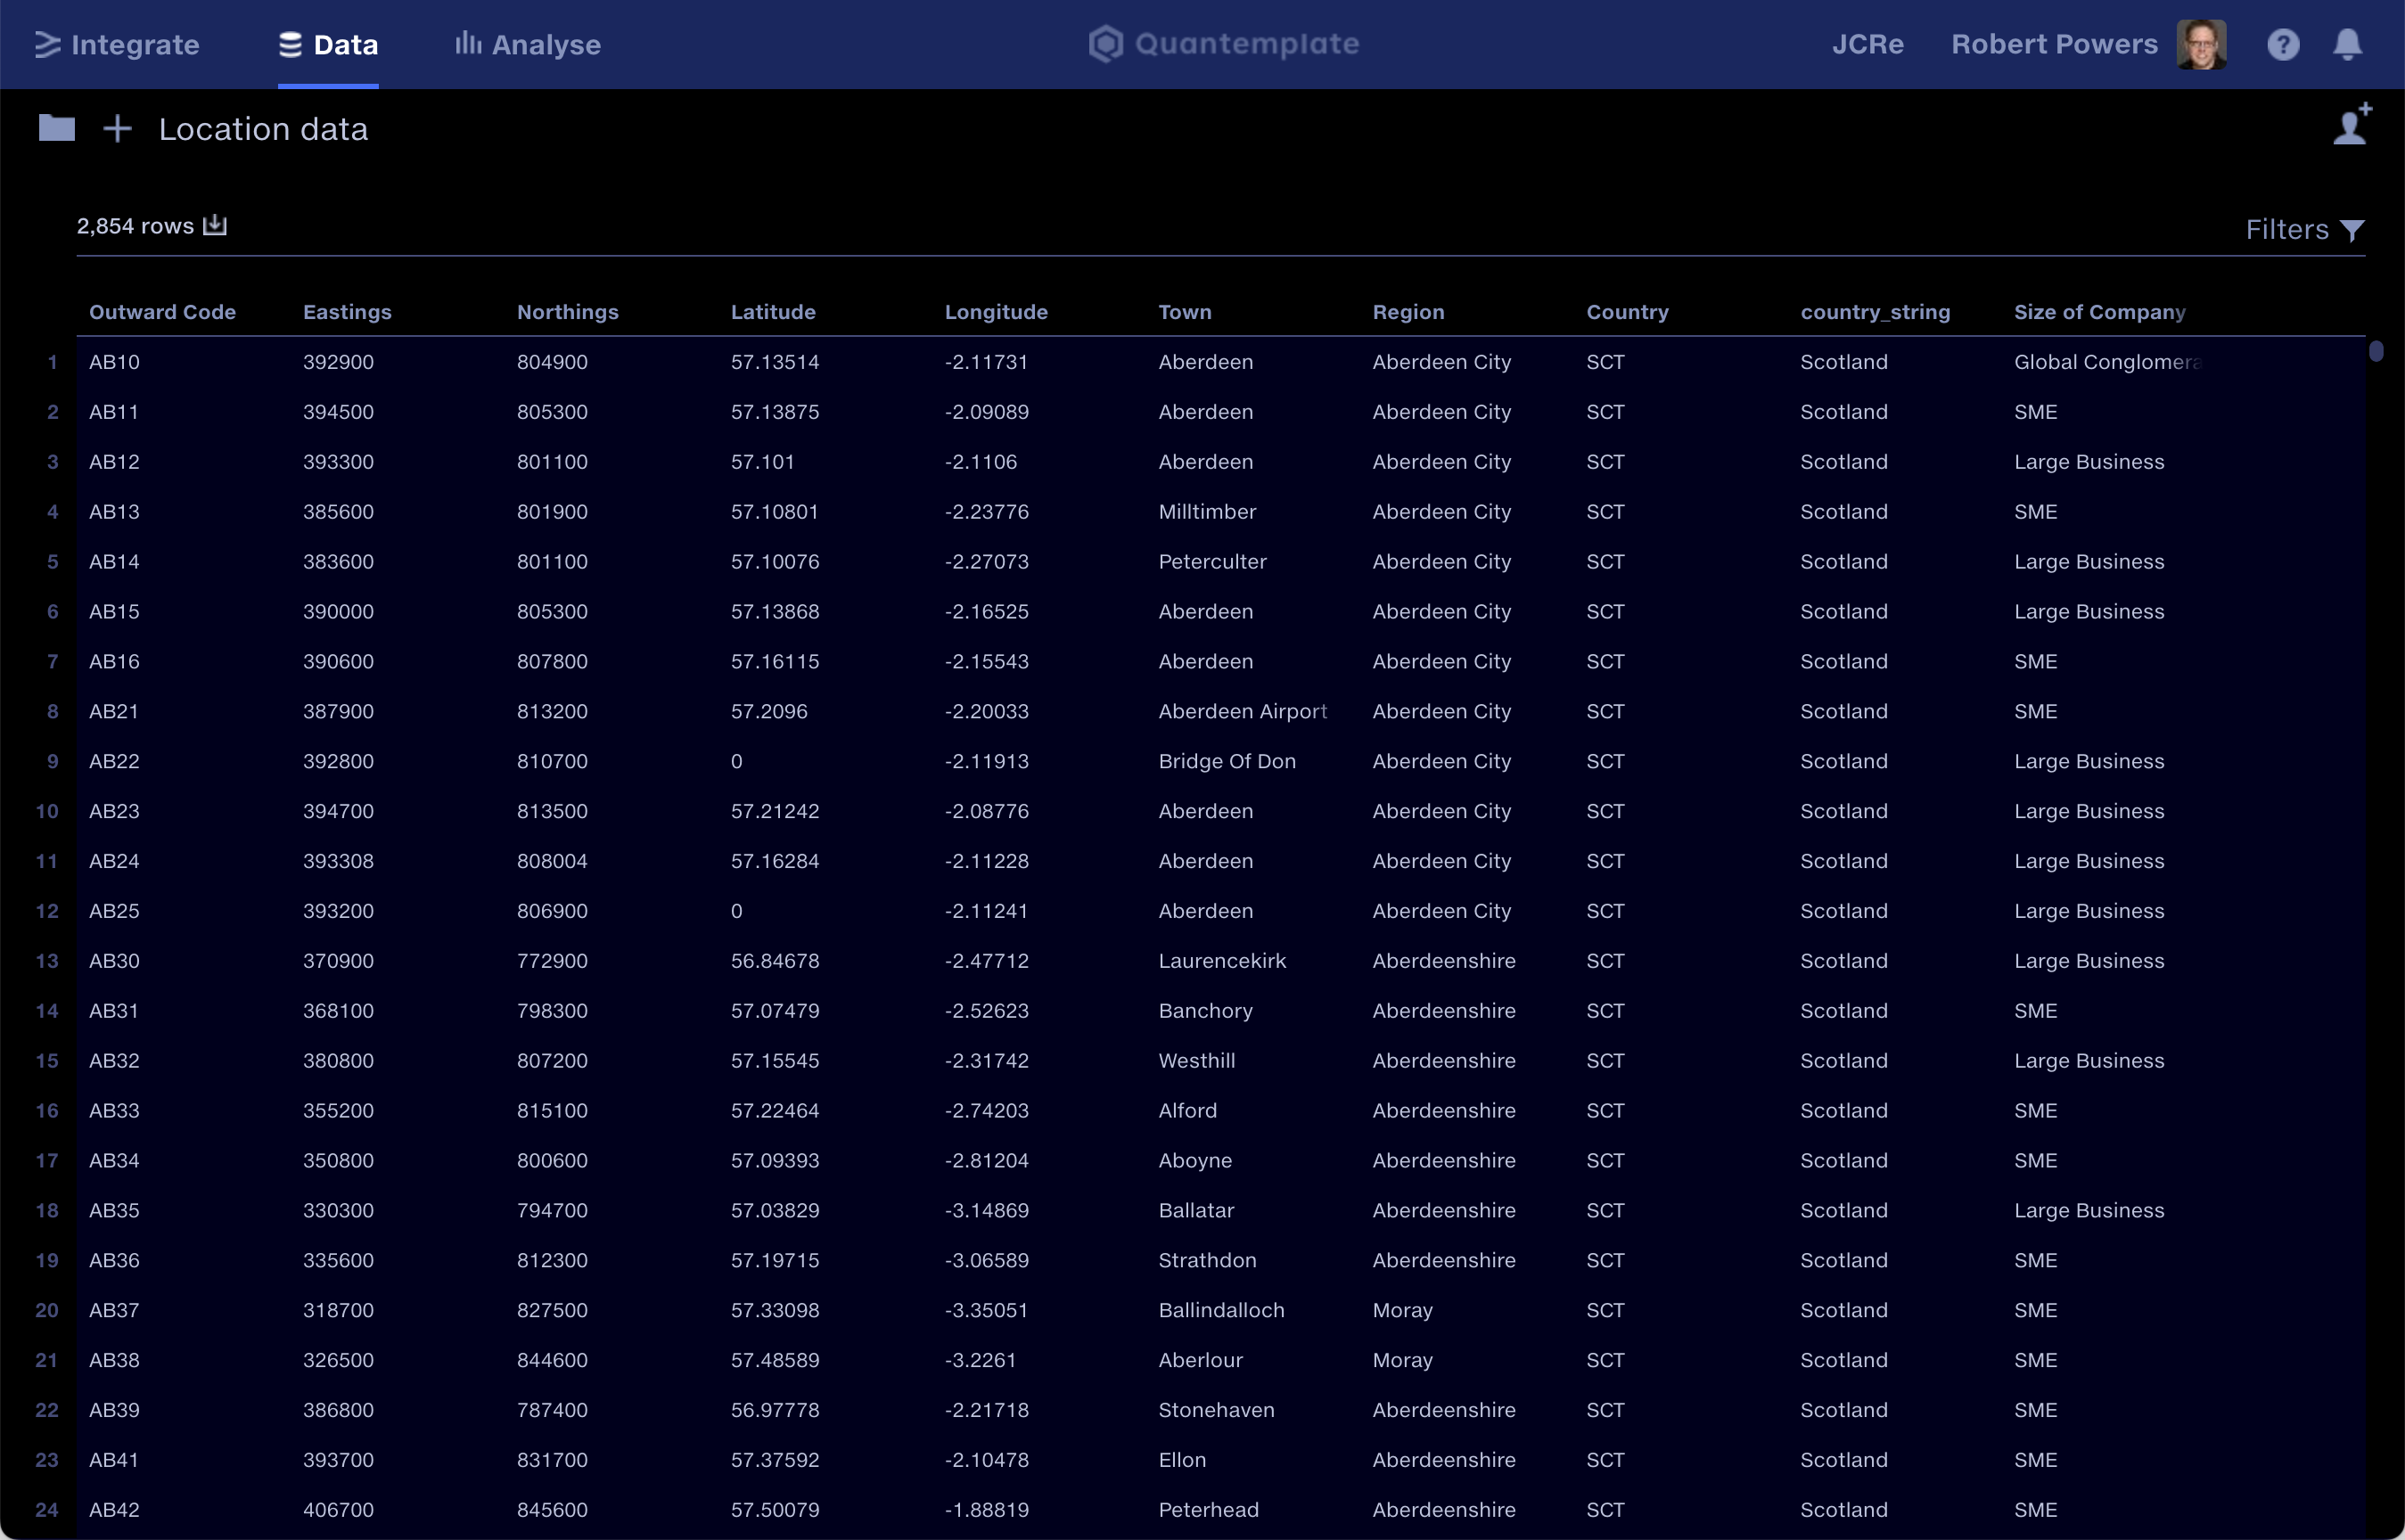
Click on an item on the uploads tab to see a preview of the first 1,000 rows.
Once in the dataset preview, navigate between uploads via the file navigator dropdown, above the data grid. The currently previewed input is highlighted blue.
The list can be filtered to show only used or unused uploads, as described above.
To return to the Uploads view, click the ‘Uploads’ navigation button in the top left.
Apply filters to the data preview to understand your data better. Click the filter button on the top right, or press the F key, to open the filter bar.
Read more about filter bars in Quantemplate.
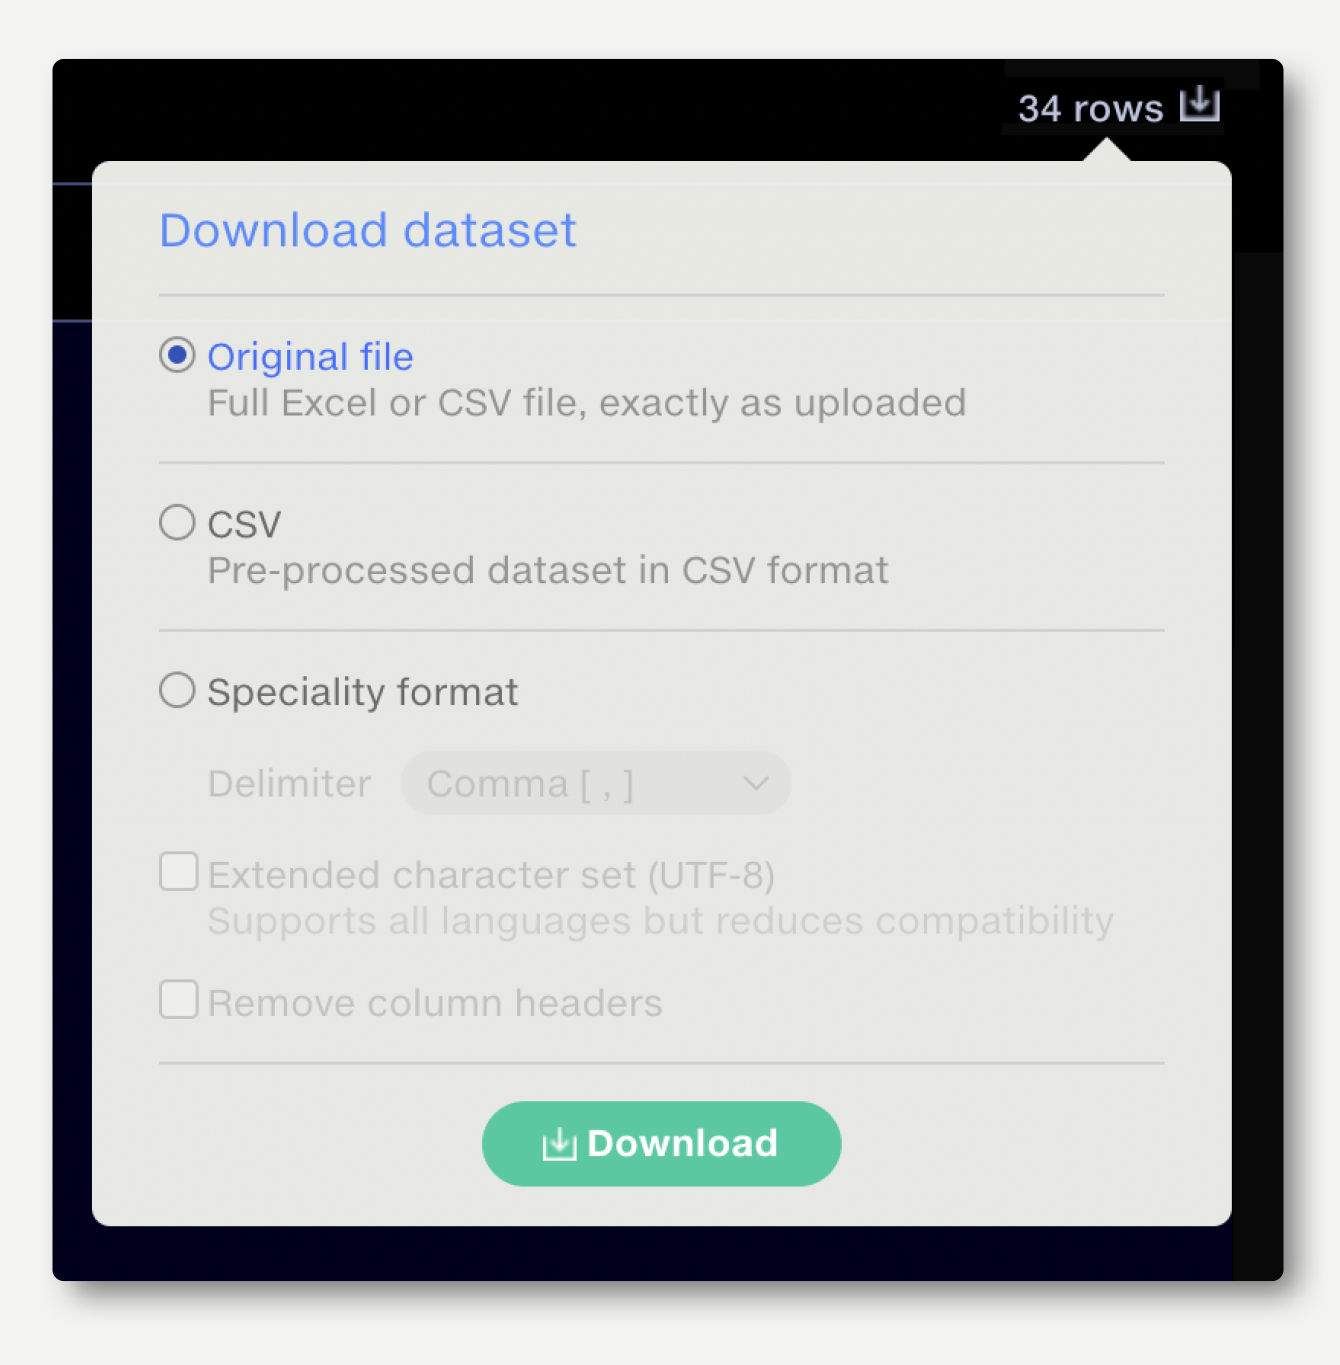
Data that is imported to Quantemplate is pre-processed, removing all visual formatting and annotations. Files with multiple Excel worksheets are split out into separate files. The original file, preserving formatting, annotations, tabs, etc. is retained.
To download the original file: navigate to the dataset preview for the upload, click on the download button on the top right and select ’Download Original file‘.
The Data Repo is the storage area for clean datasets and reference data.
Datasets with a single row of headers can be uploaded directly to the Data Repo to create a reference dataset for use in pipelines – for example, a target header schema to map to. The upload process will ignore any blank rows above or below the data, or blank columns either side of the data. The first line of data will be interpreted as column headers. Read more about uploading data to the data repo.
Cleansed outputs from pipelines can also be exported to the Data Repo for onward sharing via API, sharing within Quantemplate, or reporting on in Analyse.
The reference data tab shows reference datasets currently used in the pipeline. Datasets can be added to or removed from the pipeline via the stage input selector.
Alongside the dataset name, the tab shows the stage the dataset is used in, the row count, the date the data was updated, and whether the dataset is used in an Automap Values operation. The view can be sorted by name, rows and updated date.
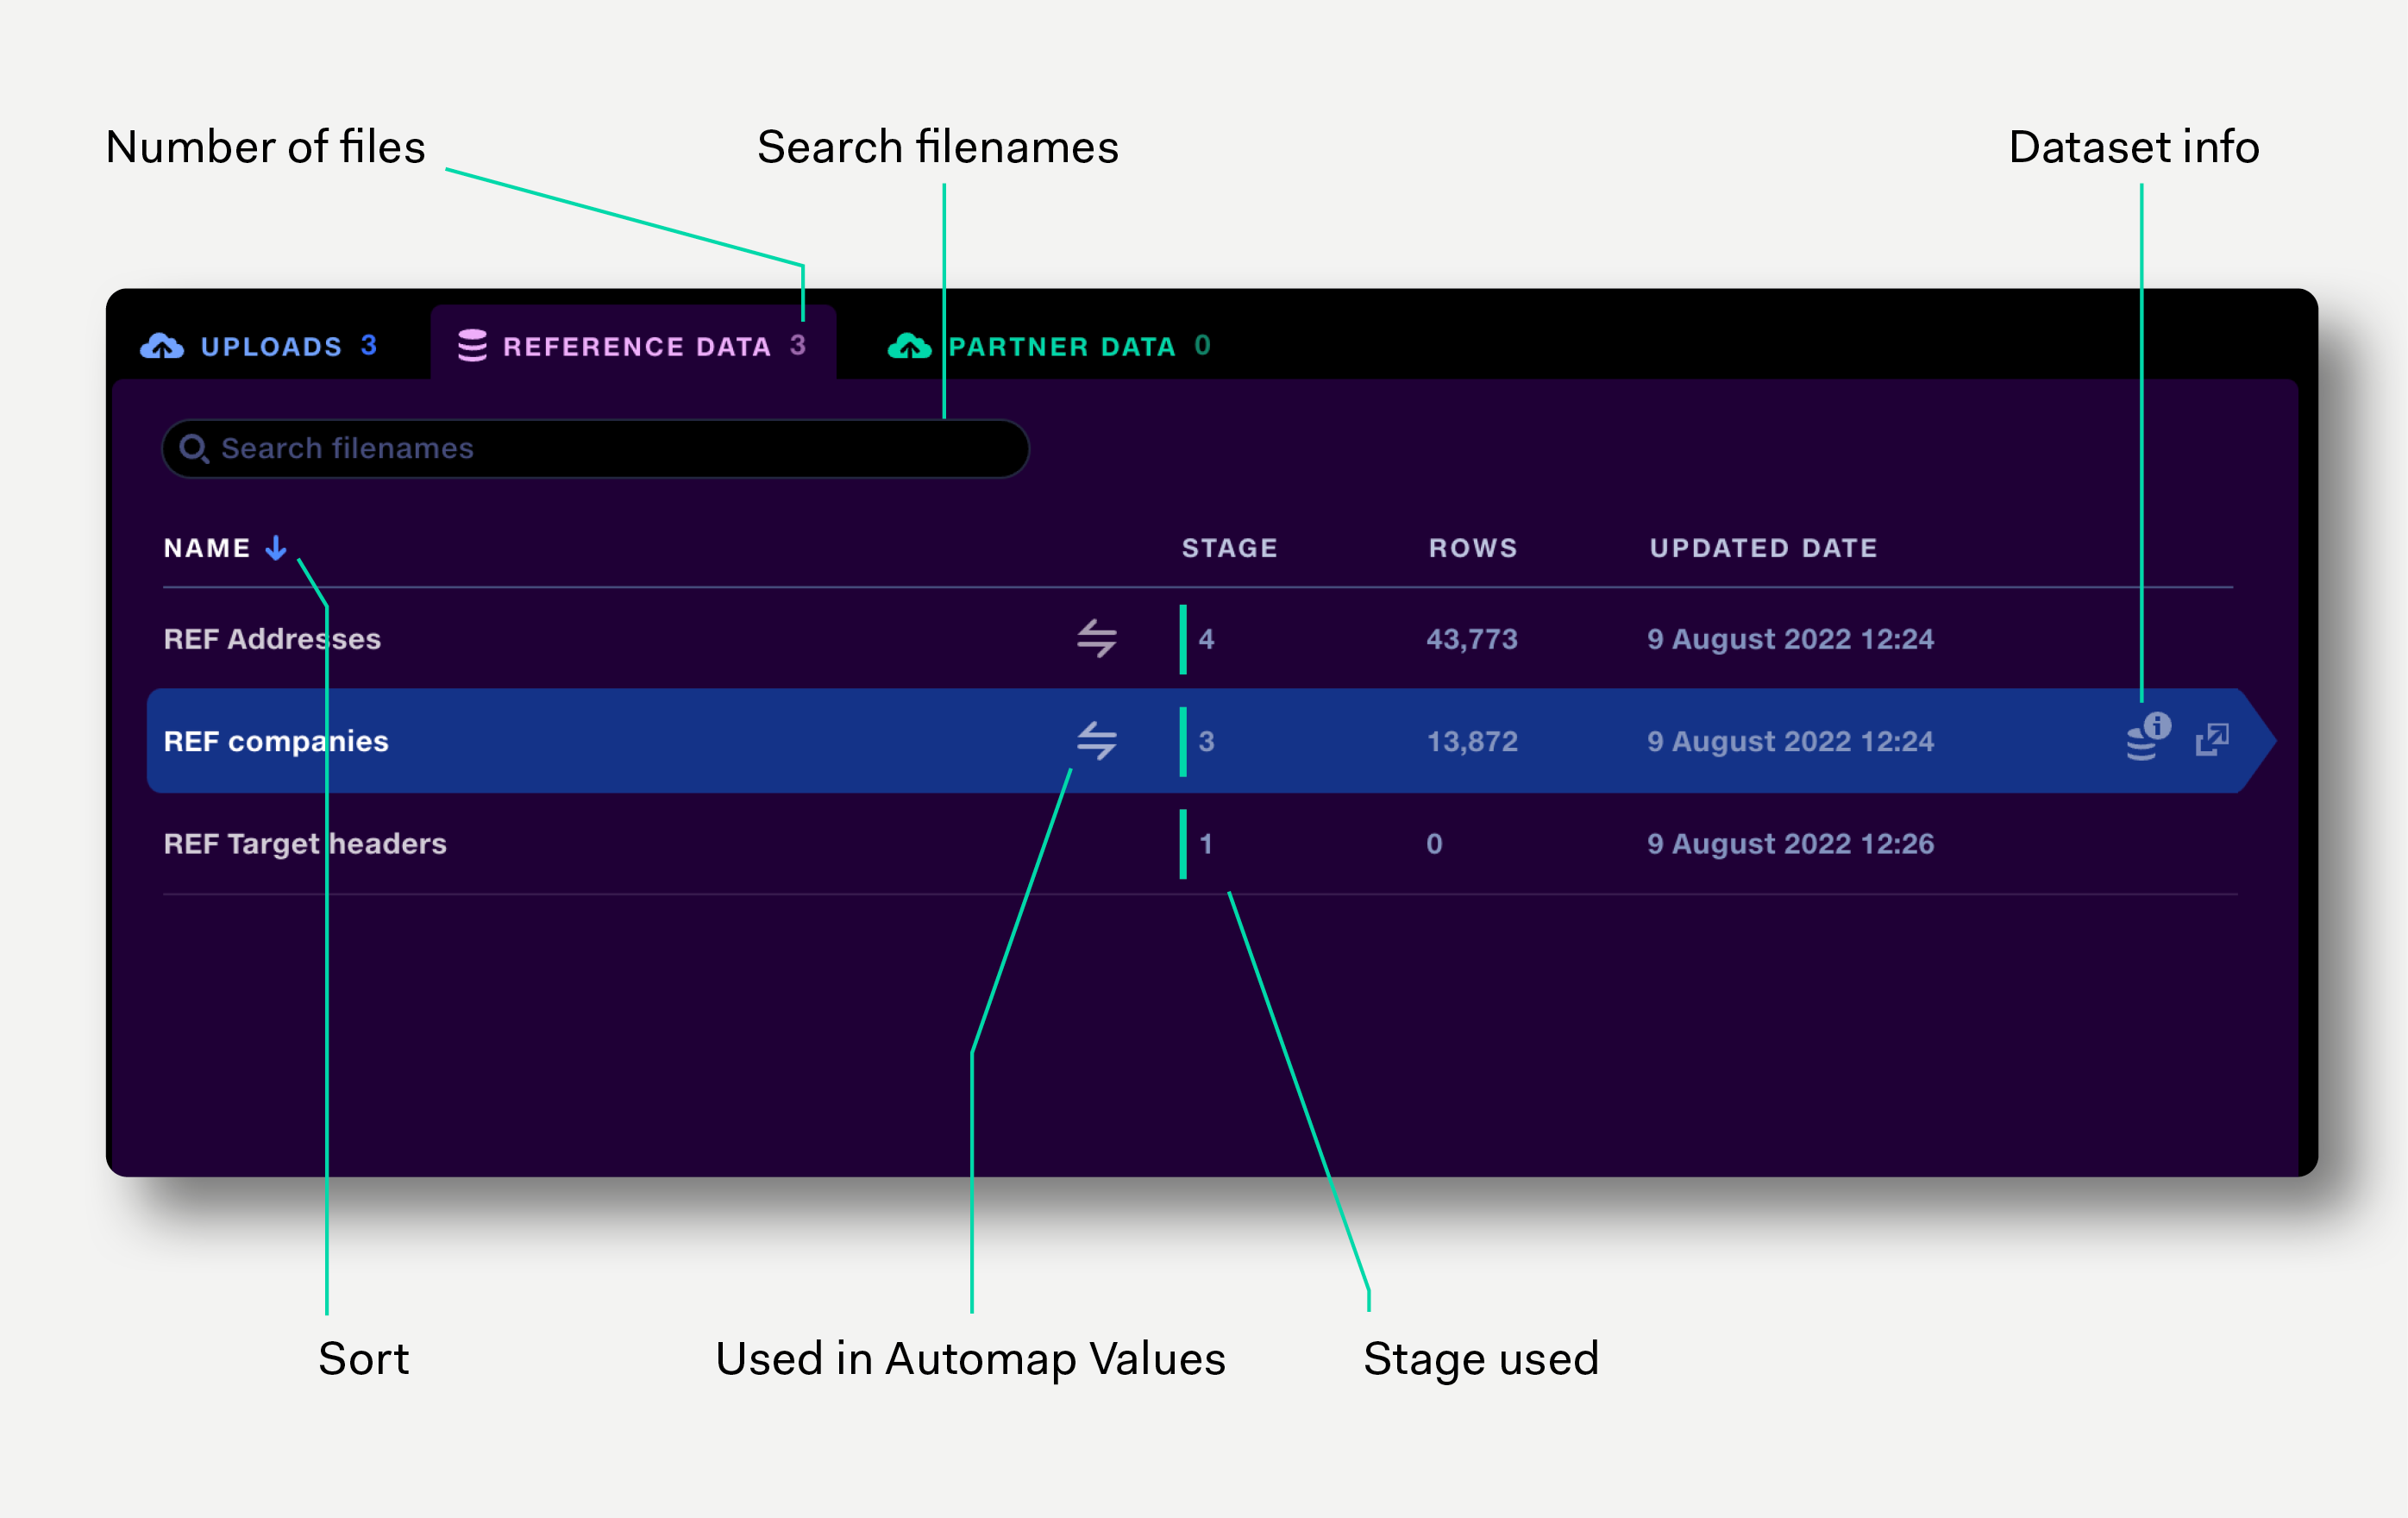
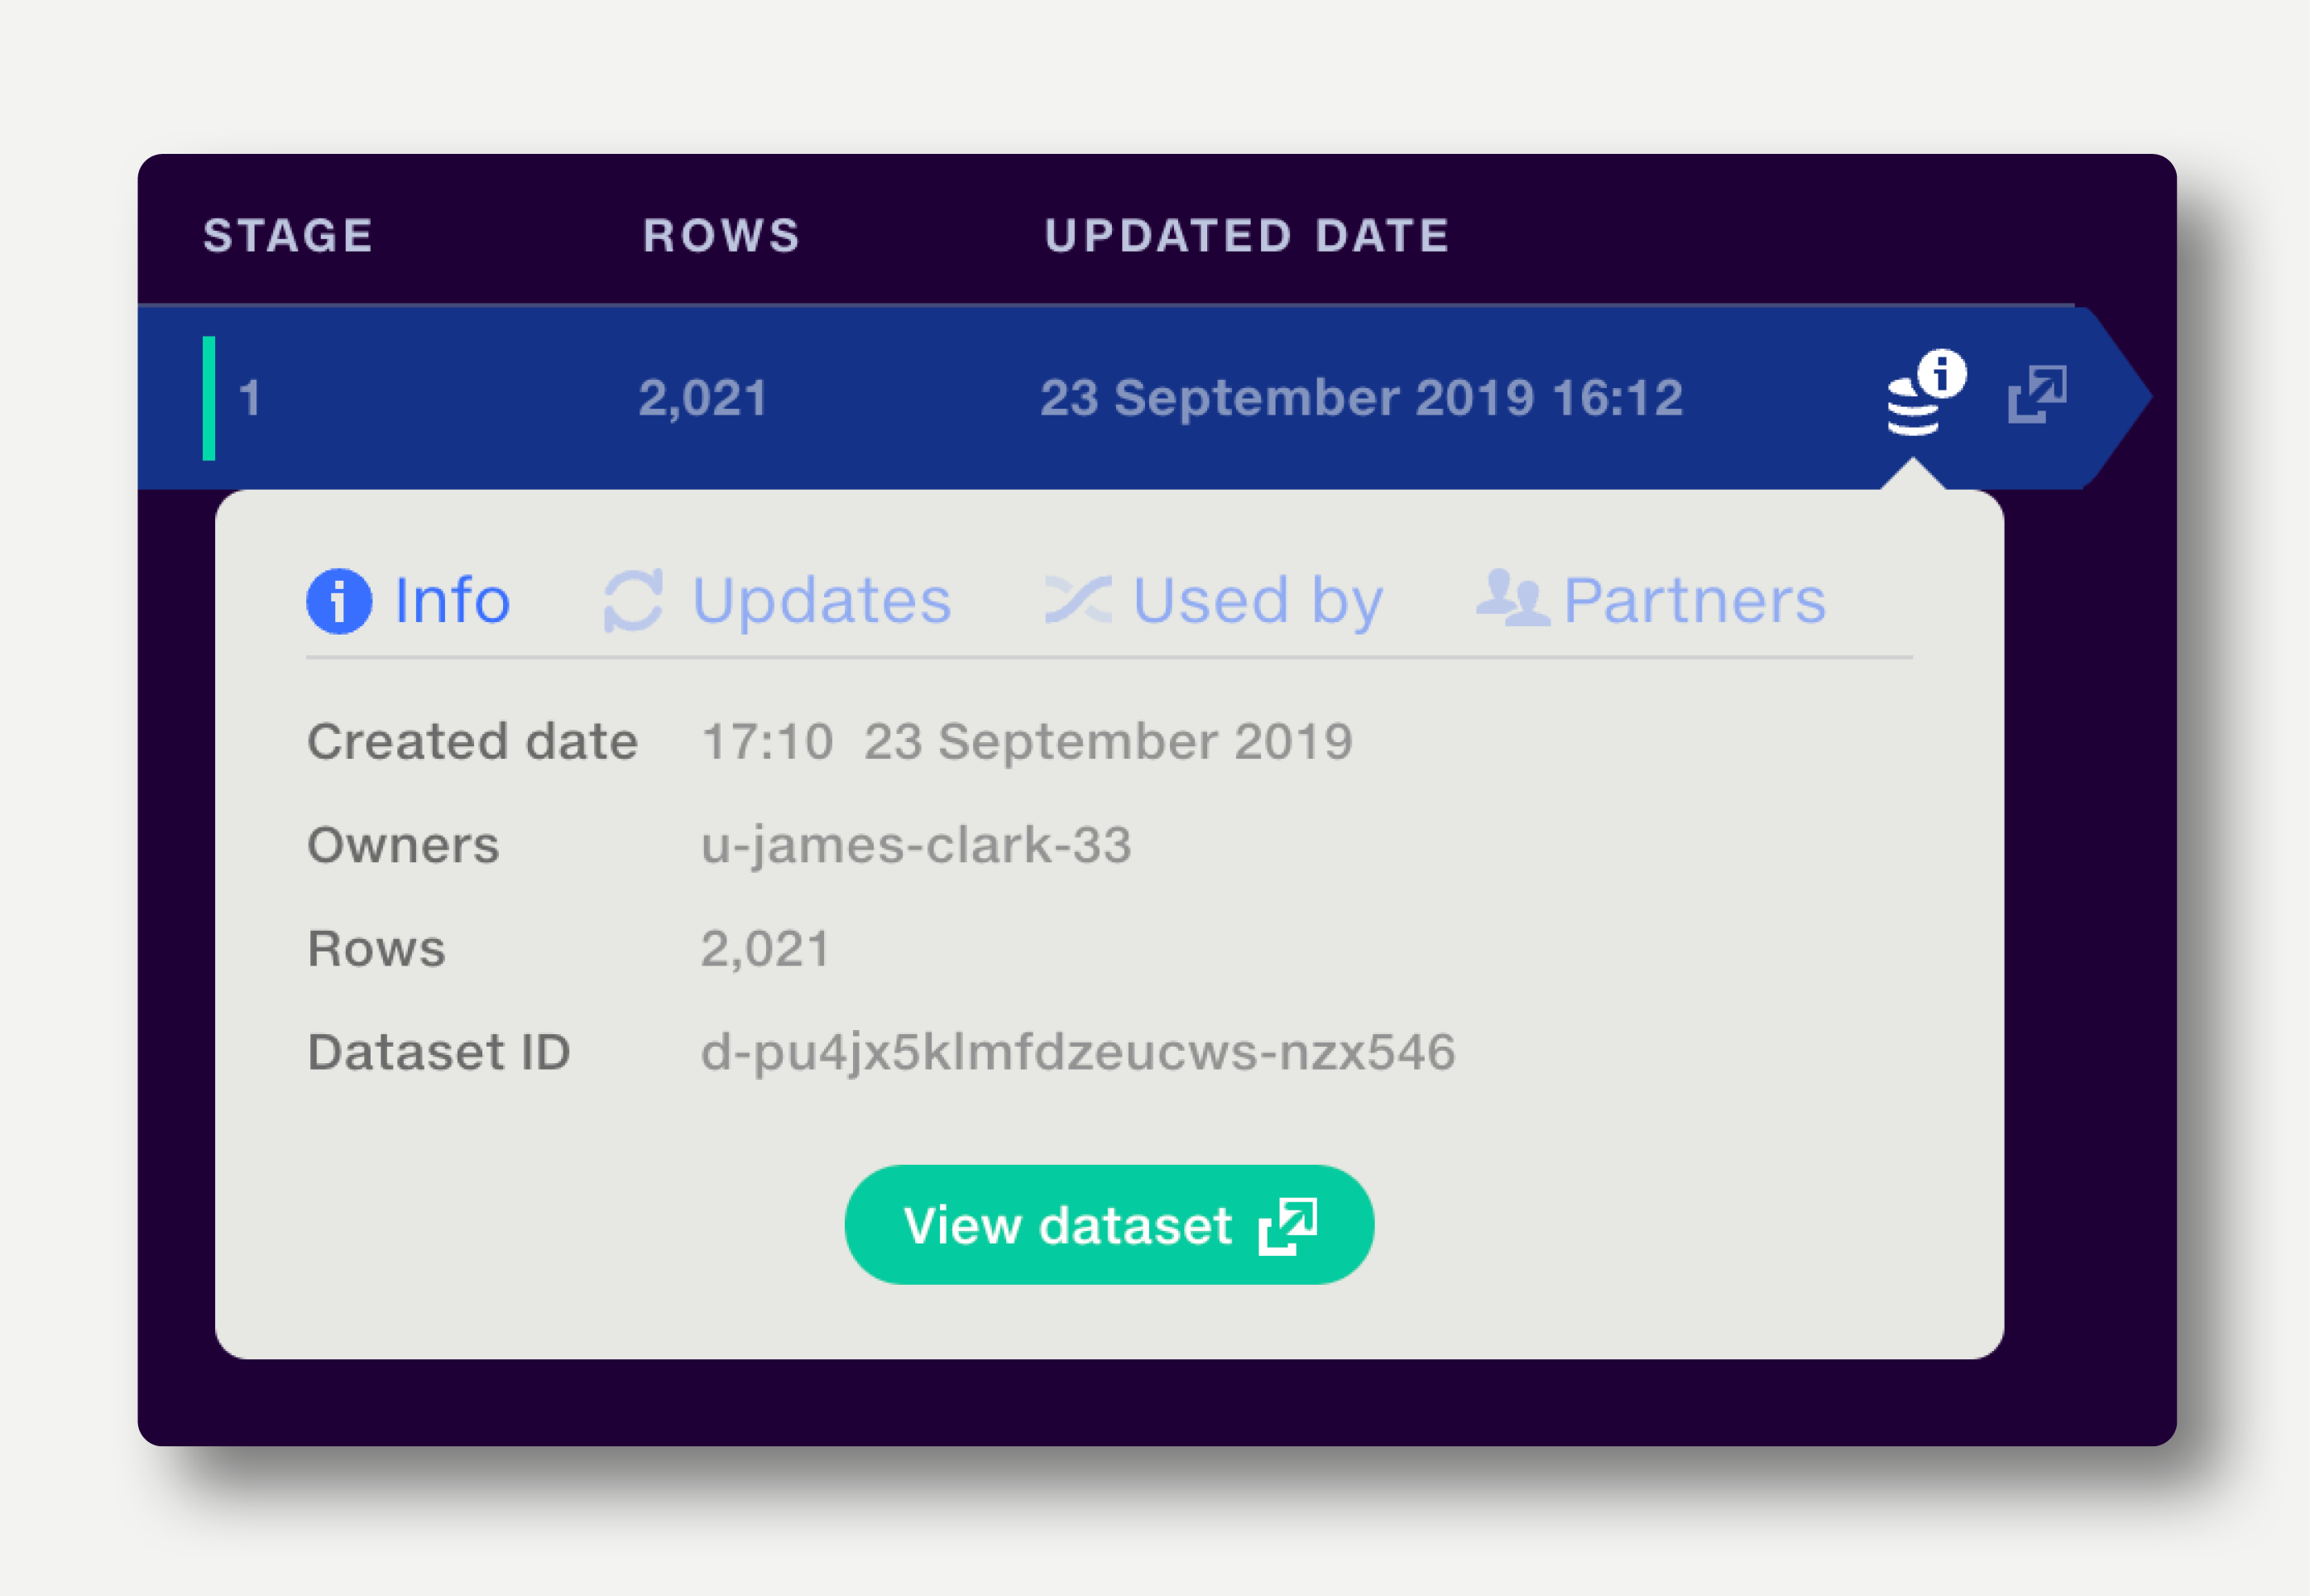
The Dataset Information popup shows information about how a dataset has been created and updated, and where else it is used. Read more about it here.
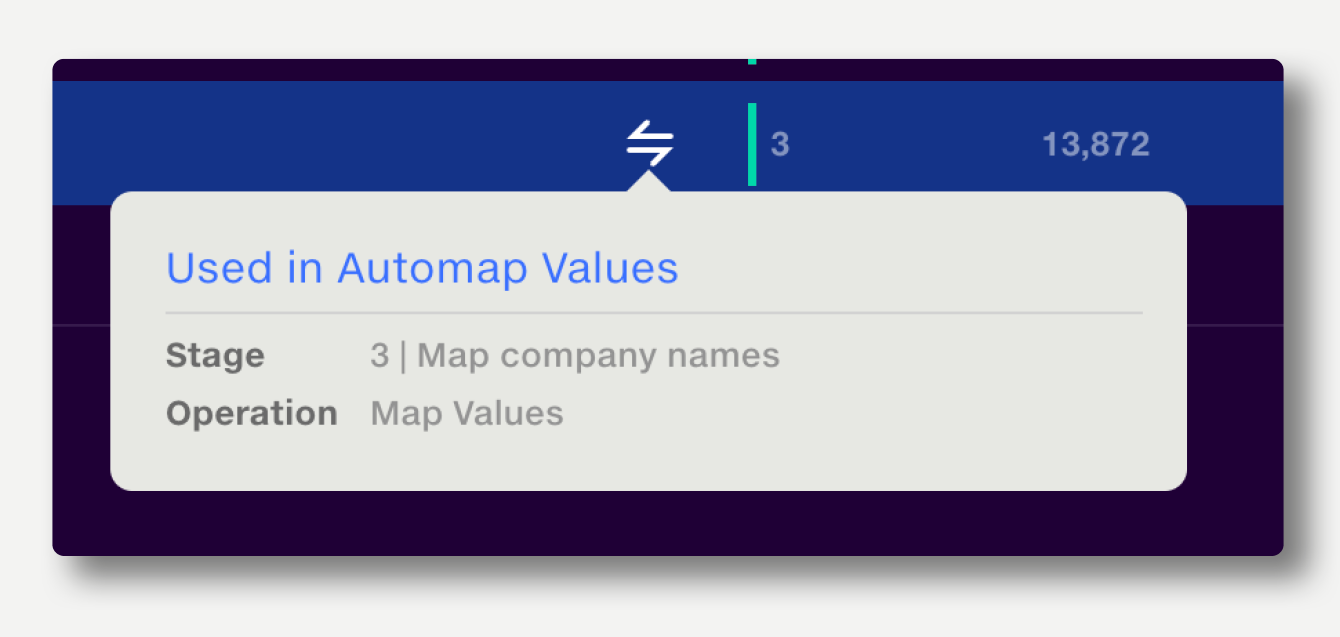
Click the Automap Values icon to show the names of the stages and operations the dataset is used in.
Click anywhere on the row to view the reference dataset in a new tab.
If a pipeline is shared with other users and they do not have access to an input (a reference dataset or feed), a warning will be displayed in the inputs tab.
Click 'Manage dataset access' to share the input with user who do not have access to it.
If you're not the owner of the input, the owner will receive a sharing request.
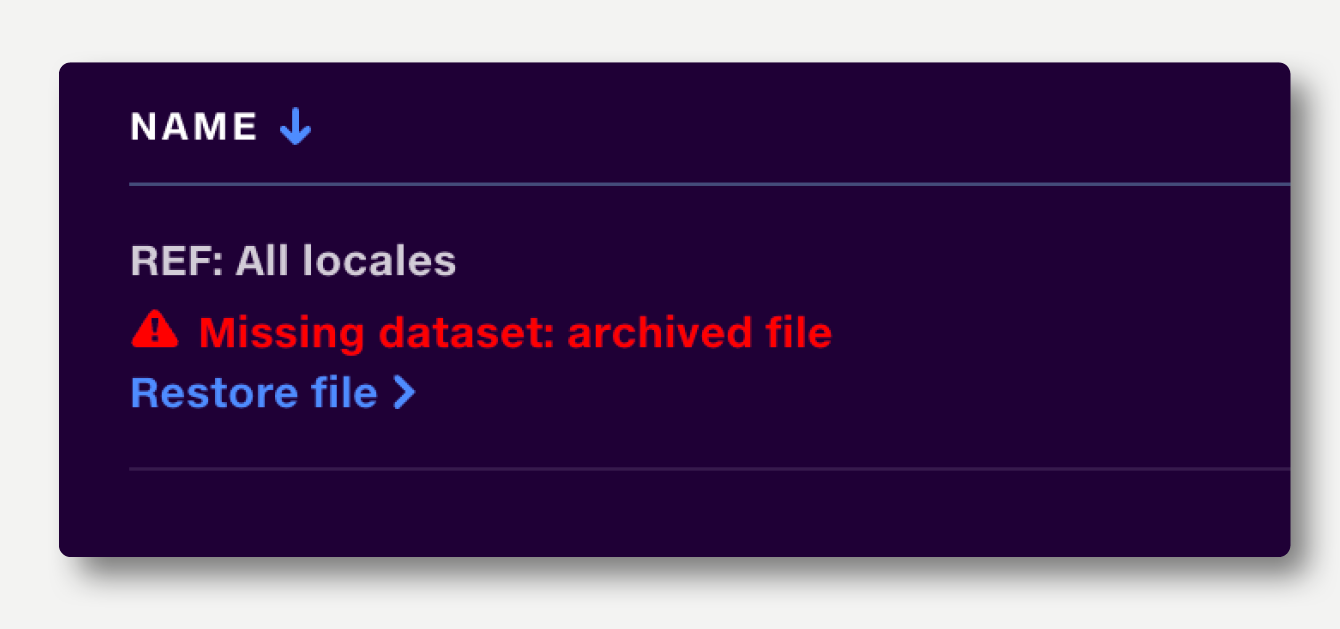
The dataset has been archived, so will not be accessible to the pipeline. The dataset should be replaced, or the dataset owner should restore the file from the archive. If you are the dataset owner, you can just click the ‘Restore file’ button which appears beneath the error message.
Quantemplate allows organisations to make pipeline outputs available to partner organisations, where they can be used as inputs to a pipeline.
To add a partner organisation’s pipeline output to the current pipeline, use the Partners tab in the stage input selector.
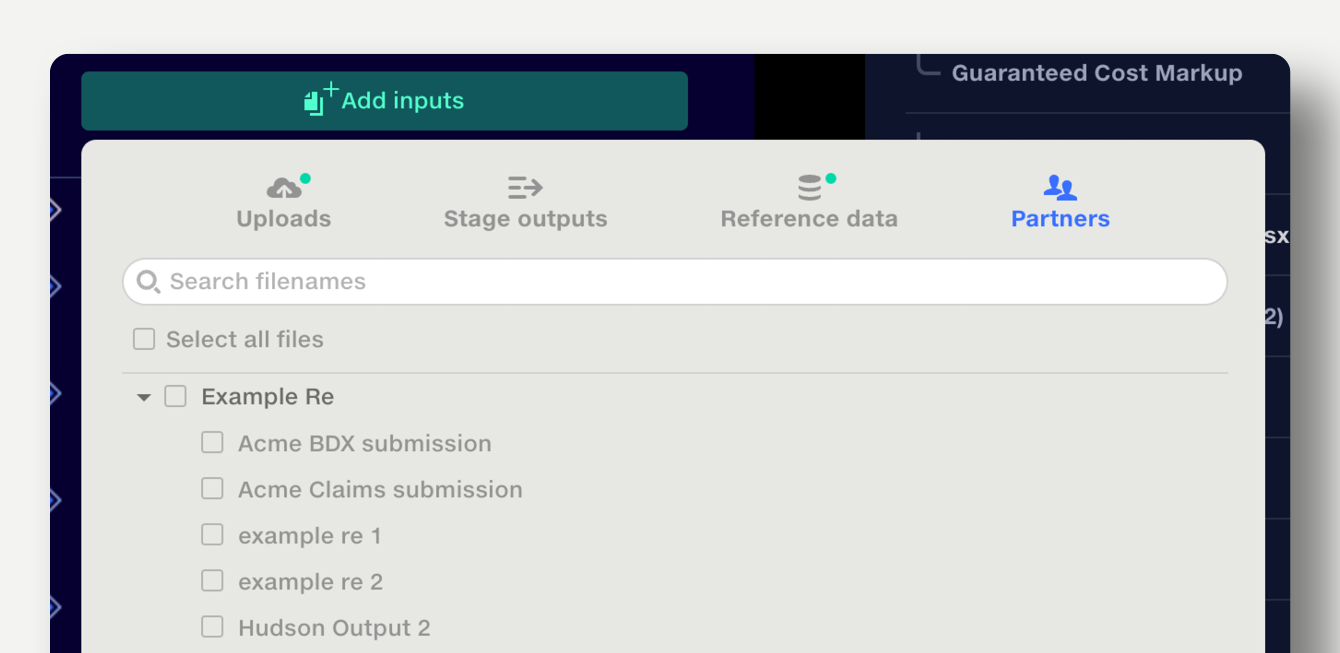
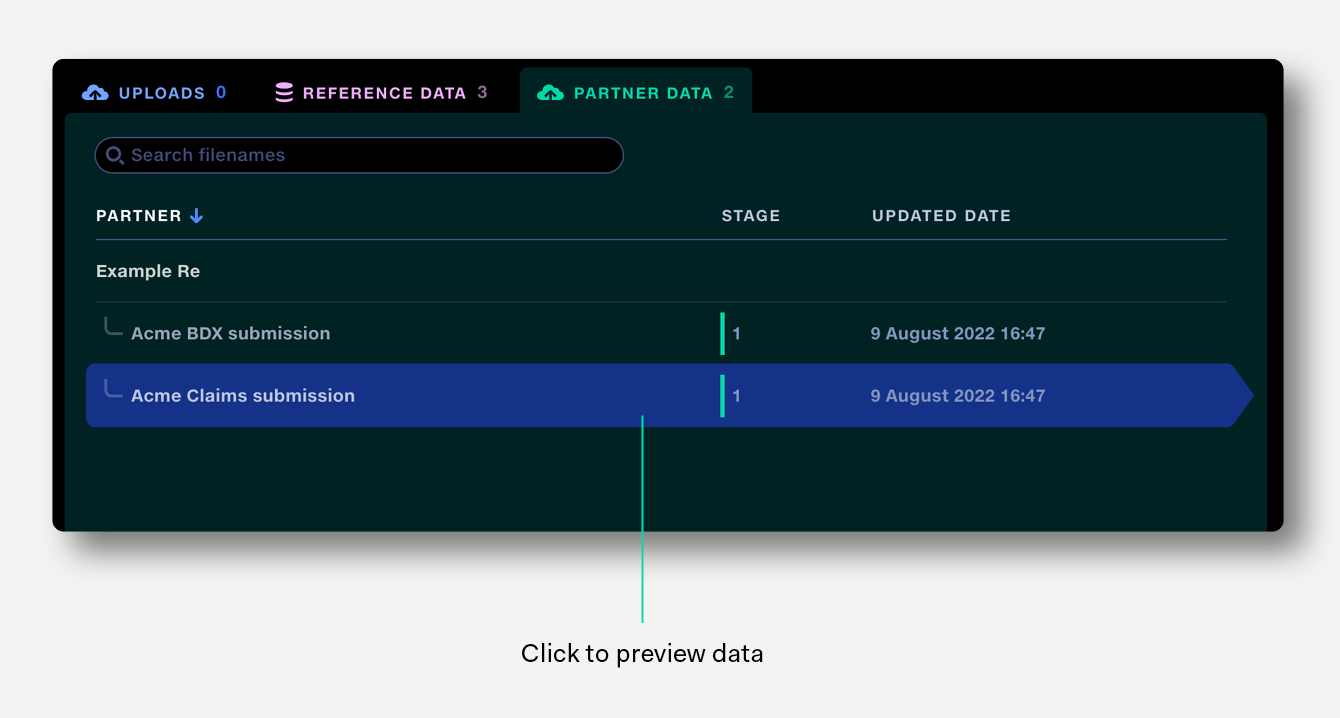
The partner data tab shows all the partner organisation’s pipeline outputs which are being used in the current pipeline, alongside the stage they are used in and the last updated date. The view can be sorted by partner name.
Click on the row to preview a partner dataset.