

Run data through a pipeline to apply the rules set in operations, create Validation and Mapping reports, and apply remappings made in Automap Values.
To run a pipeline, press the Run button in the action bar.
The currently running stage is highlighted green in the pipeline panel. When a stage run is complete it remain green until the run is complete.
The run button will be unavailable:
As the pipeline is running, progress is shown in the Run Log.
Stage outputs are listed in the Outputs tab as soon as they are created by the run.
Once the Run is complete, the Outputs tab shows the Validation and Mapping report summaries.
Navigate to the the results of previous runs via the Run History button.
To cancel a current Run, click the Cancel button in the action bar. Any outputs created by the pipeline will be preserved.
Use Auto Run to run a pipeline automatically when a reference dataset is updated. Auto Run can be conditional on multiple datasets receiving updates.
Combined with Auto Export, Auto Run enables:
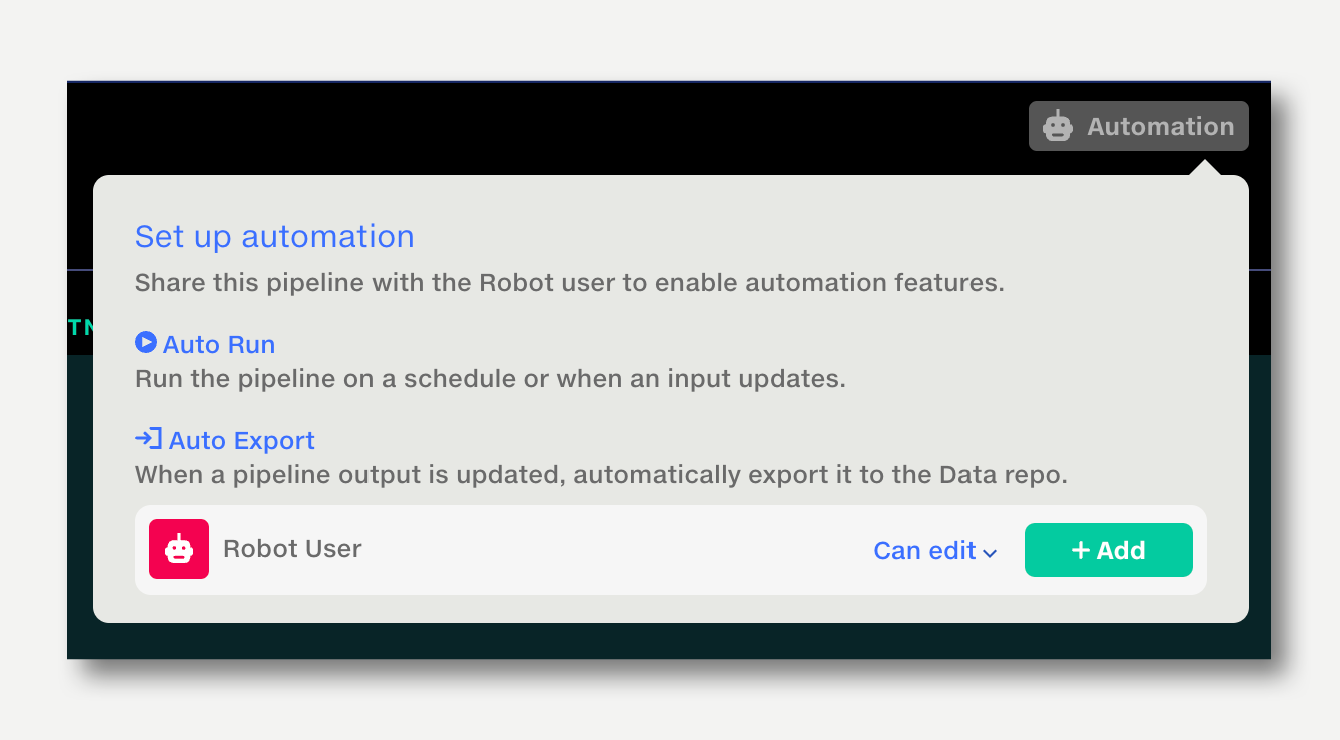
To enable automation for a pipeline, first share it with the Robot User. Once the Robot User has permission, the Automation button will appear on the top right.
The Robot User also needs permission to read all inputs, since it will be running the pipeline.
If it doesn't already have permission, a warning will be shown in the inputs tab and a button to share with the Robot User will be shown in the automation trigger popup. Click it to share with the Robot User (if you are the owner), or request permission (if you are not the owner).
All pipeline users should be at least view-only granted access to all pipeline inputs prior to enabling AutoRun
If some users are missing access, a warning will show next to each affected input in the inputs tab.
Click ‘Manage dataset access’ to choose users’ access level and share the input.
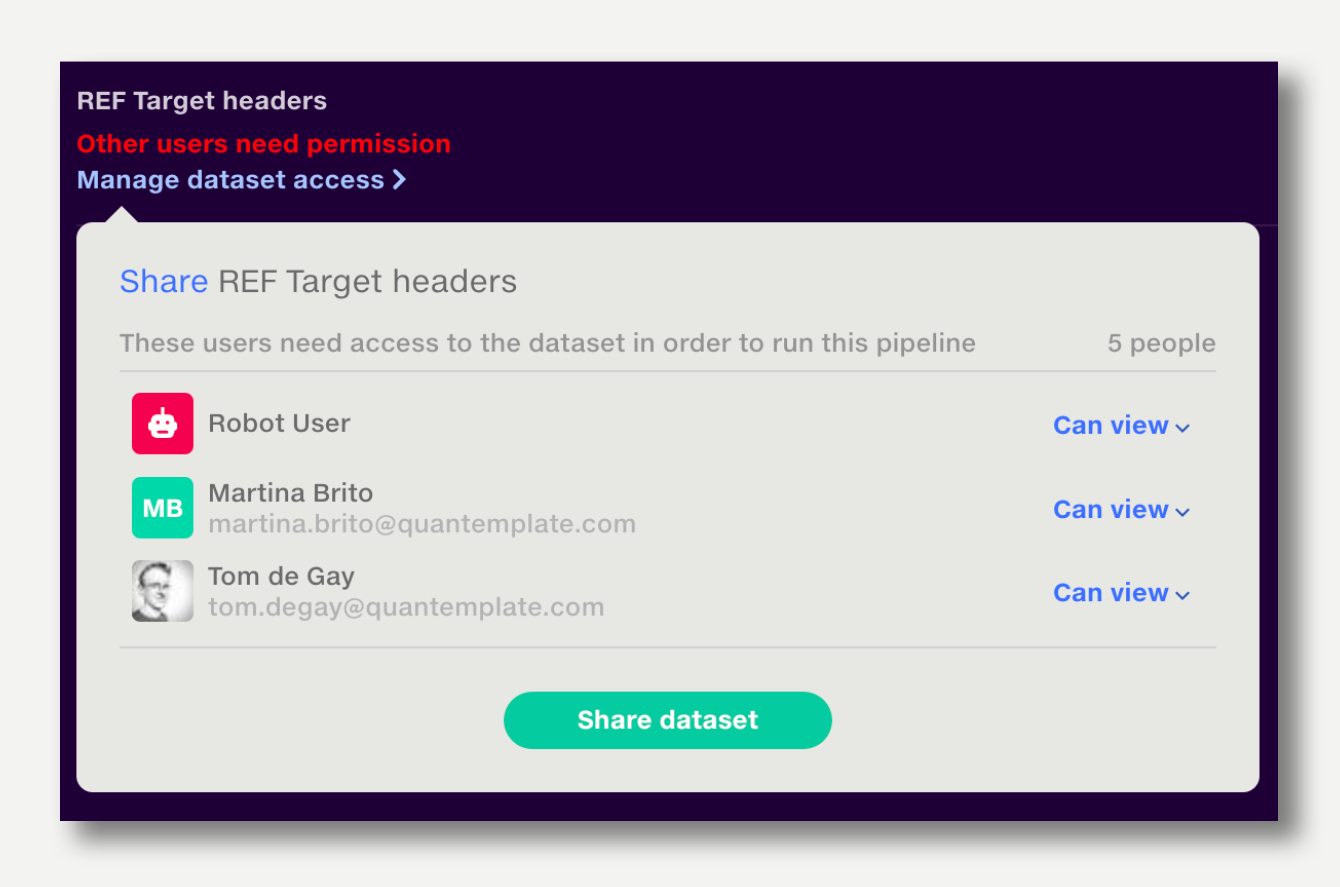
Alternatively, in the automation settings popup, select ‘Share [n] datasets’ to share all pipeline inputs at once.
If you are not the owner of the input datasets, a share request will be sent to the owner.
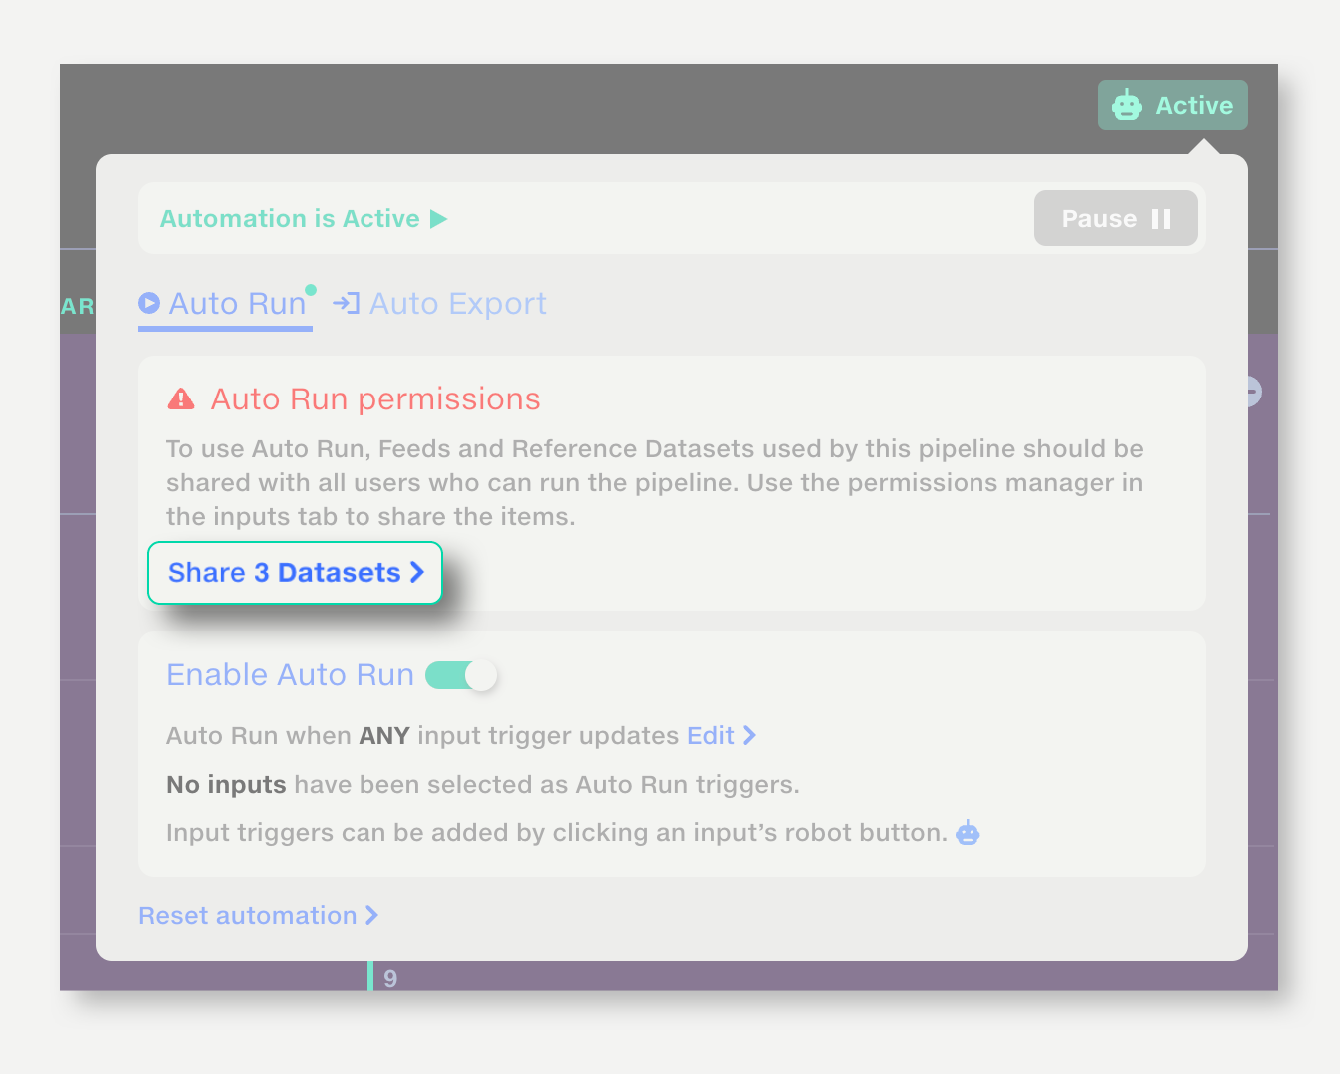
An Auto Run trigger is a pipeline input (feed or reference dataset) that will trigger a run when it is updated.
To set reference dataset as a trigger:
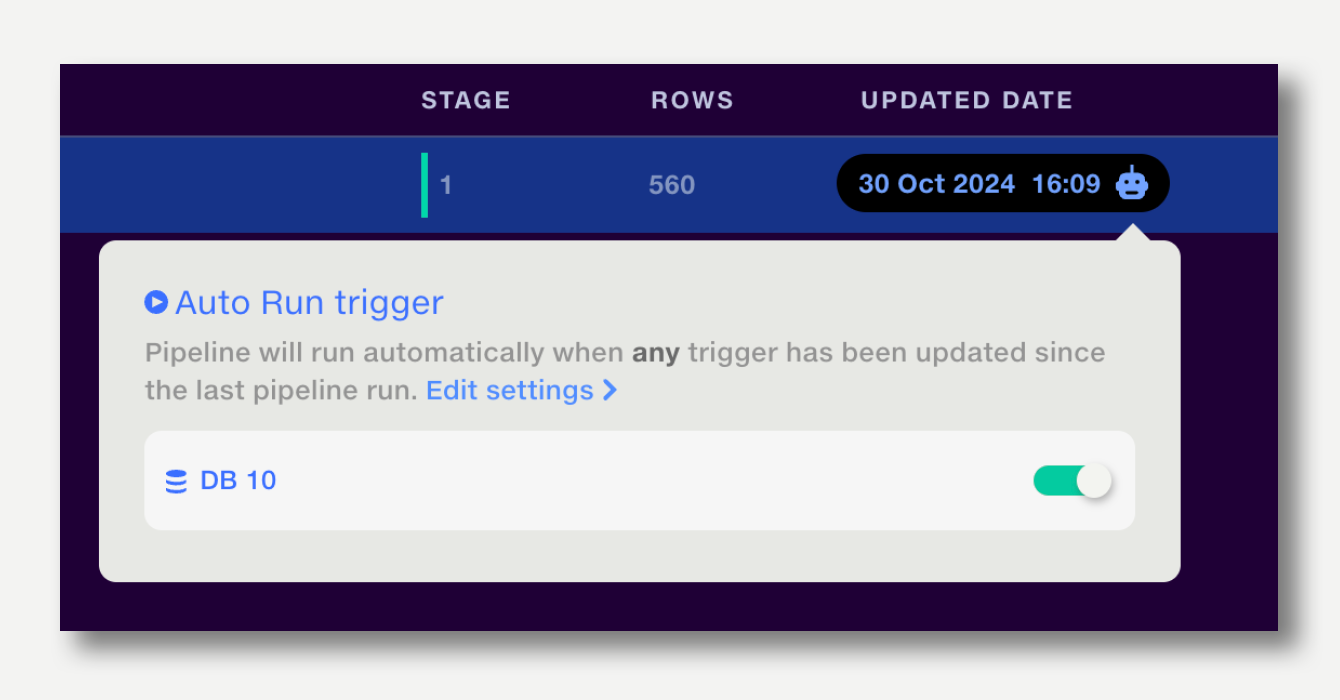
Note:
To set a feed as a trigger:
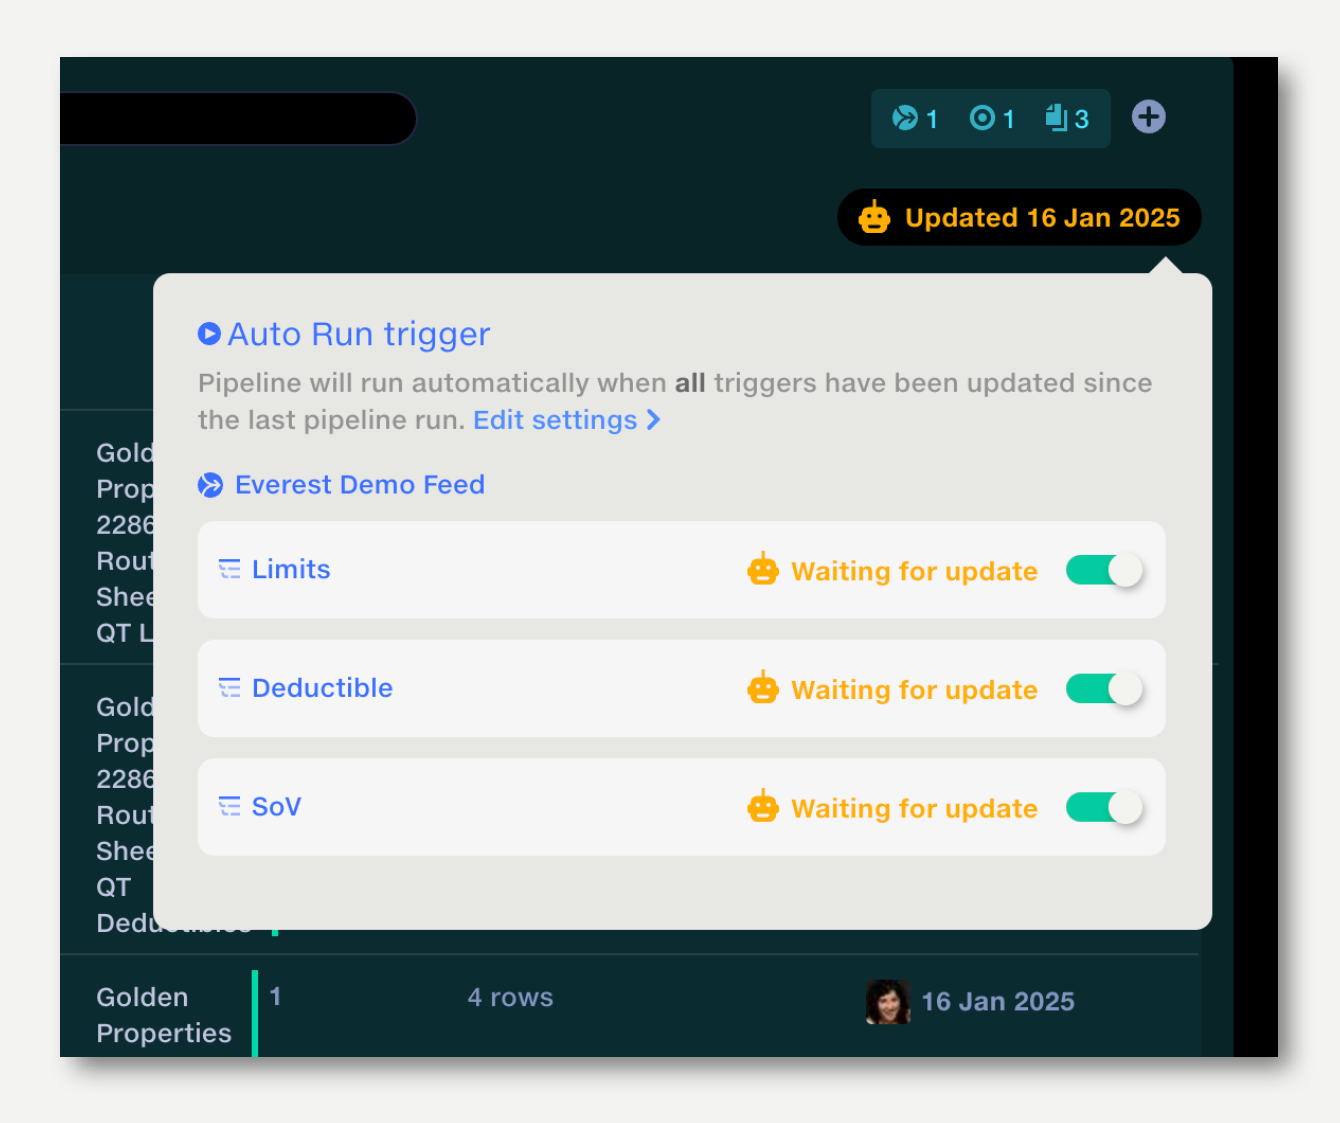
A pipeline can be set to run either when any trigger updates, or when all triggers receive an update since the last run.
By default, it will run when any trigger updates. To change this, open the Automation popup on the top right and click to edit the Any-All setting.
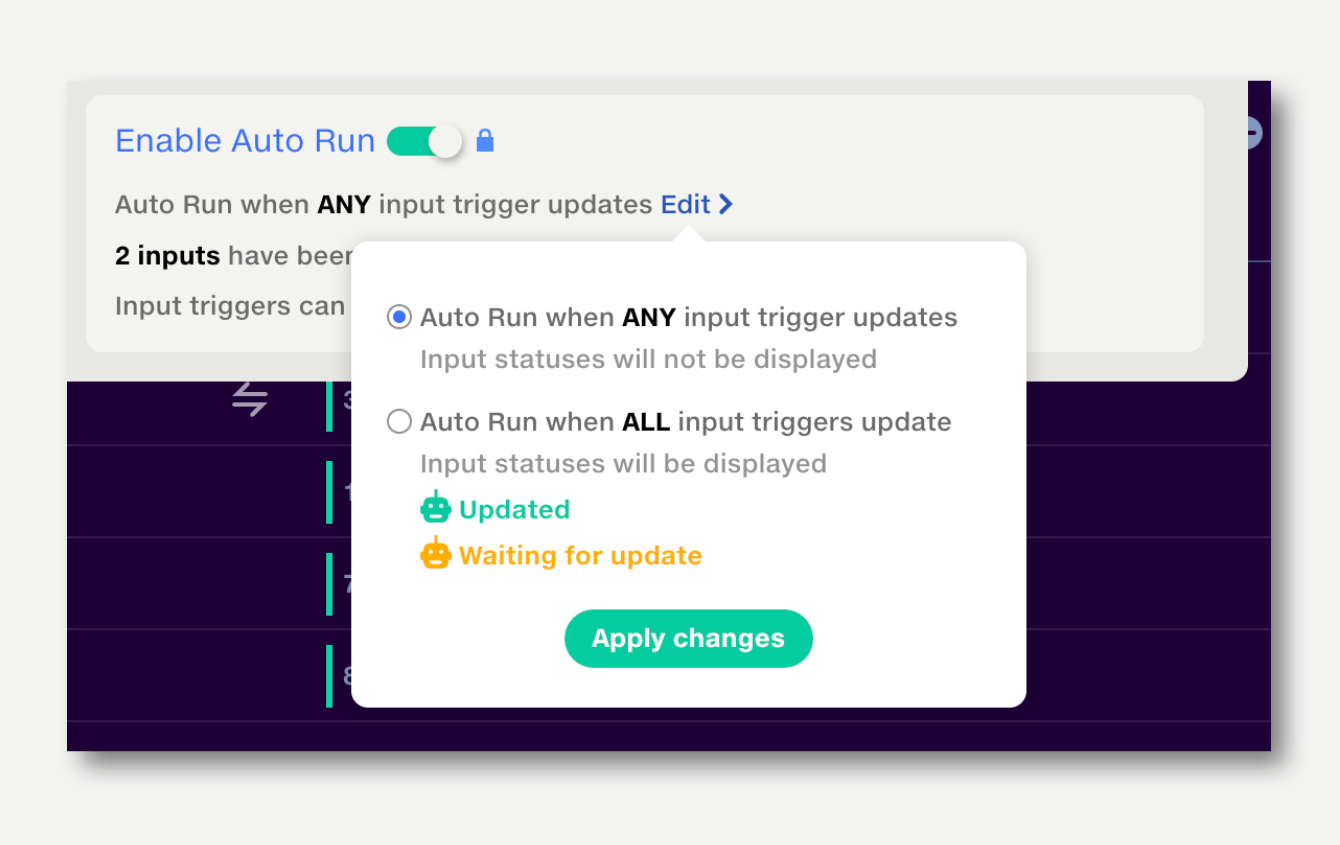
When Auto Run is set to Any, all triggers are shown in blue.

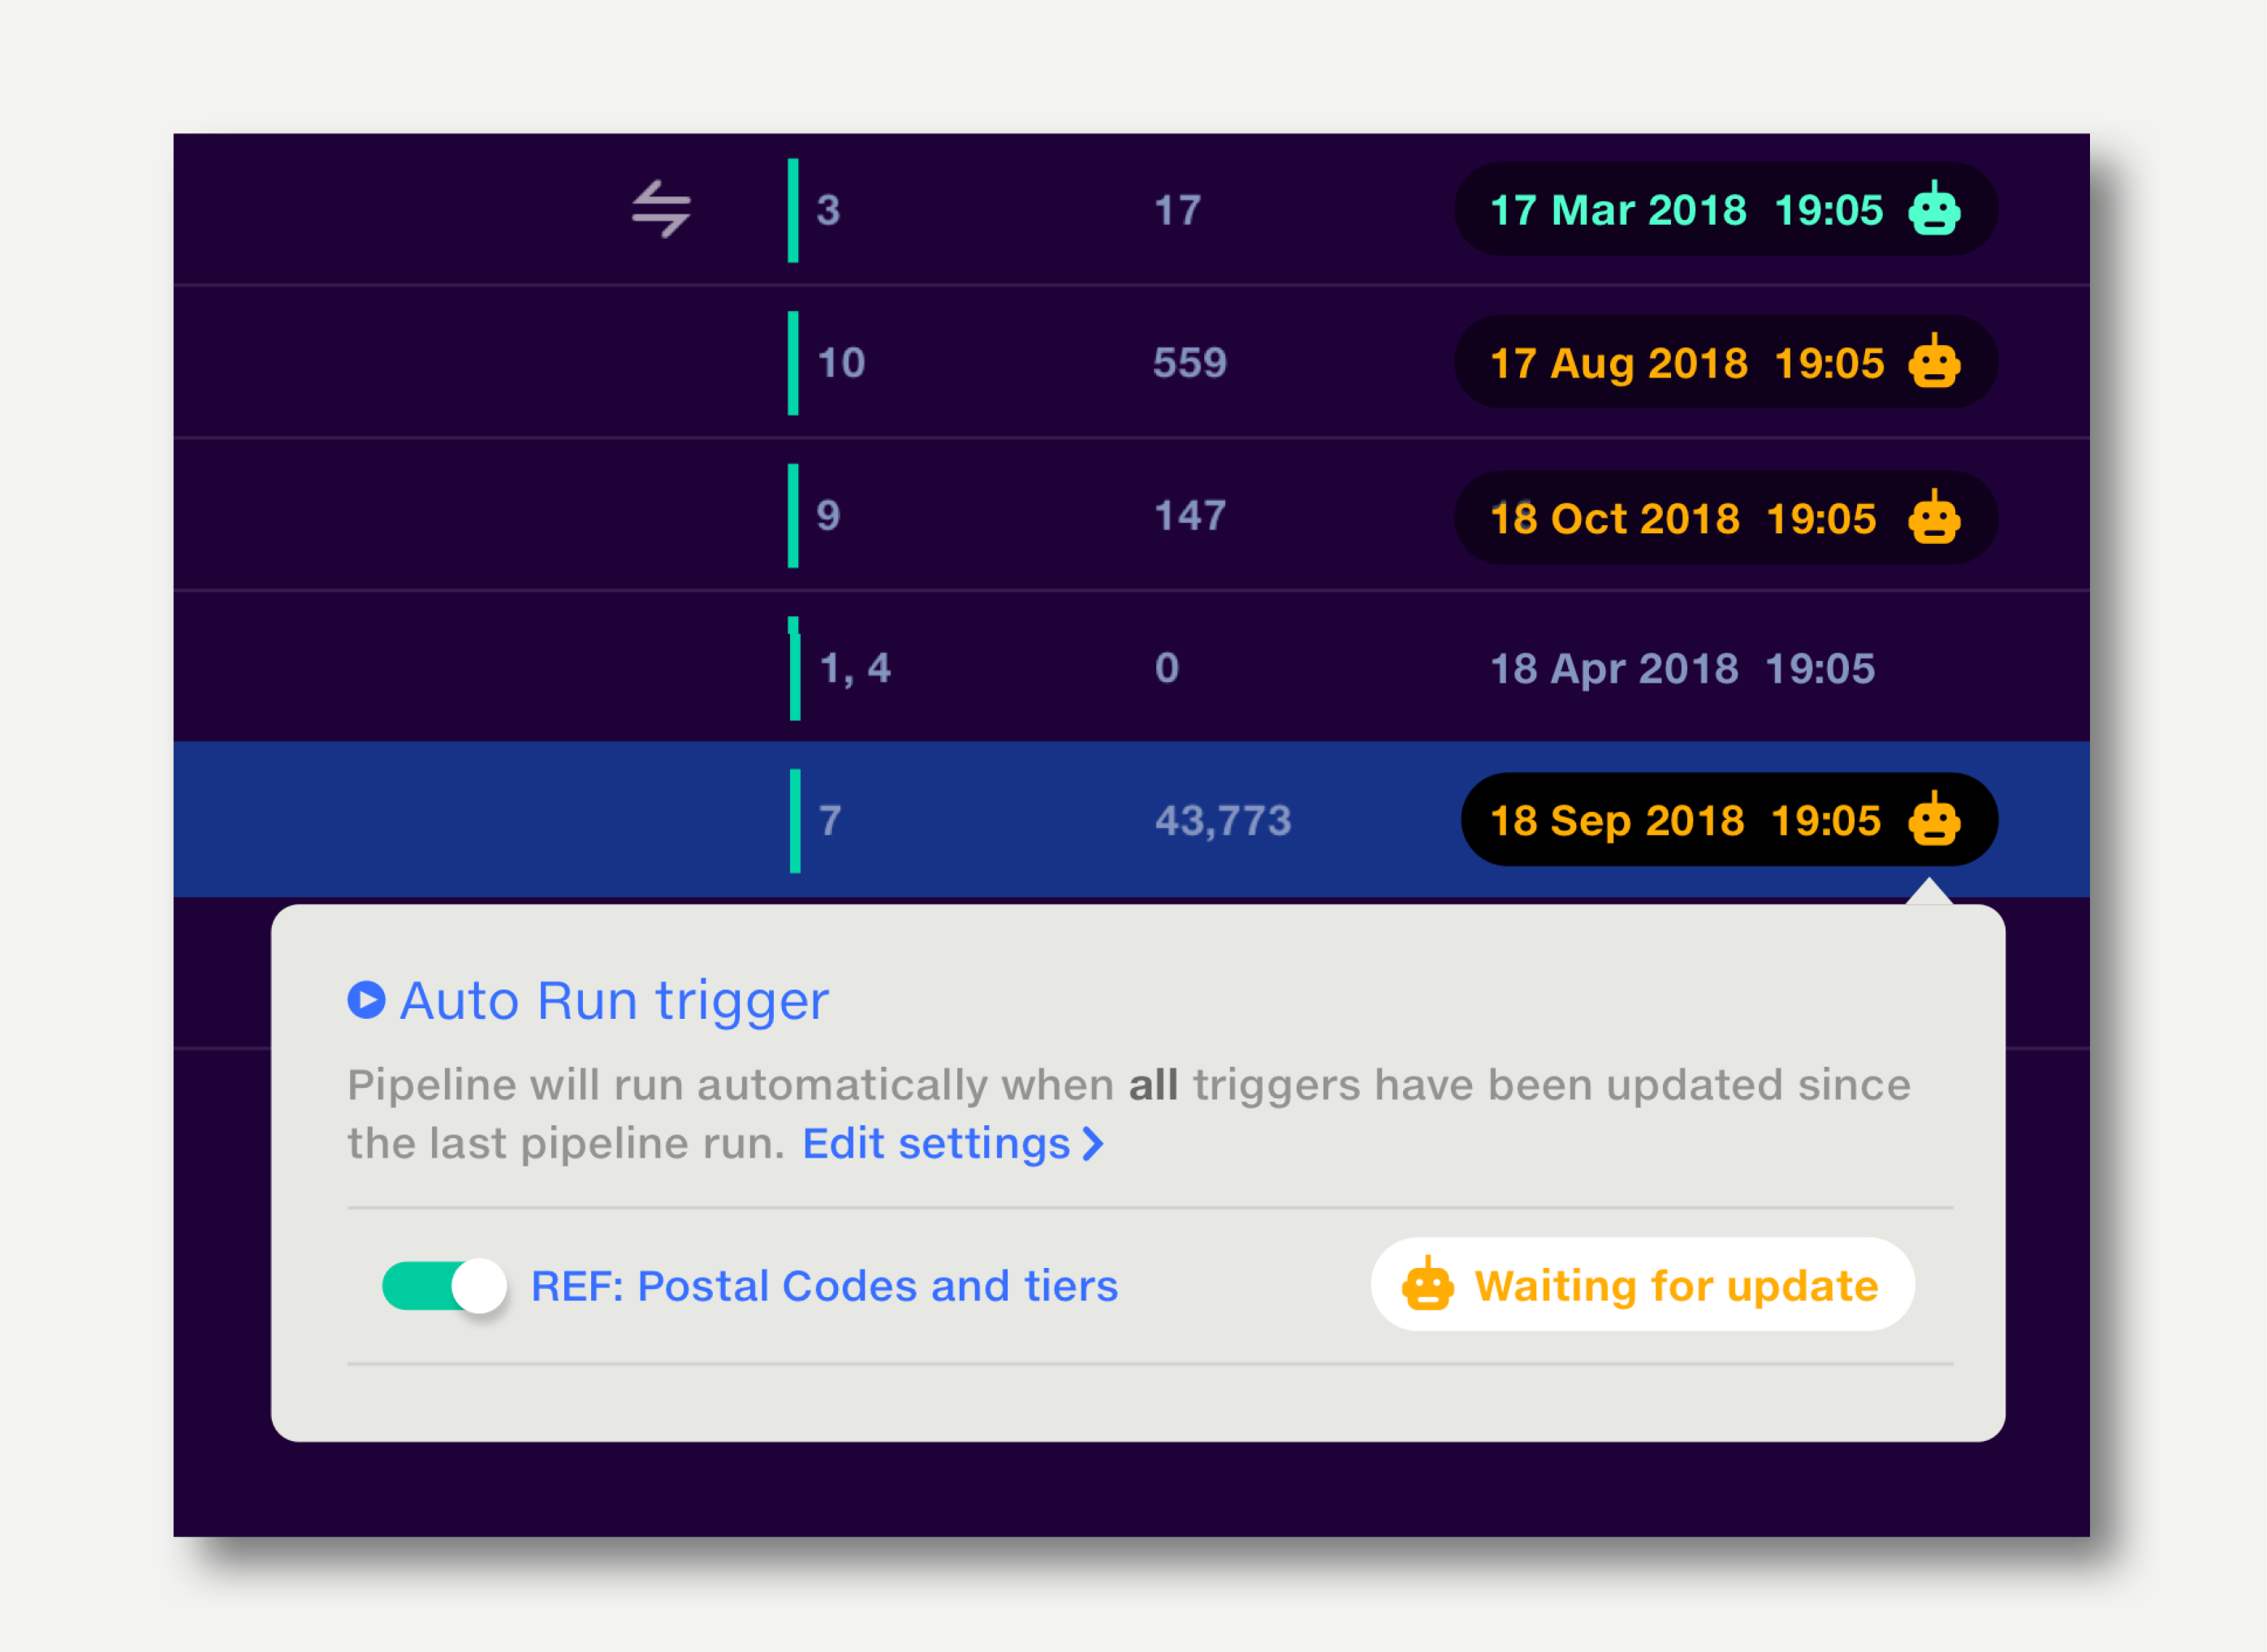
When Auto run is set to All, triggers which have been updated since the last run are shown in green; triggers which are waiting for an update are shown in orange. The pipeline will run when all triggers go green.

When a pipeline is autorun, the inputs which triggered the run will show a glowing green input arrow for the duration of the run.
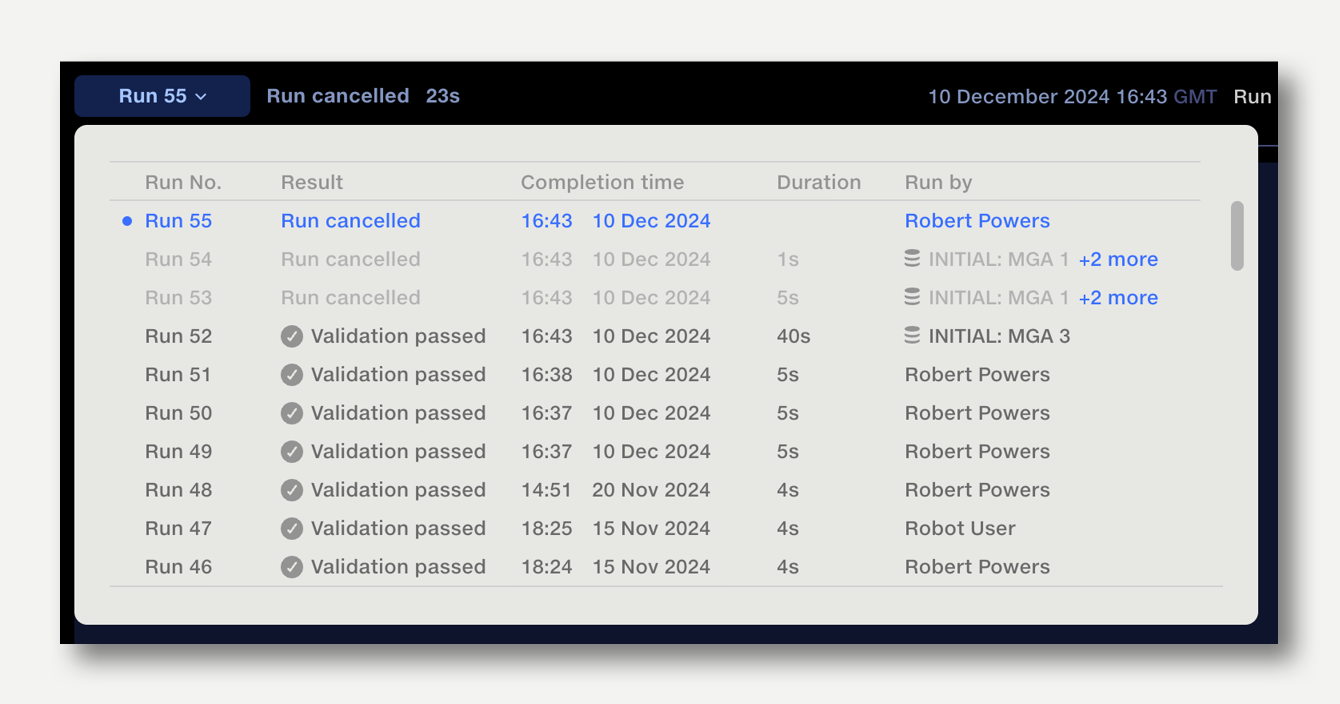
When a pipeline has been Auto Run, the pipeline Run History popup will show the triggering inputs in the Run By column.
If any-all is set to All, all triggering datasets will be listed. Click on ‘+[n] more’ to see the full list.
The Append Metadata operation can be used to create an output listing the datasets which triggered a pipeline Auto Run.
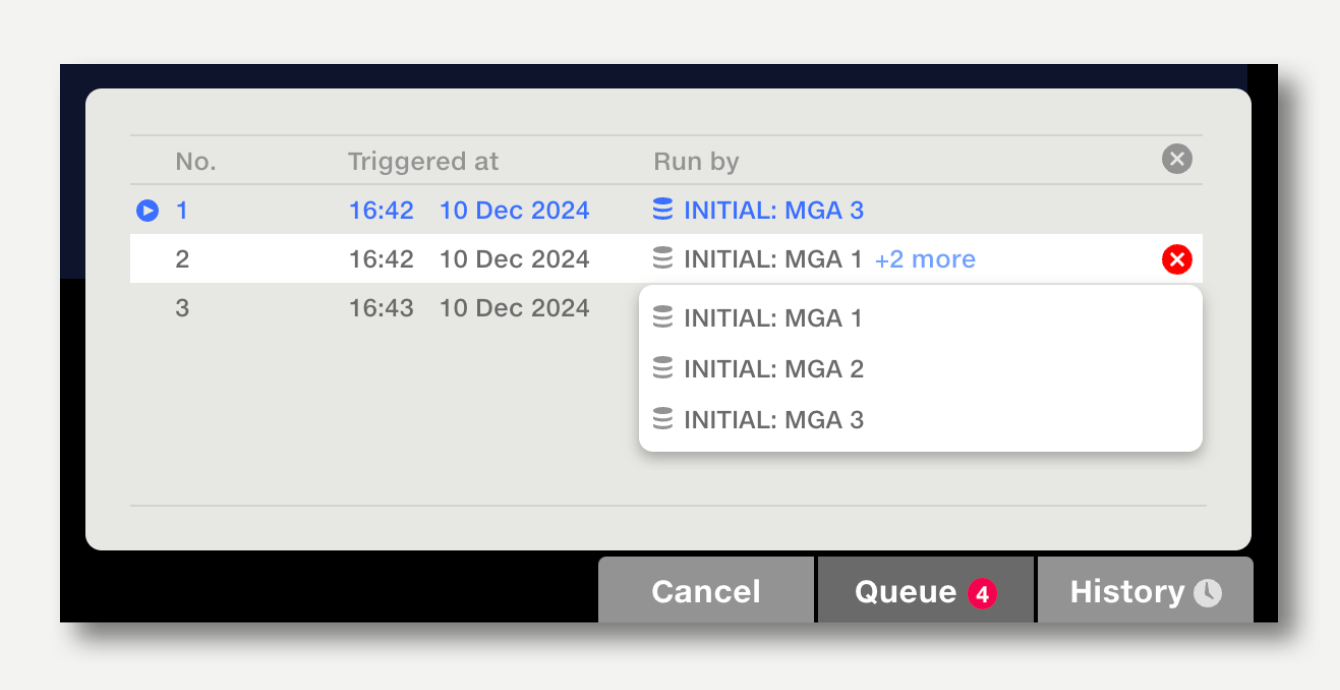
If an Auto Run is triggered whilst the pipeline is already running, the new run will be placed in queue. When the current run has finished, the next pipeline run will commence.
The queue can be be viewed via the queue button in the action bar. The queue popup shows the inputs which triggered the run. Click on the cross button next to a queued run to cancel it, or the cross button on the top right to cancel all queued runs.
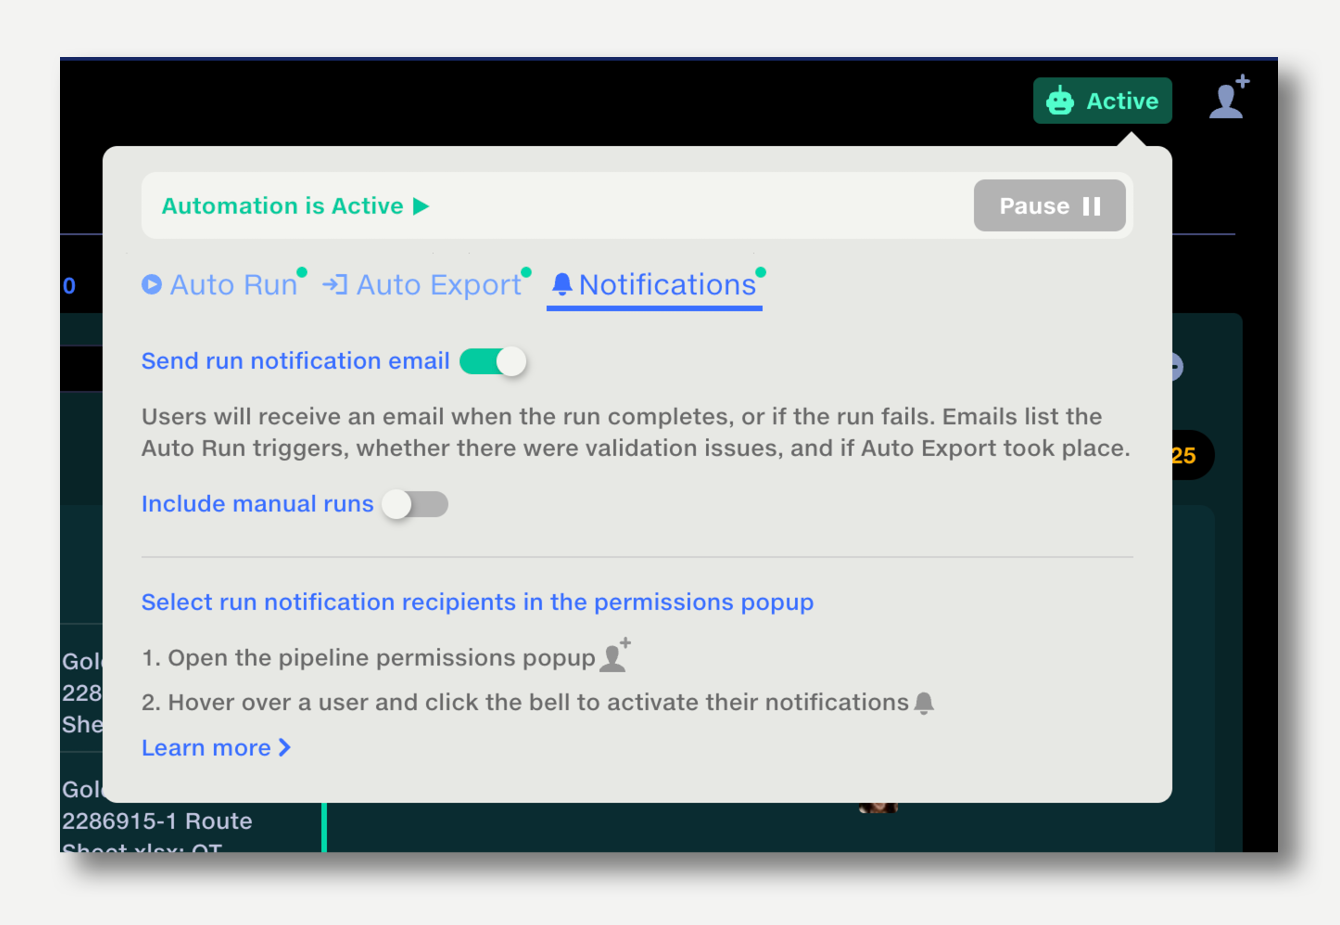
Receive email notifications when automation events occur, such as a pipeline Auto Run completing, or an Auto Export being blocked by a validation failure.

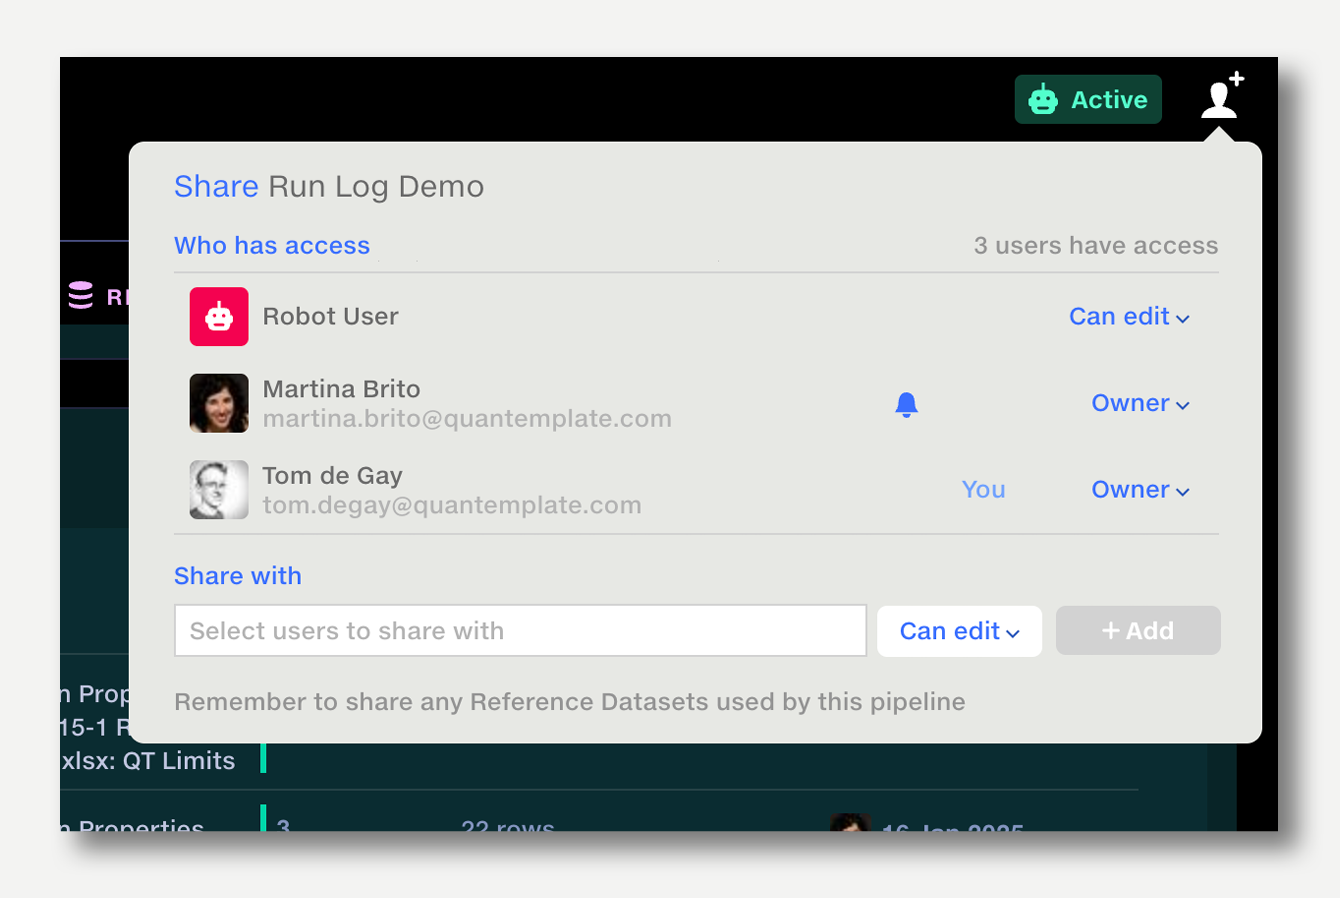
Pipeline owners can set who receives email notifications. To set up email notifications:
Chaining multiple pipelines together can be useful to run data through a central processing pipeline, or to process data via an external service, such as Google Maps geocoder.
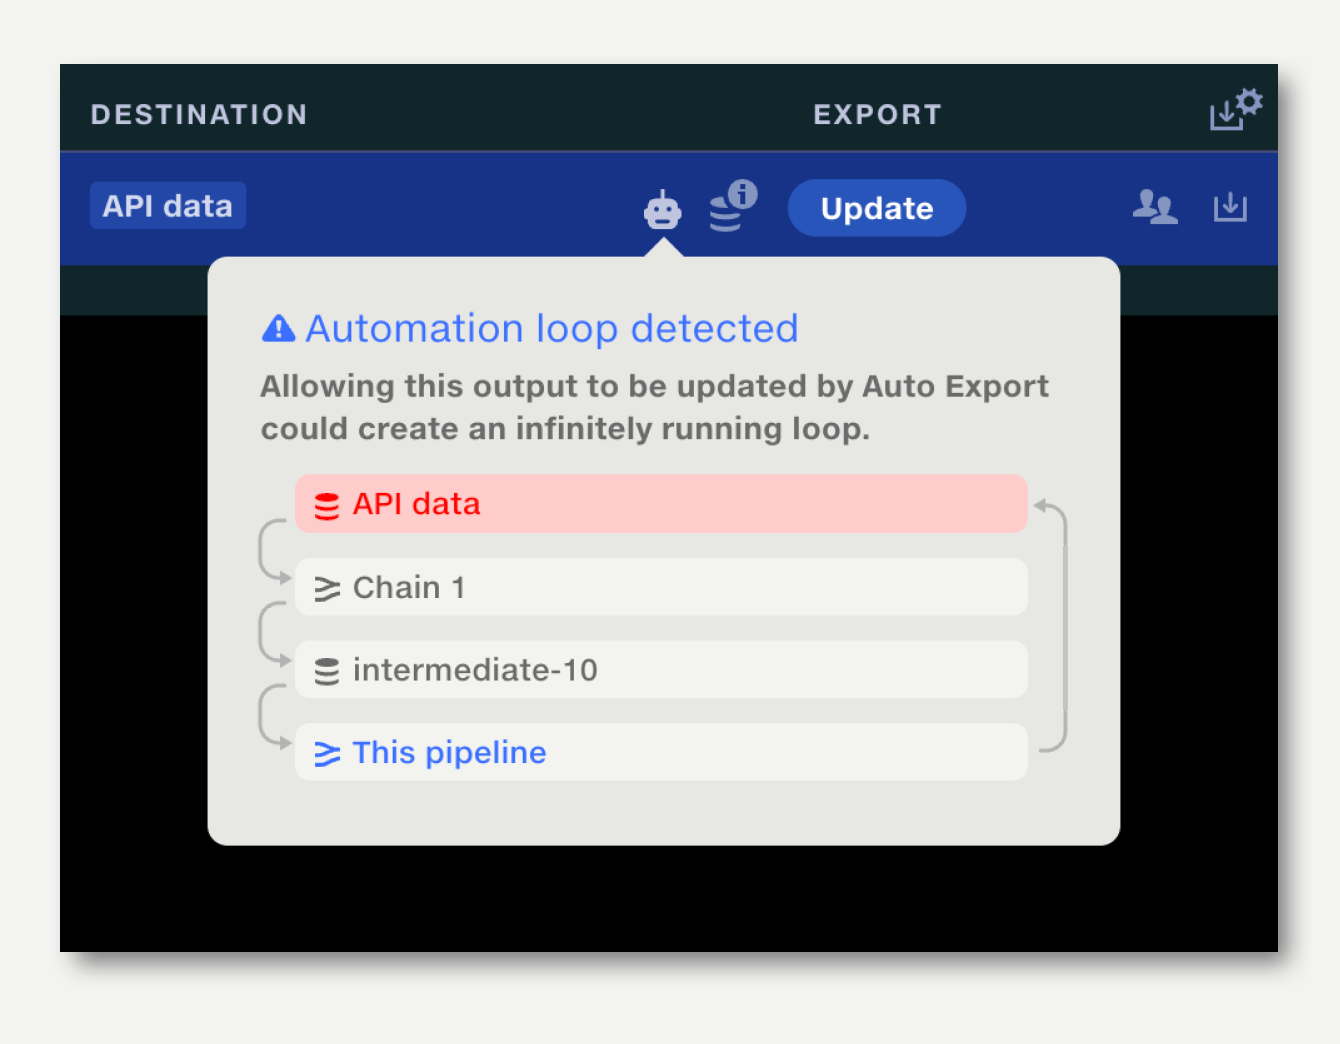
When setting up Auto Run and Auto Export, Quantemplate will automatically check that the configuration cannot create an infinitely running loop – for example by auto-exporting to a dataset that is used as an Auto Run trigger.
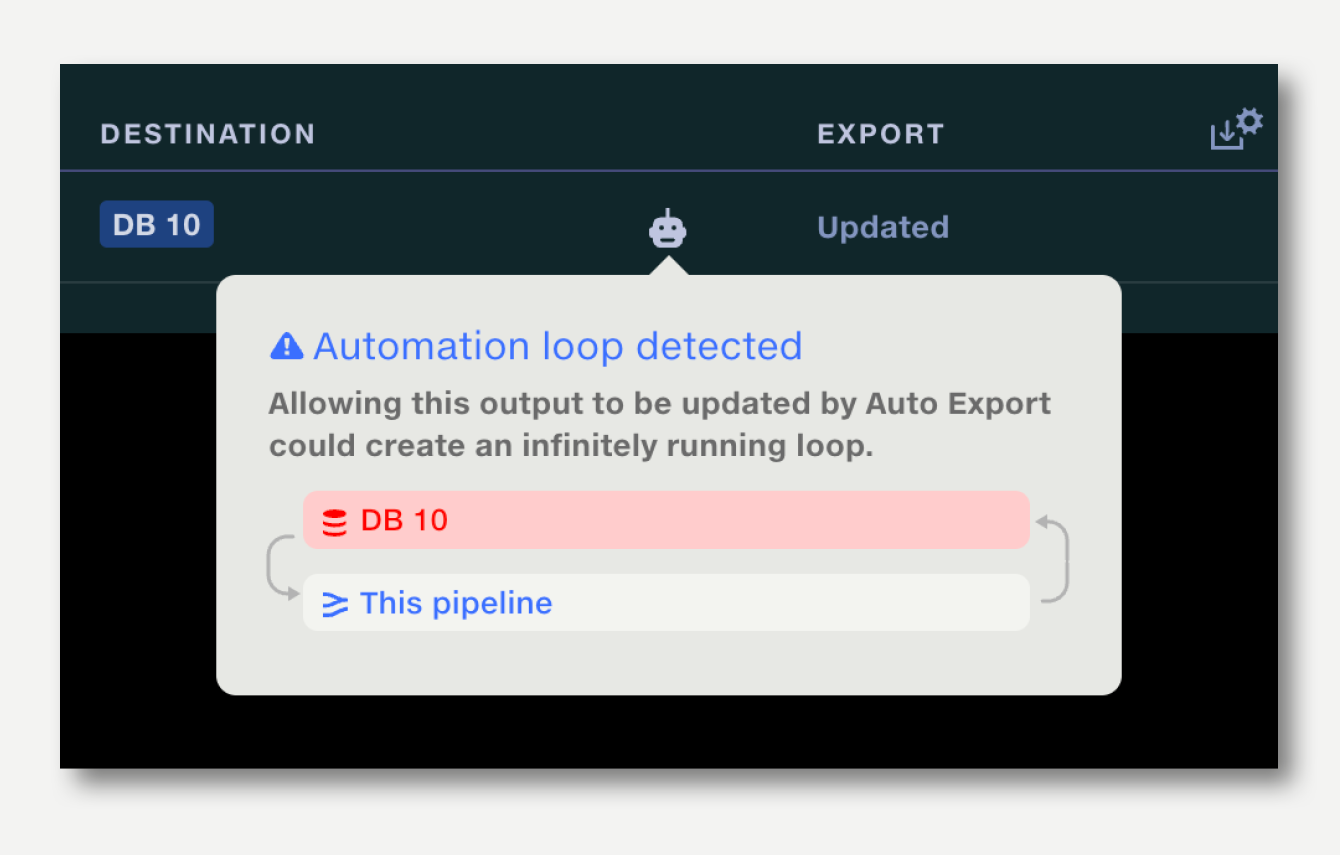
When setting up chained pipelines, Quantemplate’s loop detection works across the whole chain, preventing infinitely running loops from being created.
Pipelines and datasets can be chained to a maximum of 20 linked documents.